- 搭建第一个Web服务器(在eclipse或idea上部署Tomcat服
- 【项目实战经验】DataKit迁移MySQL到openGauss(下)
- 物流管理系统|基于Springboot的物流管理系统设计与实现(源码+
- workstation 用途
- SpringBoot(java)实现websocket实现实时通信
- Flink实战之 MySQL CDC
- 【SpringSecurity】五、UserDetails接口和Use
- Idea 反编译jar包
- IOC使用Spring实现附实例详解
- Nginx七层负载均衡
- 【STM32项目】基于STM32多传感器融合的新型智能导盲杖设计(完整
- 服务器运行mysql的时候出现:Error response from
- 分布式WEB应用中会话管理的变迁之路
- 缓存相关知识总结
- 浅谈Zuul、Gateway
- 使用 Docker 部署 Nacos 并配置 MySQL 数据源
- The artifact mysql:mysql-connector-
- SpringAI——Java生态接入LLM
- 项目启动报错:If you want an embedded data
- 基于时域有限差分法的FDTD的计算电磁学算法-YEE网格下的更新公式推
- 详解爬虫基本知识及入门案列(爬取豆瓣电影《热辣滚烫》的短评 详细讲解代
- 22年国赛tomcat后续(653556547)群
- Windows 安装 Apache 和 PHP的详细步骤
- 前端Vue日常工作中--Watch数据监听
- GmSSL-3.1.1编译
- 如何使用Flask搭建web程序框架并实现无公网IP远程访问本地程序
- 「PHP系列」PHP 函数详解
- 图解缓存淘汰算法 LRU、LFU | 最近最少使用、最不经常使用算法
- Python进阶(一)(MySQL,Navicat16免费安装)
- Mysql、高斯(Gauss)数据库获取表结构
本篇文章的主题是 如何通过springboot来实现微信的模版消息推送
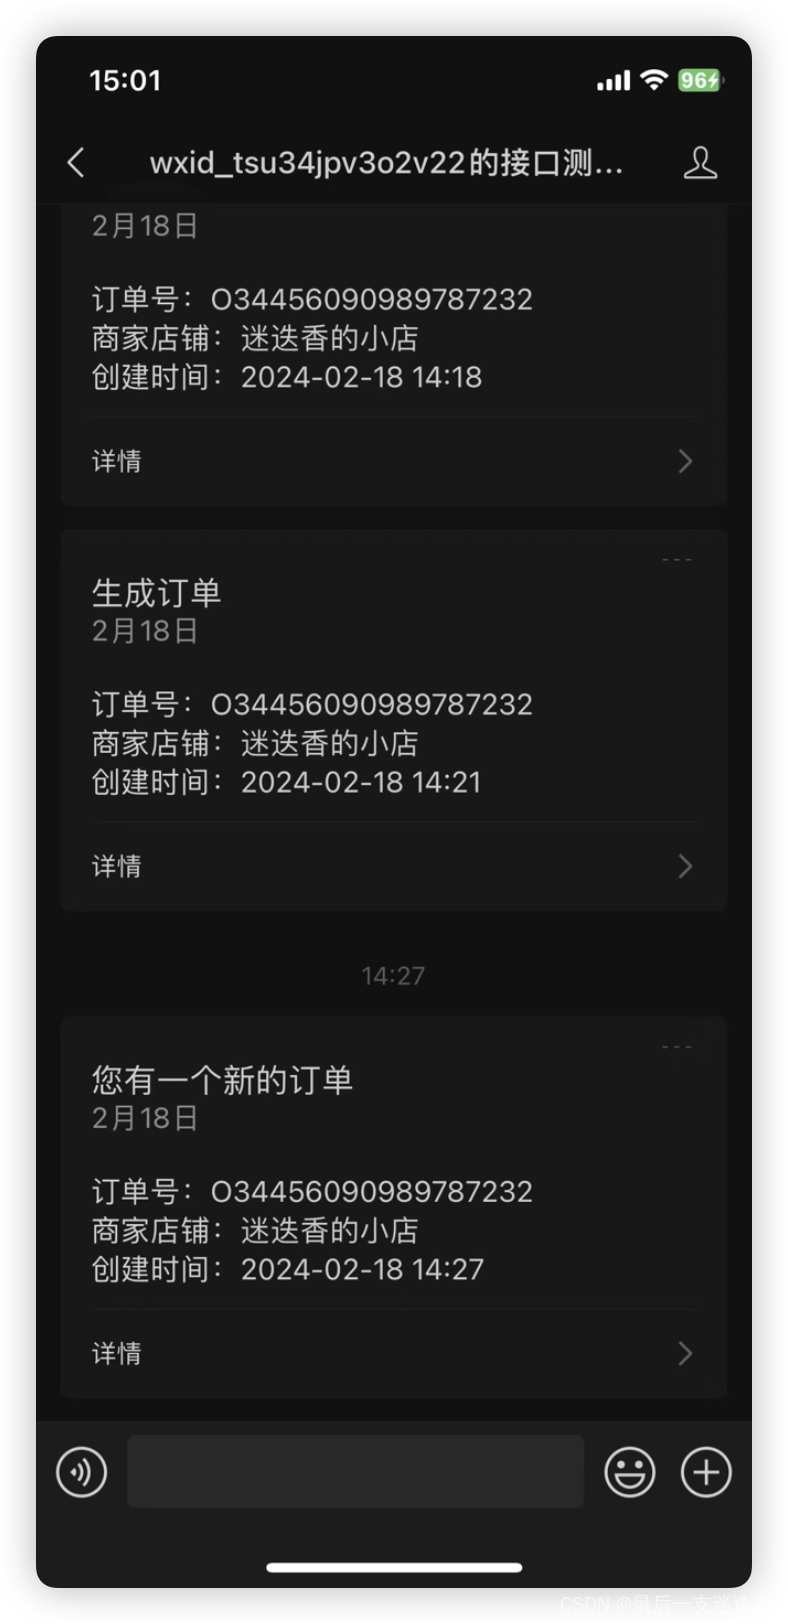
实现效果:
在当今的信息化时代,微信作为国人最为常用的通讯工具之一,已经不仅仅是一个简单的社交应用,更是连接人与服务、人与信息的桥梁。企业微信模板消息作为一种高效、便捷的信息传递方式,被广泛应用于各类业务场景中,如订单通知、会议提醒、活动推送等。
通过本教程的学习,您将掌握如何在Spring Boot项目中集成微信SDK,如何编写代码发送微信模板消息,并了解整个推送的过程。
简要说明:
由于发送模版消息需要微信的服务号,申请服务号的话需要营业执照,个人是没有办法申请的,但是微信为了给开发者们提供测试特意开放了公众平台测试账号号,大家可以申请测试号来进行模版推送的开发和测试
开发步骤:
- 访问微信公众平台测试账号页面
- 获取appID和appsecret
- 扫码二维码添加测试号
- 添加模版消息
- 集成微信SDK
- 调用相关API
1、微信公众平台测试号管理
1.1 访问微信公众平台测试账号页面
大家首先访问微信公众平台地址:https://mp.weixin.qq.com/
如果还没有注册账号的可以申请一个个人订阅号,这个教程大家网上自行查阅,很简单~
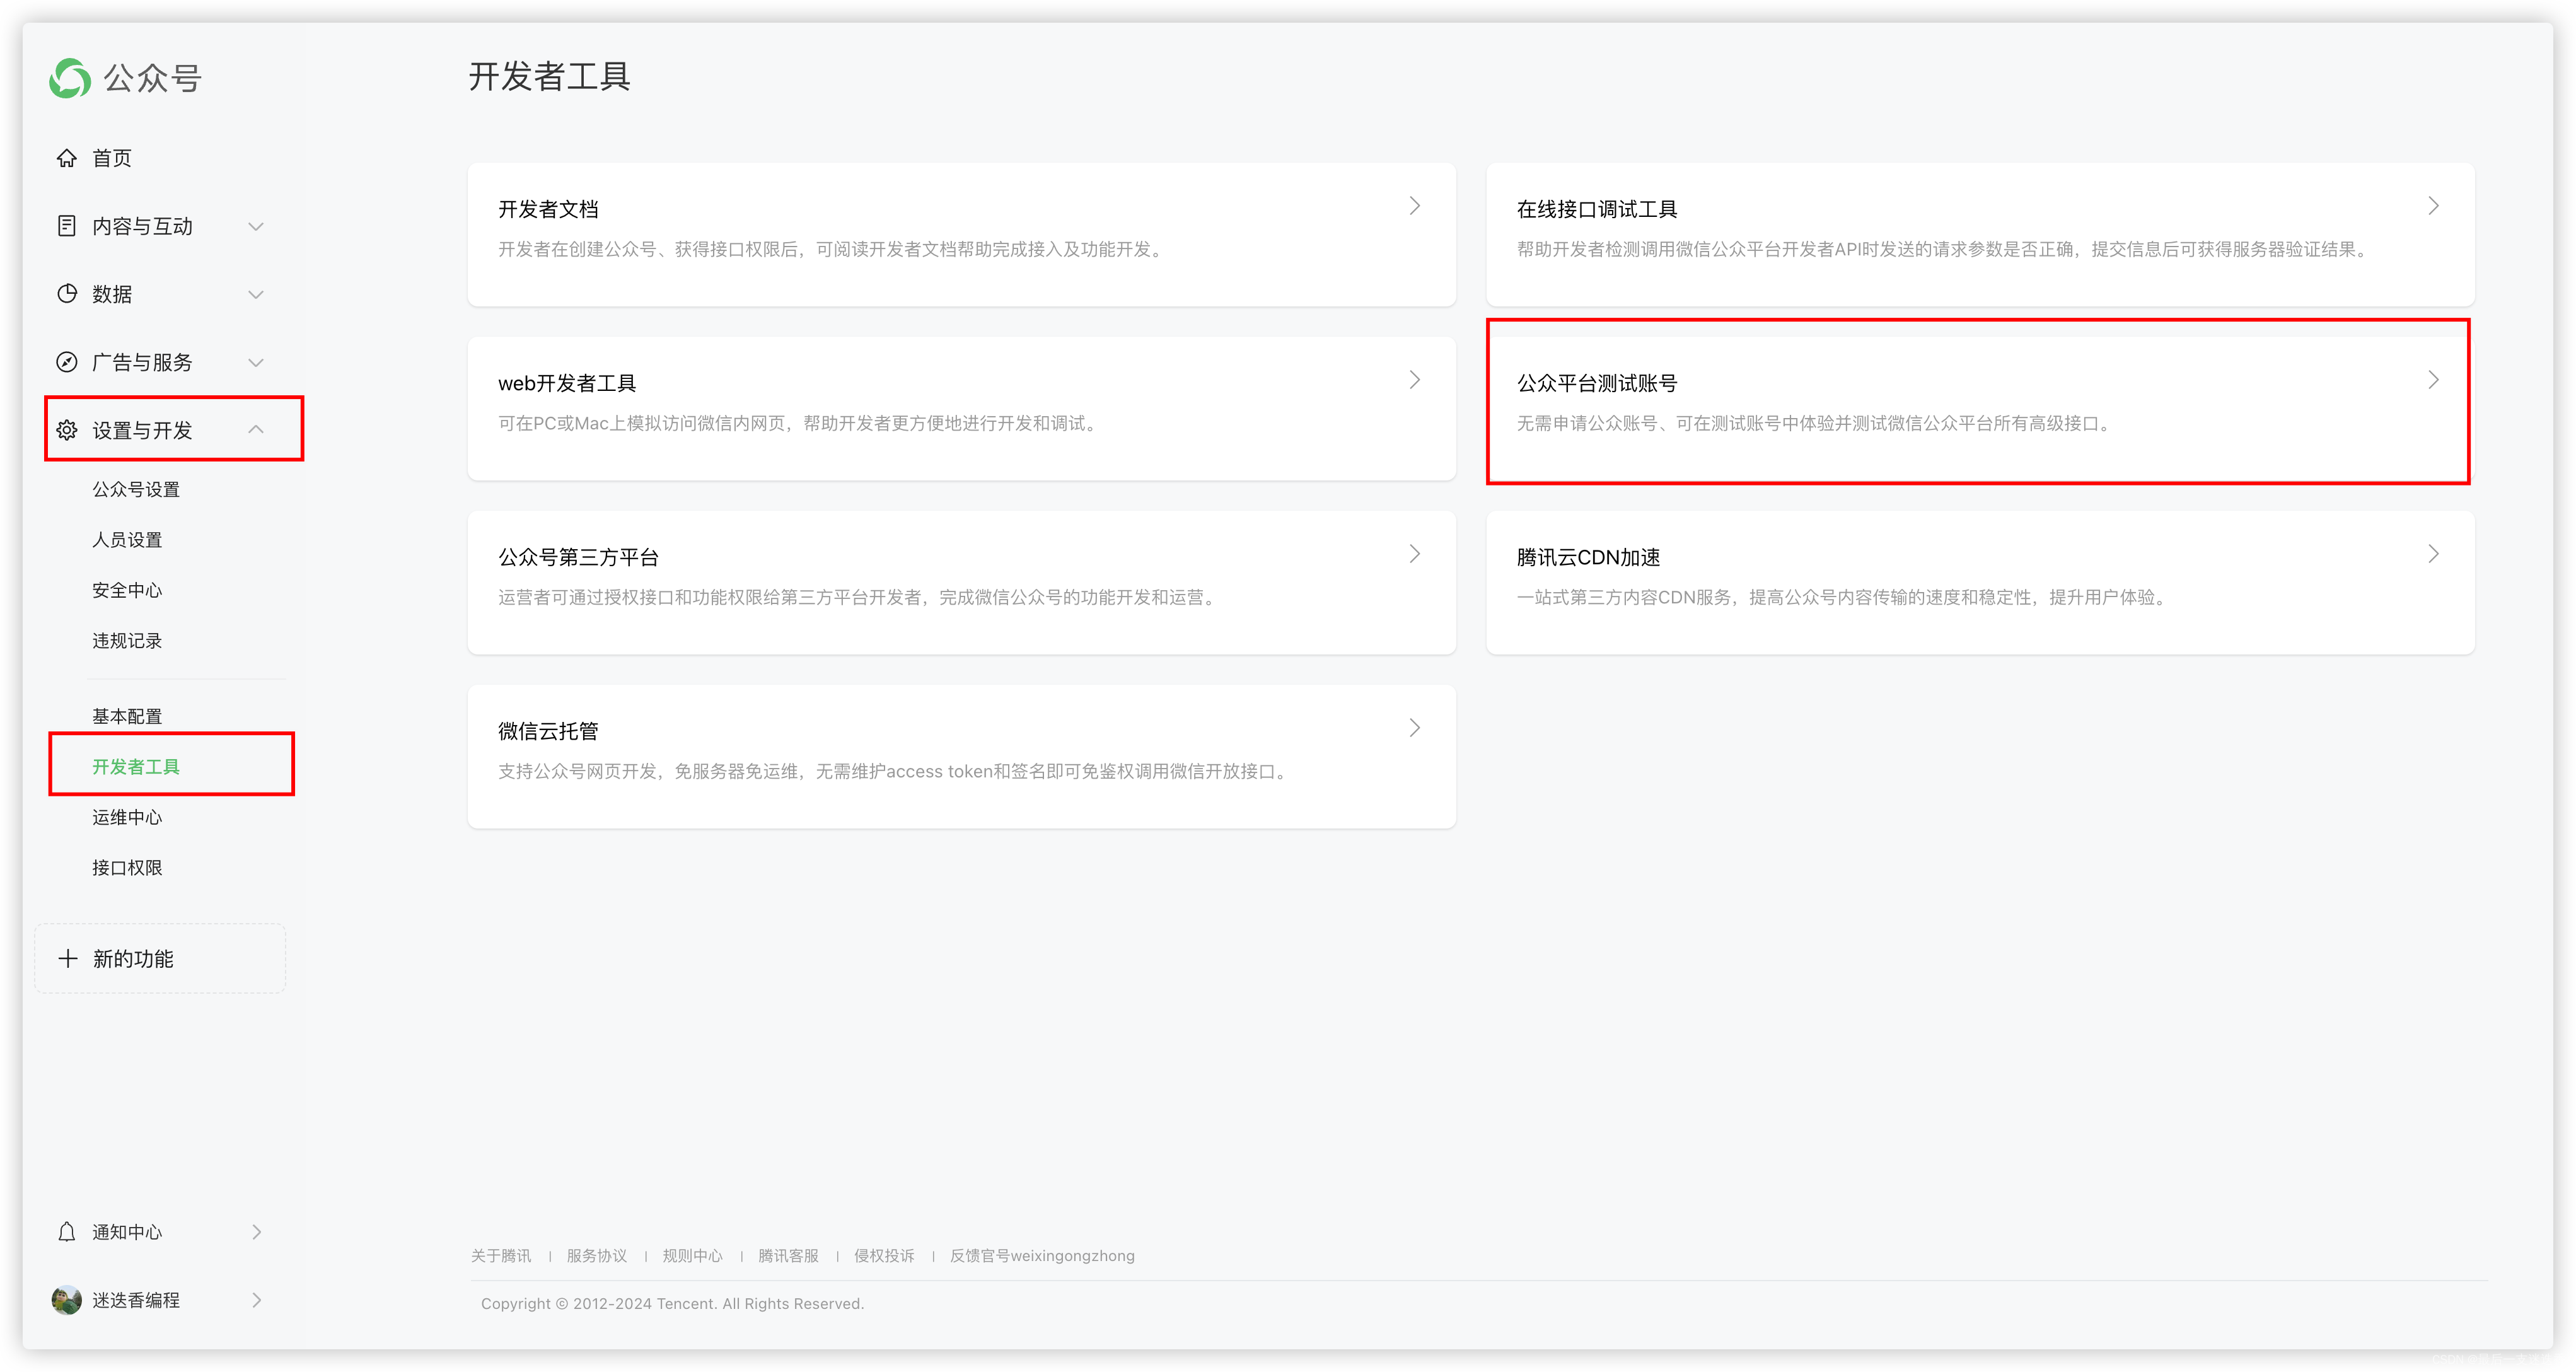
登录成功之后选择 开发者工具 --> 公众平台测试账号
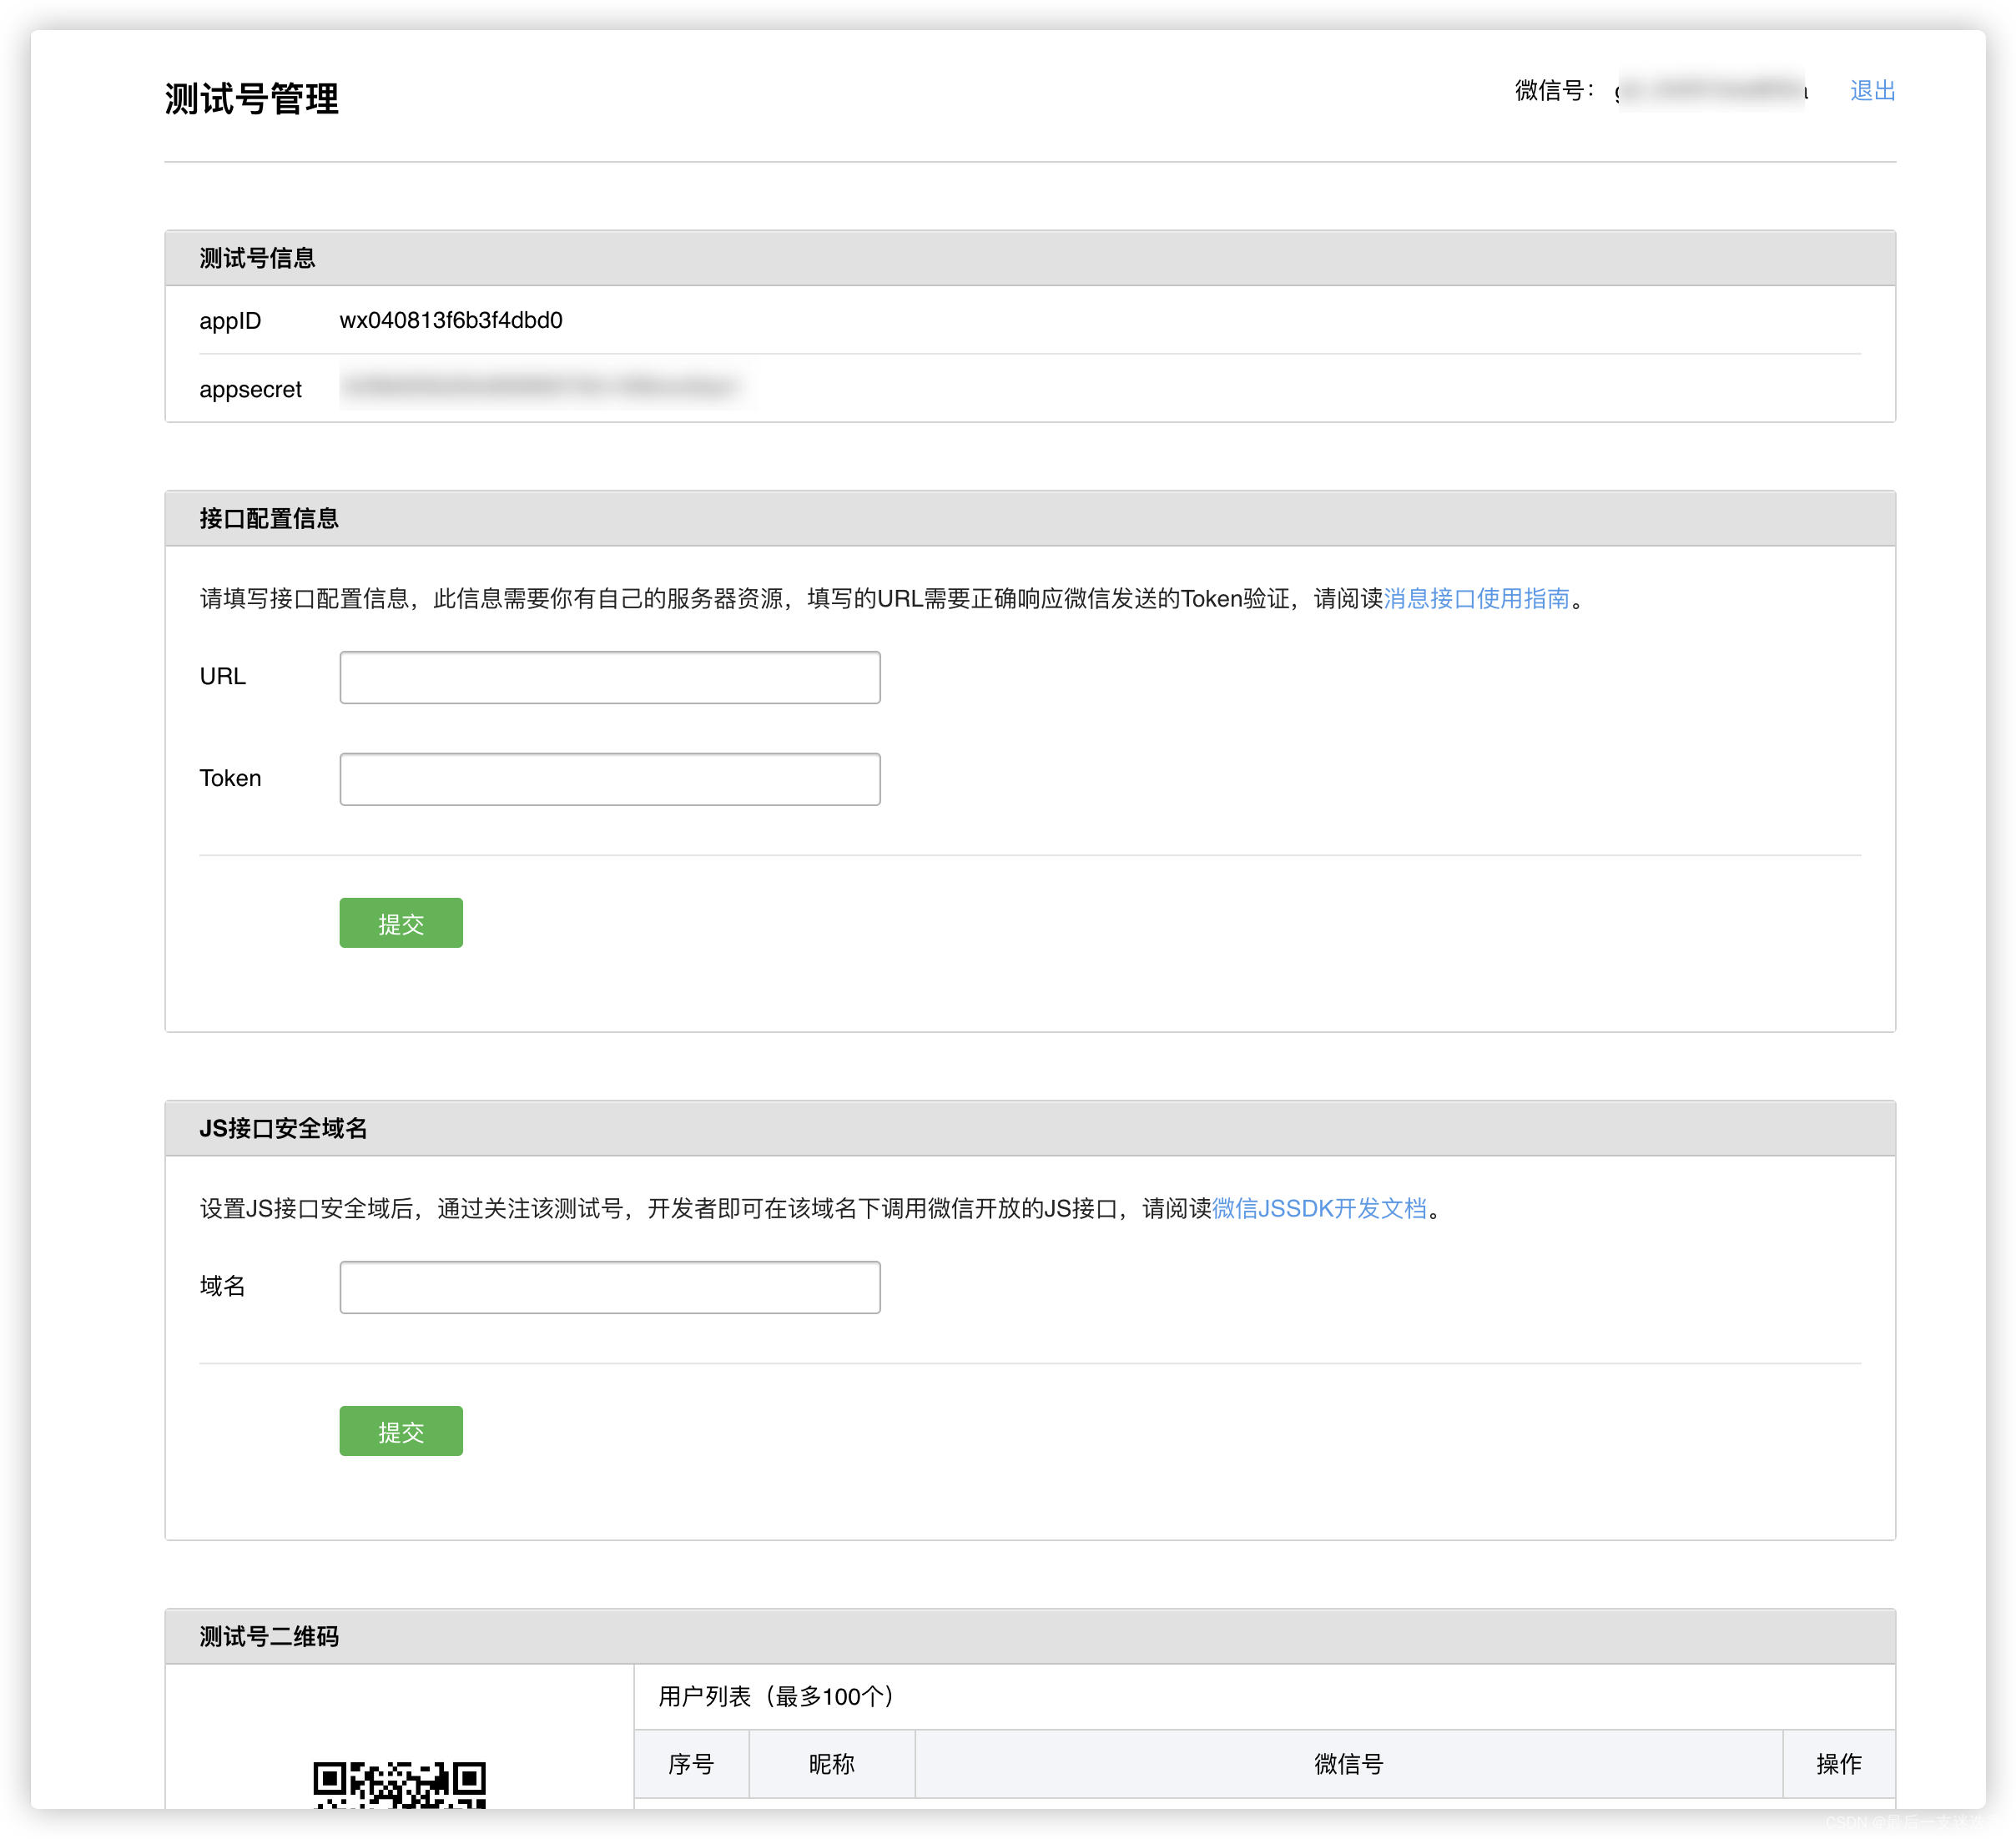
测试号管理页面如下:
1.2 获取appID和appsecret
获取你的测试号信息

1.3 扫码二维码添加测试号
使用你的微信扫描这个测试公众号的二维码并关注
然后会得到你的**微信号(openId)**这个后面会用到

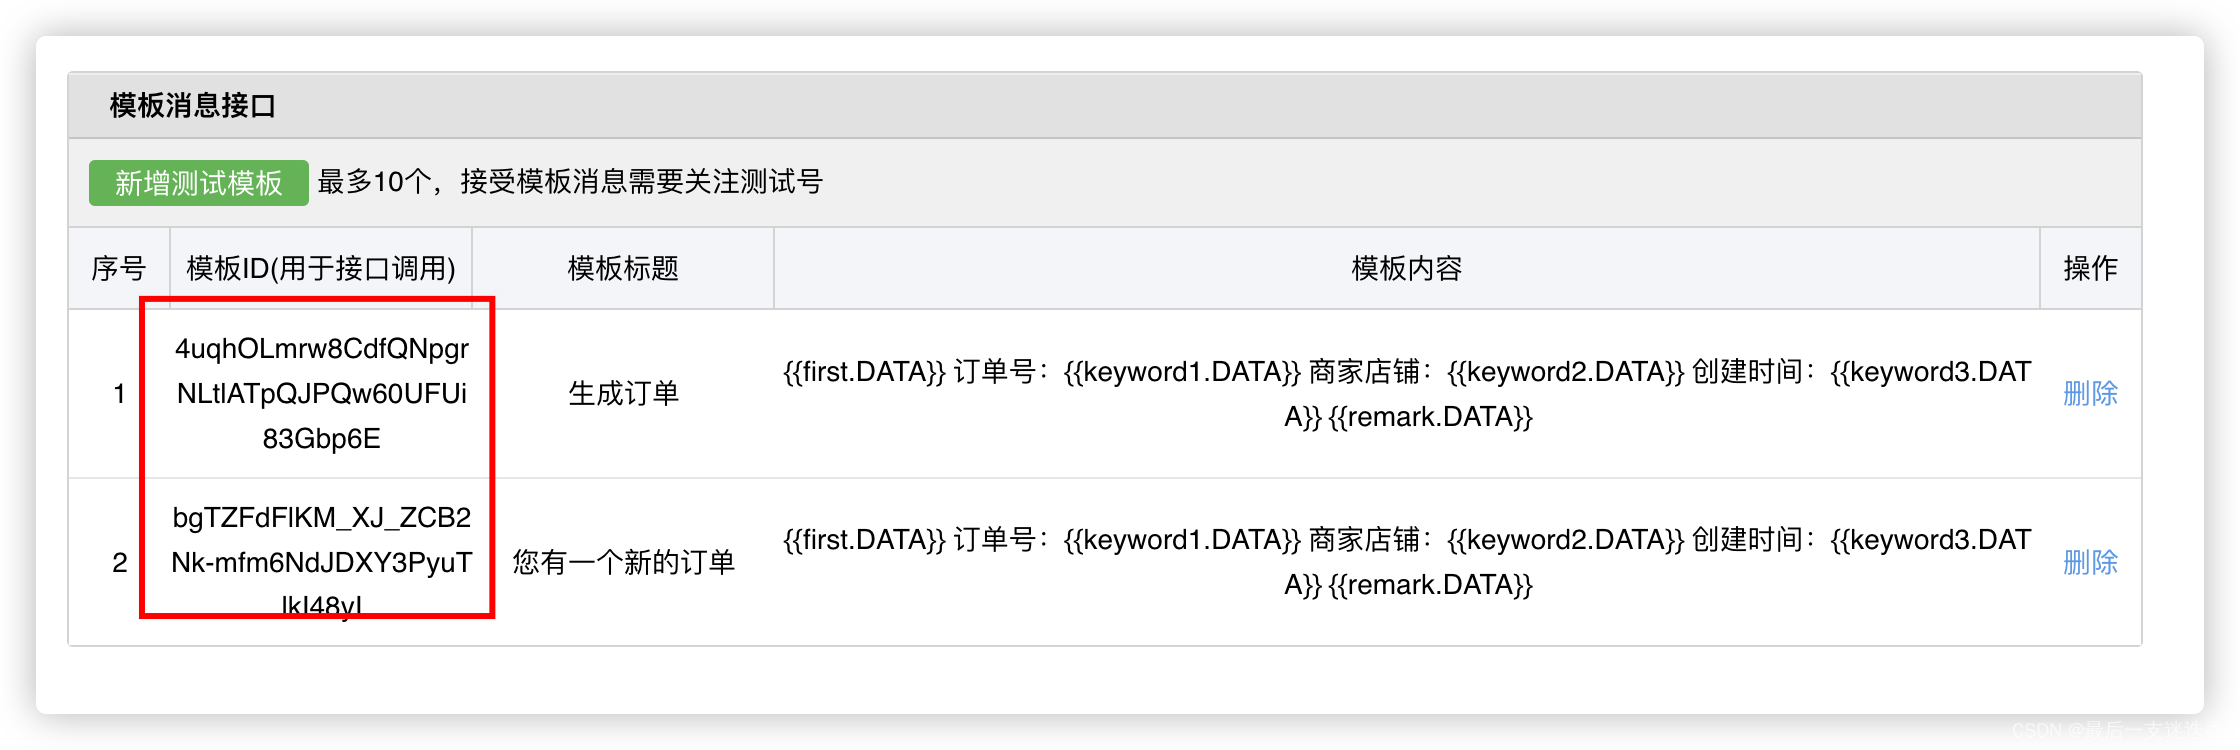
1.4 添加模版消息
点击新增测试模版

添加模板信息
一定要按照注意事项填写 参数需以{{开头,以.DATA}}结尾
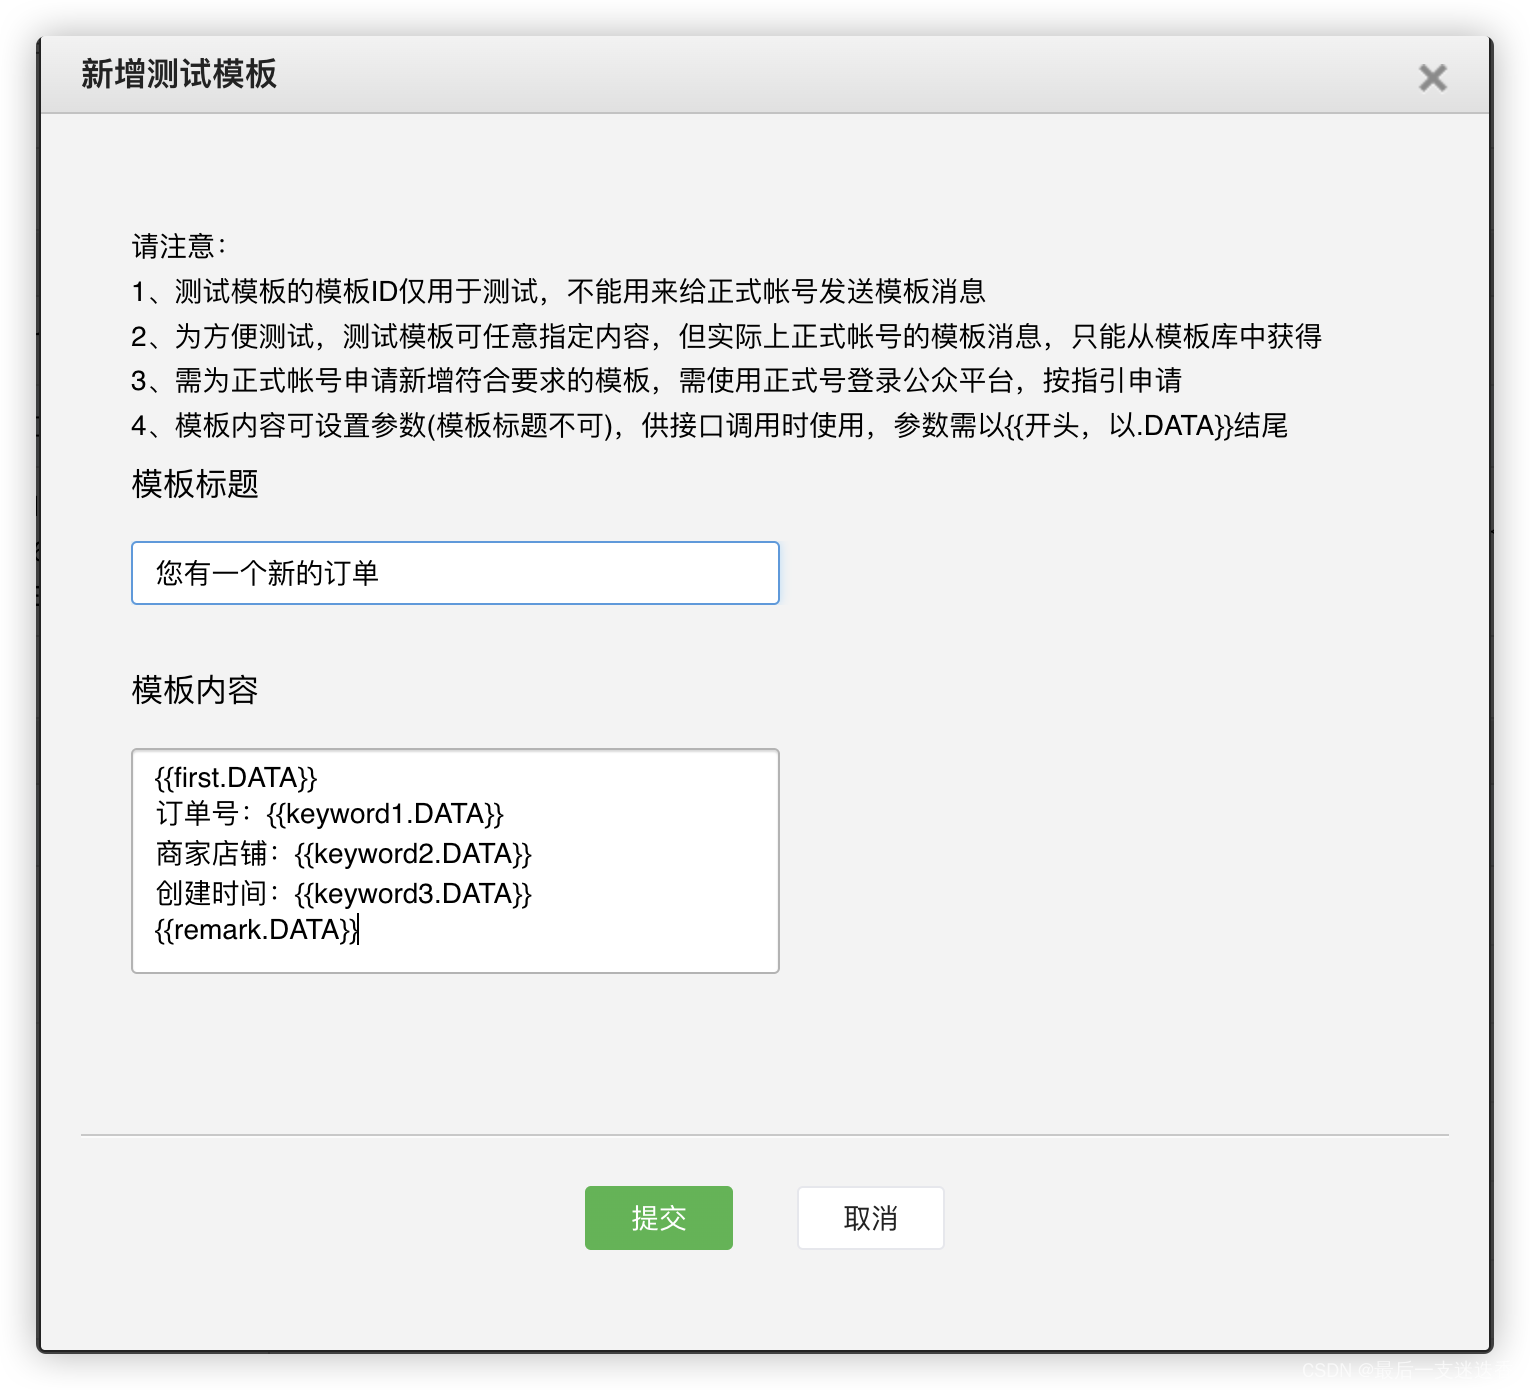
我这边创建了两个模版,这个模版id后面也会用到
2、集成微信SDK
2.1 引入微信工具包
            com.github.binarywang
            weixin-java-mp
            3.0.0
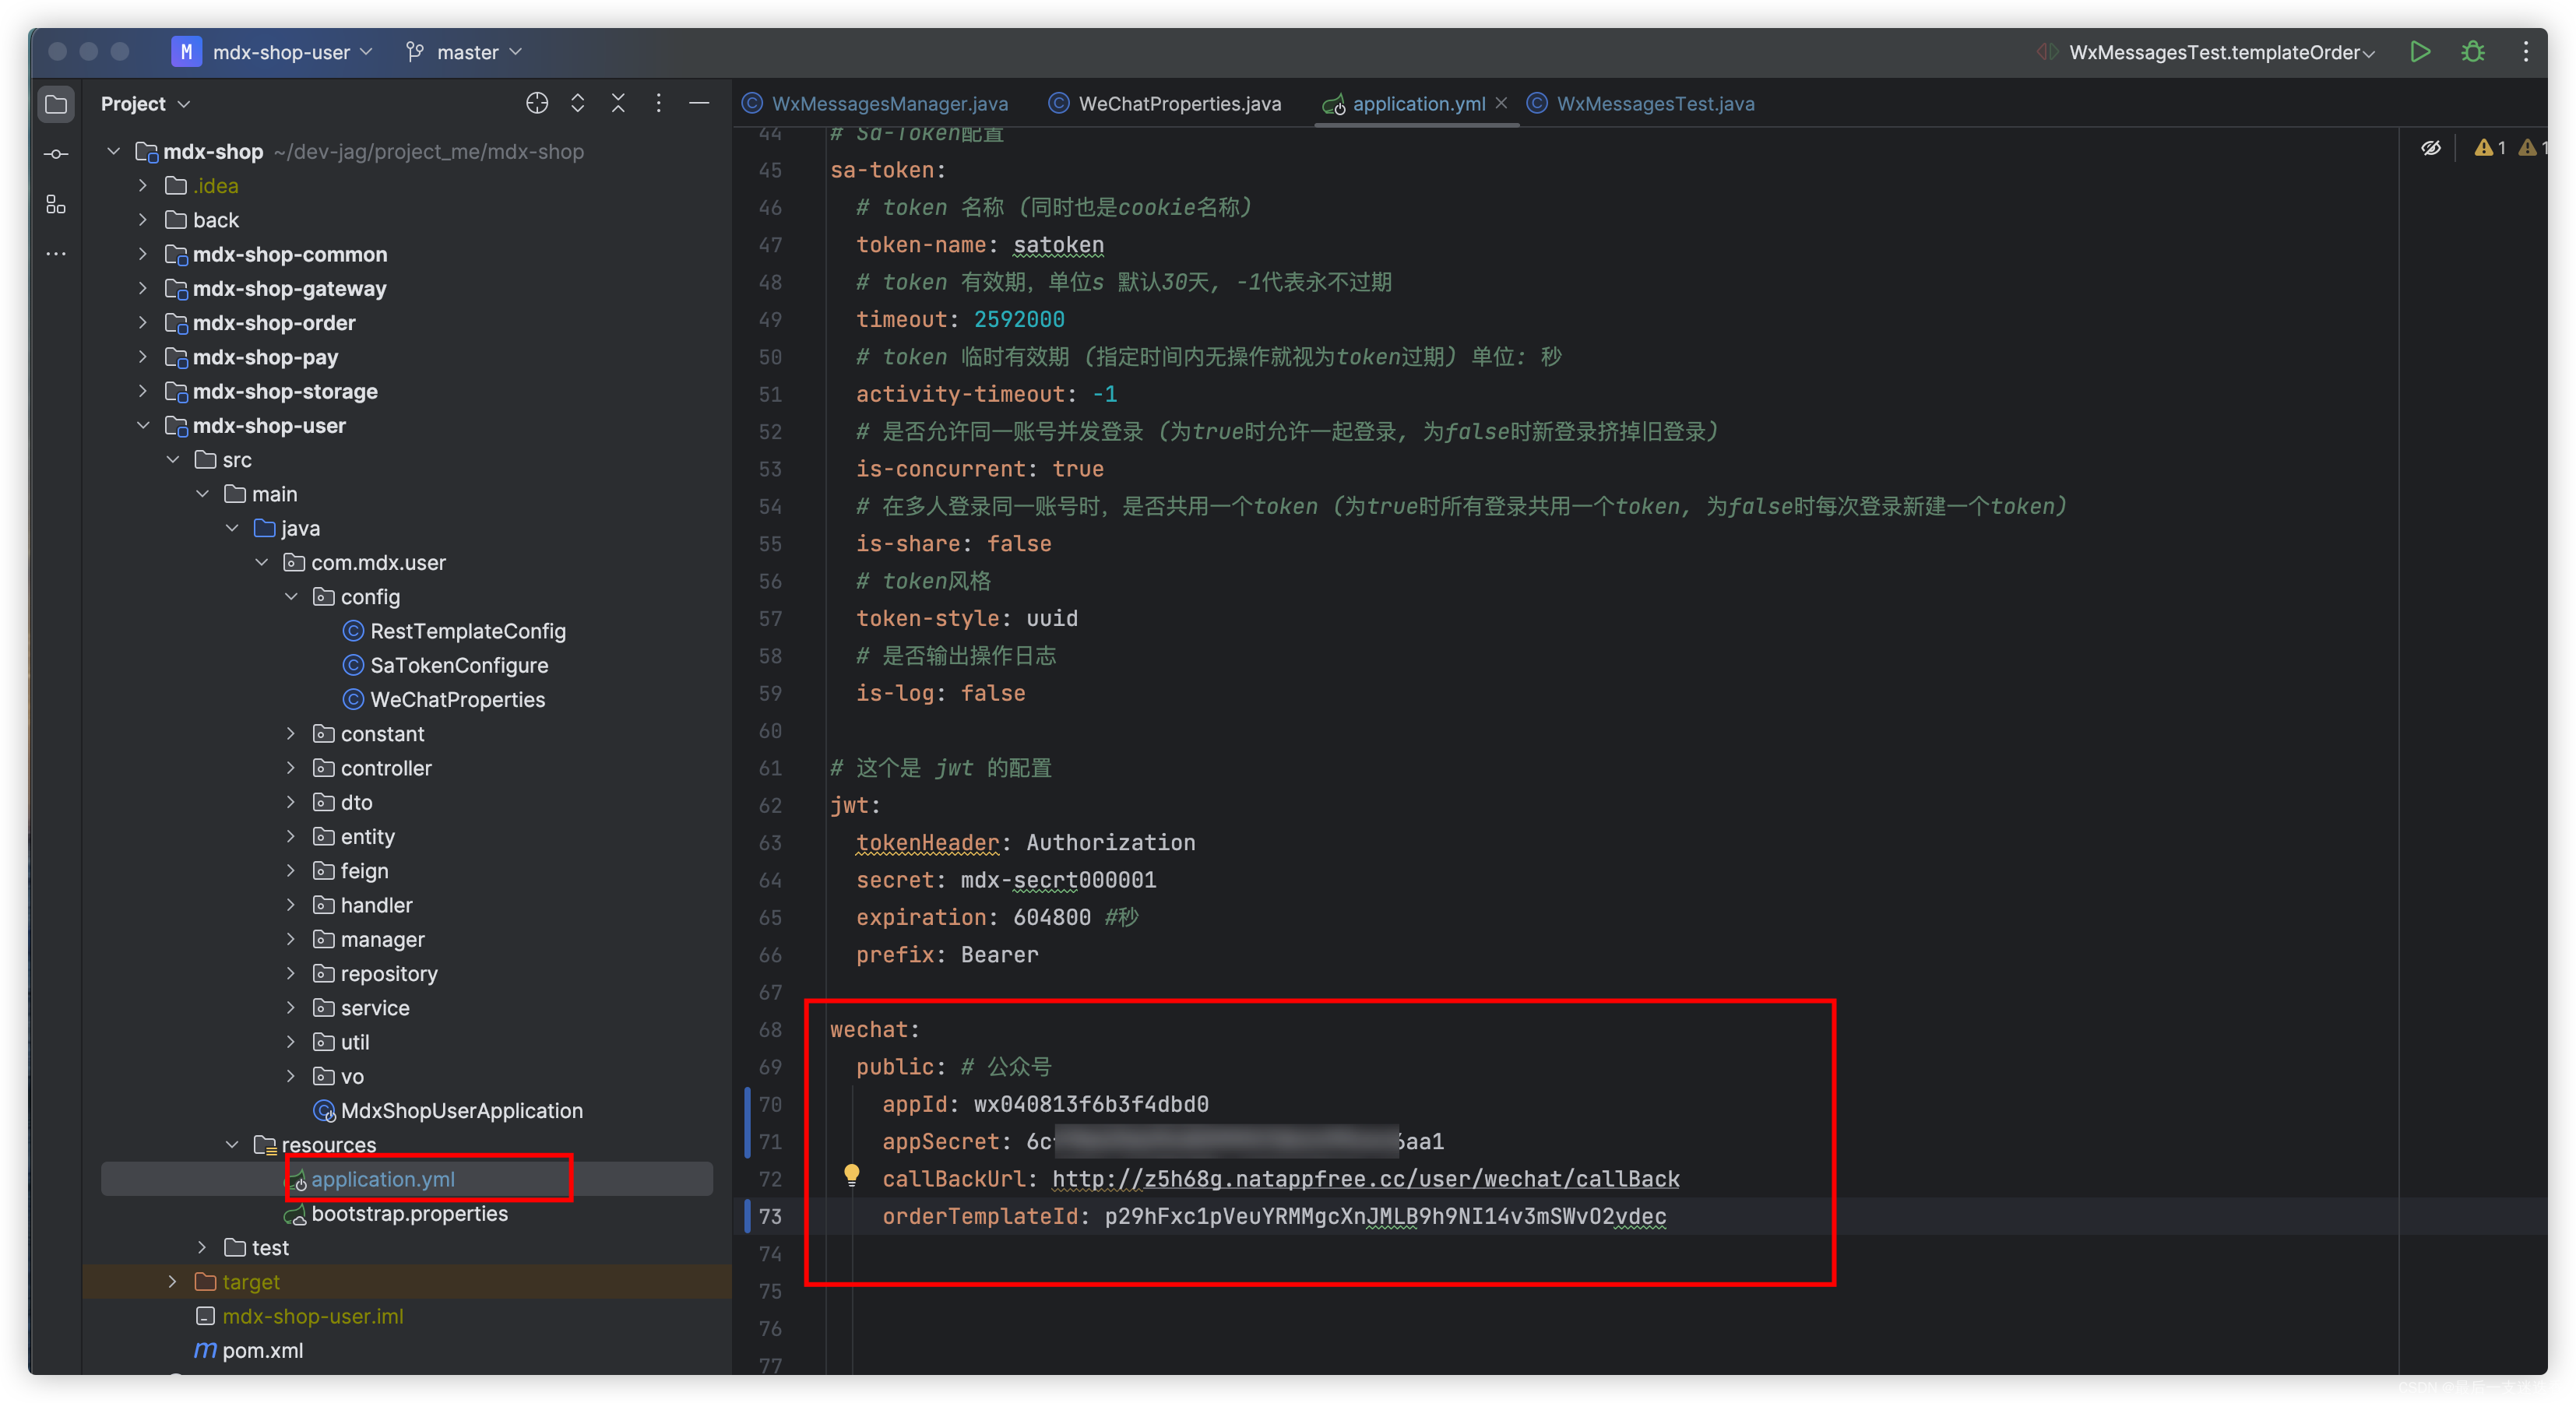
2.2 添加配置文件
appId、appSecret和orderTemplateId就是上面微信公众平台测试号管理中我们获取到的几个参数,现在把这三个参数配置到我们的项目中。
callBackUrl暂时先不用管
创建配置类
@ConfigurationProperties(prefix = "wechat.public")
@Component
@Data
@RefreshScope
public class WeChatProperties {
    private String appId;
    private String appSecret;
    private String callBackUrl;
    private String orderTemplateId;
}
3、API调用
3.1 发送消息模版的实现
package com.mdx.user.manager;
import com.mdx.user.config.WeChatProperties;
import lombok.extern.slf4j.Slf4j;
import me.chanjar.weixin.mp.api.WxMpInMemoryConfigStorage;
import me.chanjar.weixin.mp.api.WxMpService;
import me.chanjar.weixin.mp.api.impl.WxMpServiceImpl;
import me.chanjar.weixin.mp.bean.template.WxMpTemplateData;
import me.chanjar.weixin.mp.bean.template.WxMpTemplateMessage;
import org.springframework.beans.factory.annotation.Autowired;
import org.springframework.stereotype.Component;
import java.text.SimpleDateFormat;
import java.util.Arrays;
import java.util.Date;
import java.util.List;
/**
 * @author : jiagang
 * @date : Created in 2022/7/26 10:42
 */
@Component
@Slf4j
public class WxMessagesManager {
    @Autowired
    private WeChatProperties weChatProperties;
    public void sendOrderMsg(String openId, String orderId, String serviceName){
        String templateId = weChatProperties.getOrderTemplateId();
        // 订单时间
        SimpleDateFormat sdf = new SimpleDateFormat();
        sdf.applyPattern("yyyy-MM-dd HH:mm");
        Date date = new Date();
        String timeNow = sdf.format(date);
        WxMpInMemoryConfigStorage wxStorage = new WxMpInMemoryConfigStorage();
        wxStorage.setAppId(weChatProperties.getAppId());
        wxStorage.setSecret(weChatProperties.getAppSecret());
        WxMpService wxMpService = new WxMpServiceImpl();
        wxMpService.setWxMpConfigStorage(wxStorage);
        // 此处的 key/value 需和模板消息对应
        List wxMpTemplateDataList = Arrays.asList(
                new WxMpTemplateData("first", "您有一个新的订货单", "#FF0000"),
                new WxMpTemplateData("keyword1", orderId),
                new WxMpTemplateData("keyword2", serviceName),
                new WxMpTemplateData("keyword3", timeNow),
                new WxMpTemplateData("remark", "请登录系统查看订单详情并及时配货")
        );
        WxMpTemplateMessage templateMessage = WxMpTemplateMessage.builder()
                .toUser(openId) // openId为1.3步骤中得到的微信号
                .templateId(templateId)
                .data(wxMpTemplateDataList)
                .url("https://blog.csdn.net/qq_38374397?type=blog")  // 跳转详情地址
                .build();
        try {
            wxMpService.getTemplateMsgService().sendTemplateMsg(templateMessage);
            log.info("消息模版发送成功~");
        } catch (Exception e) {
            log.error("推送失败:" + e.getMessage());
        }
    }
}
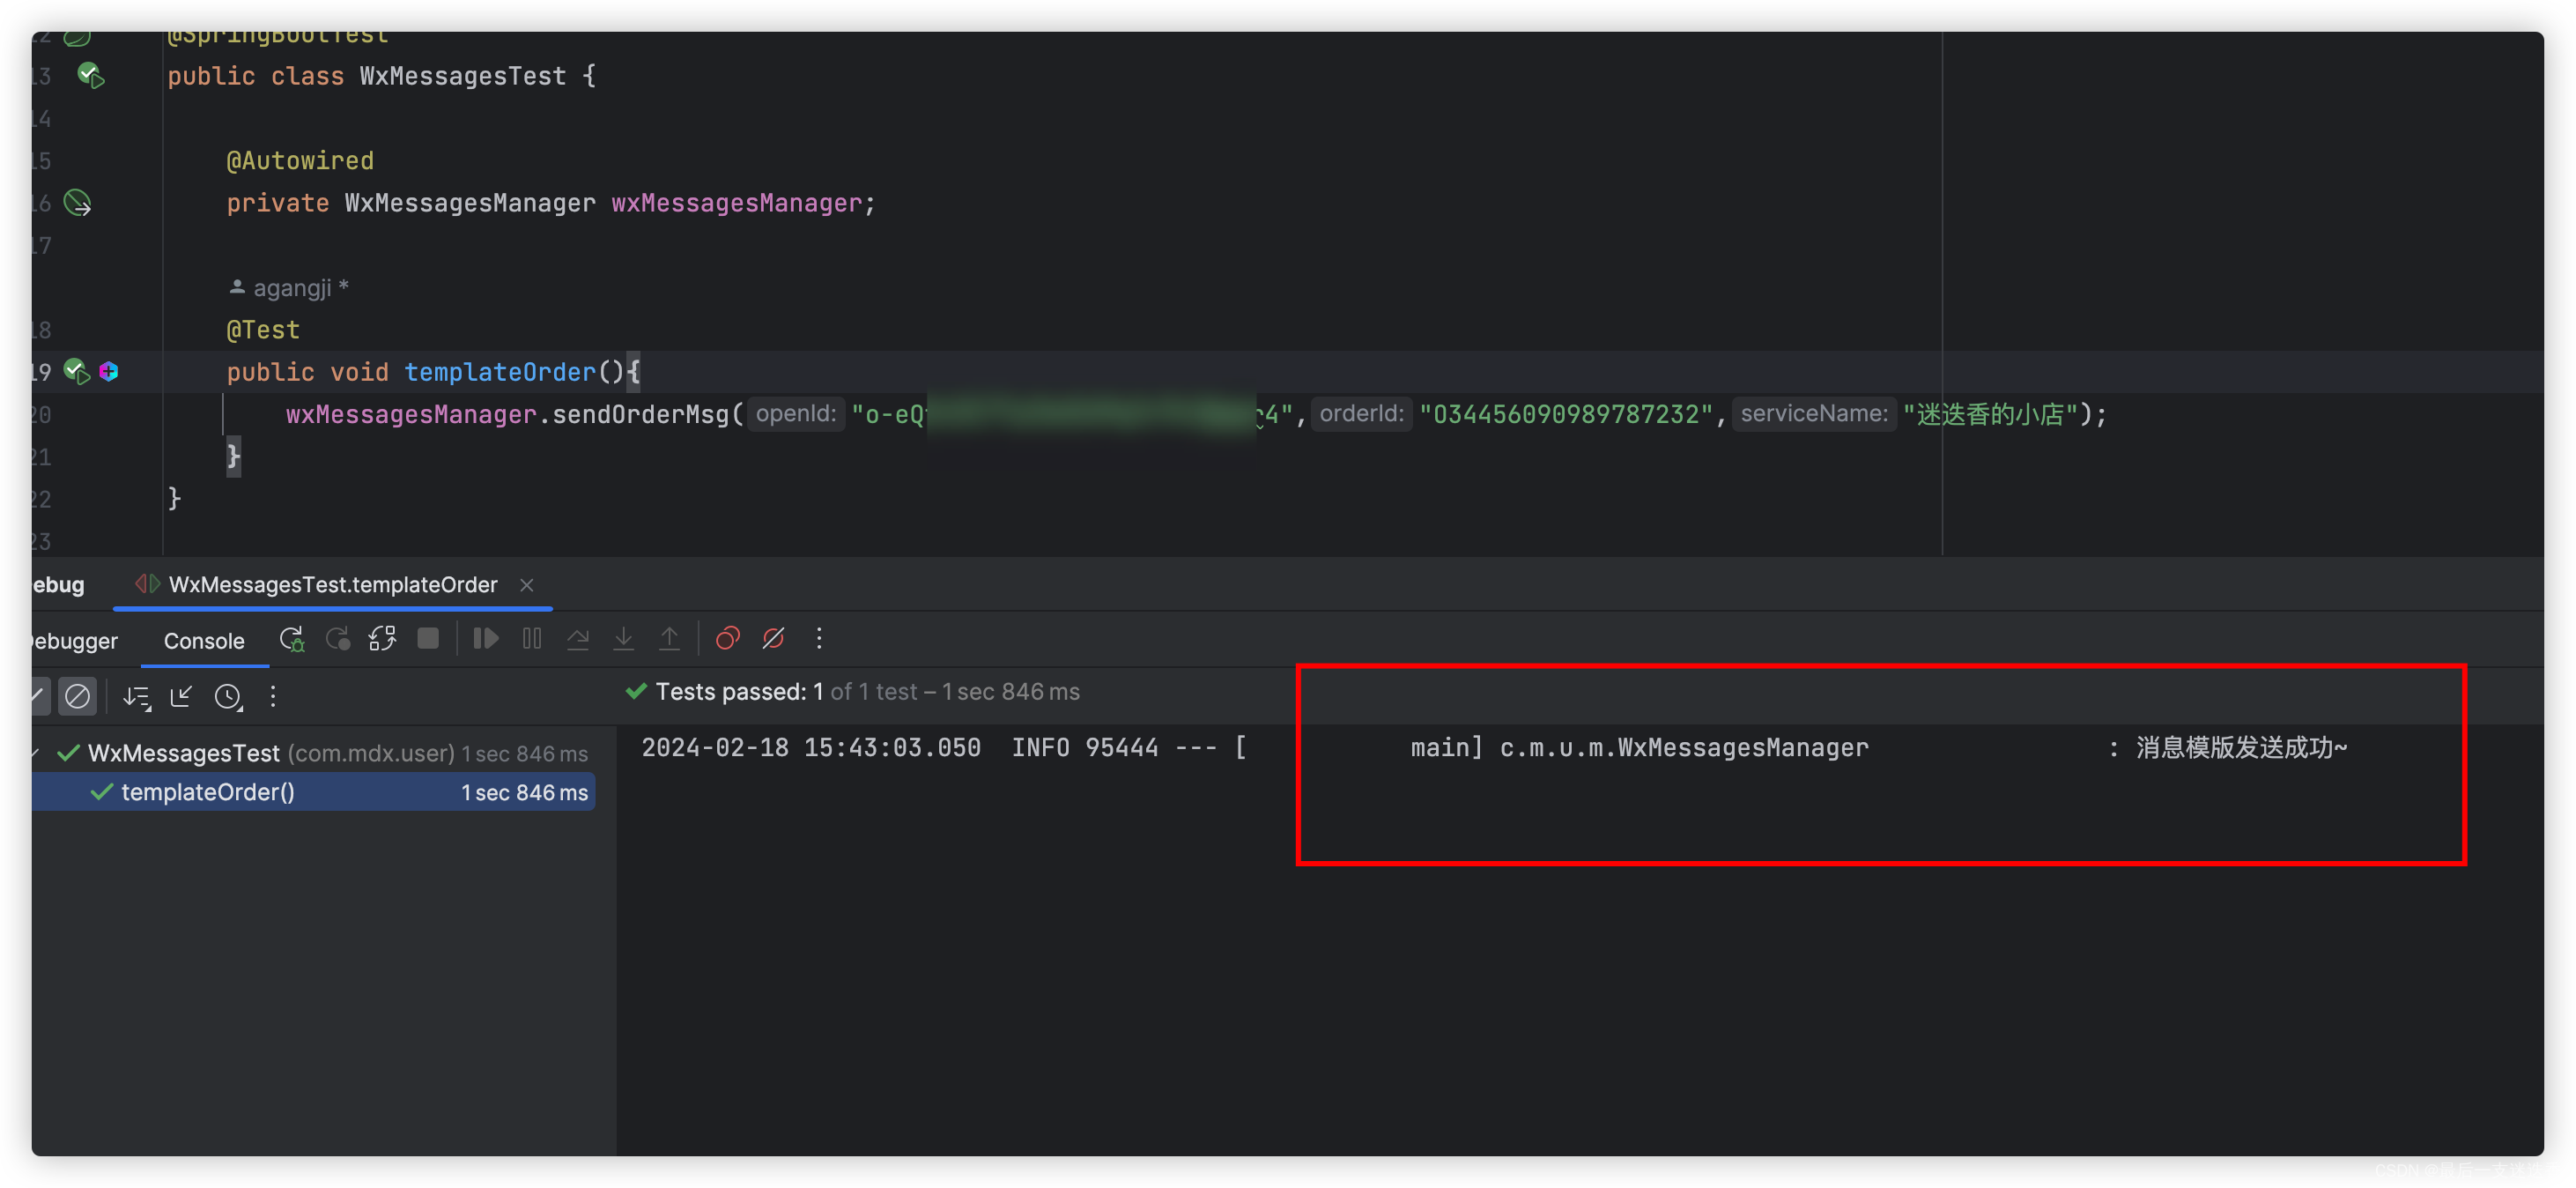
3.2 测试类调用
openId为1.3步骤中得到的微信号,其余参数可自定义

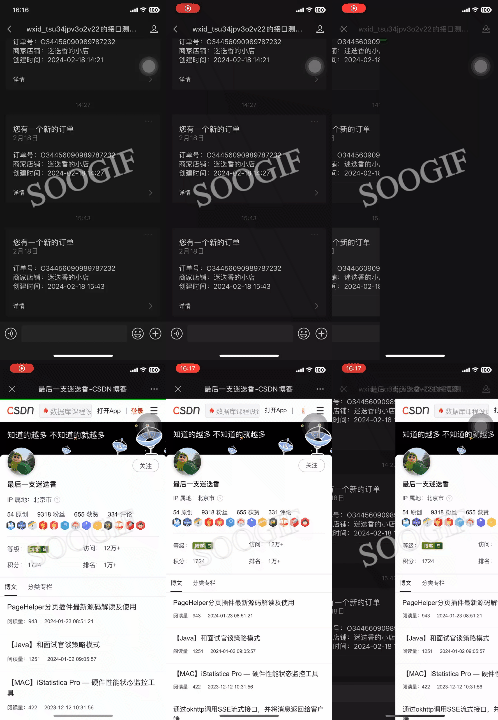
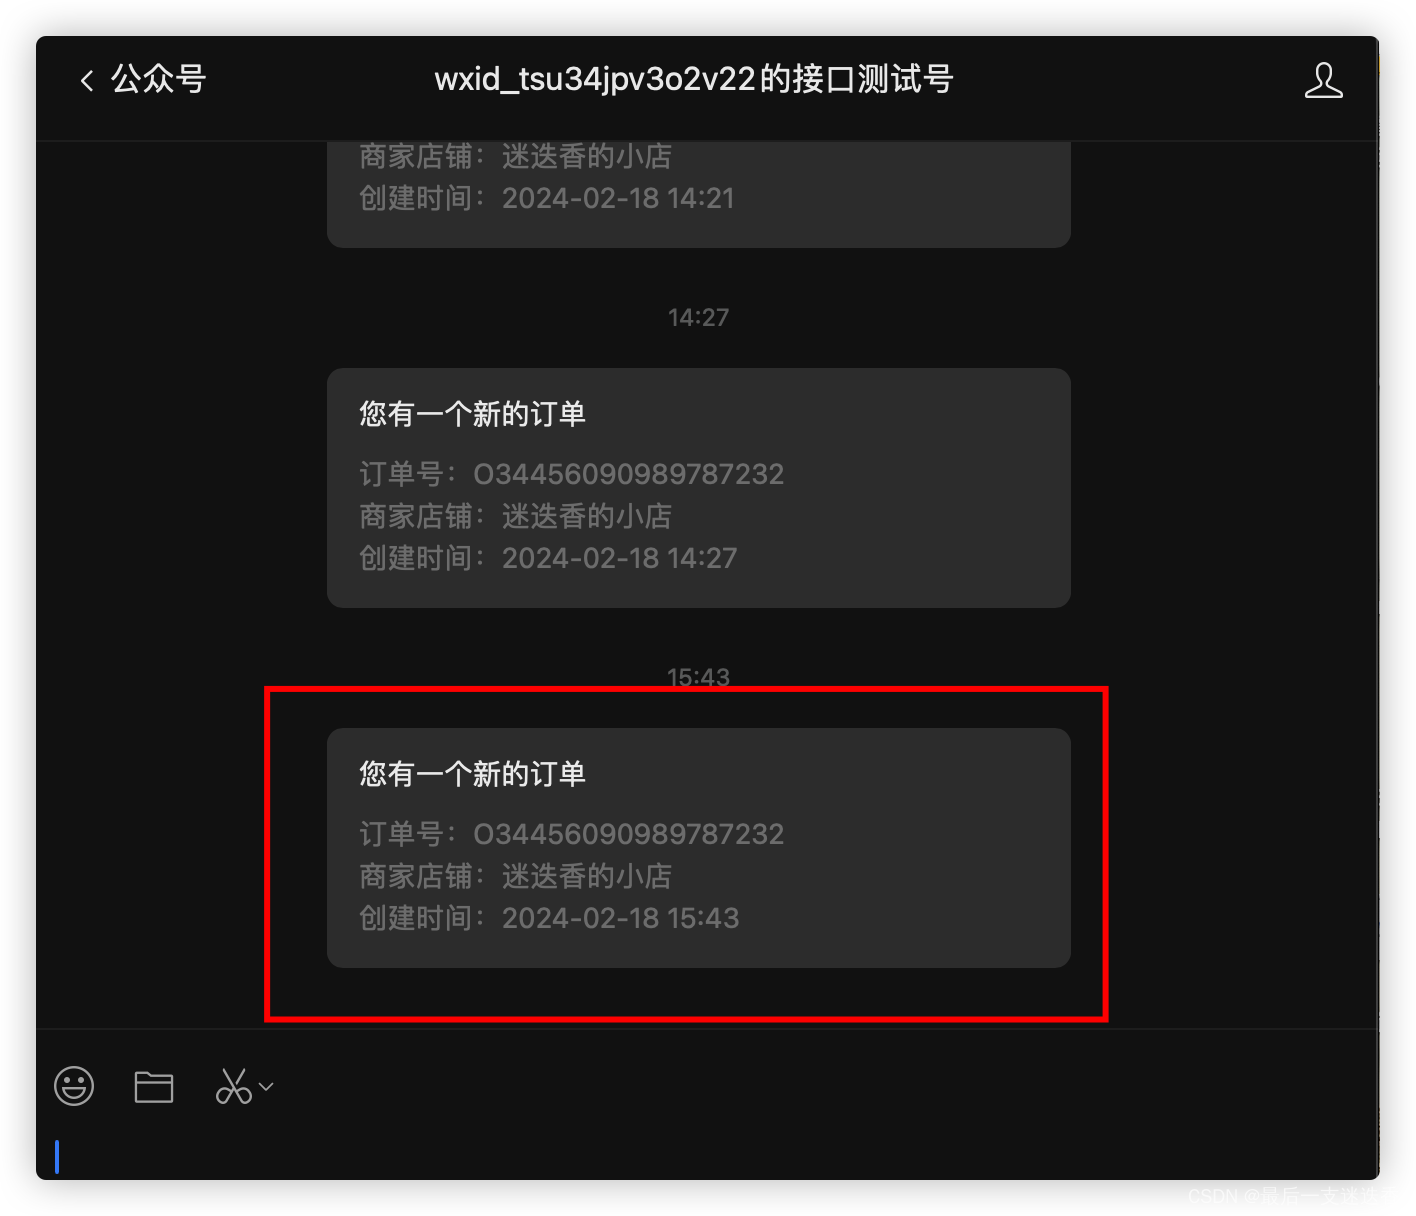
3.3 效果展示
移动端:
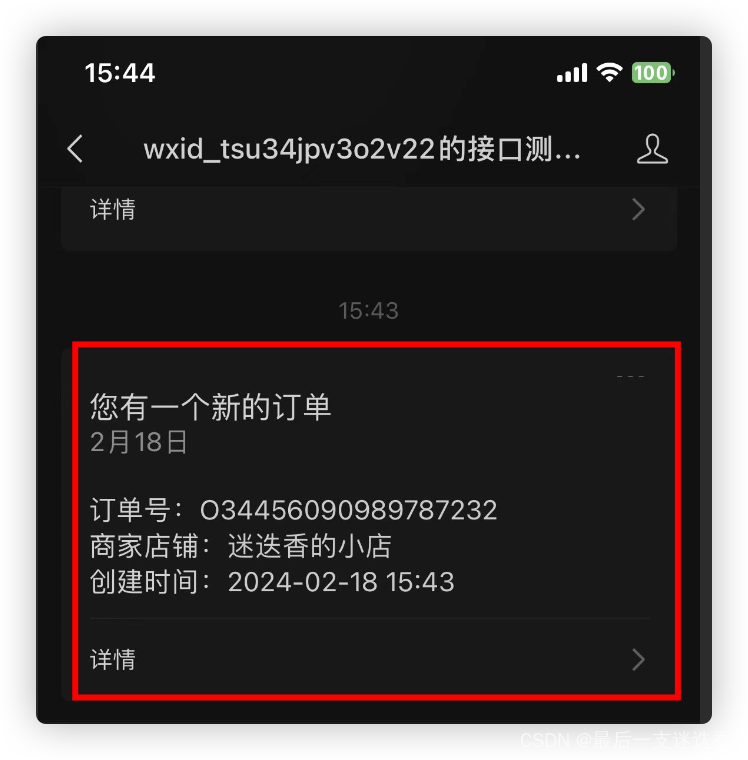
点击详情:
PC端:
最后送大家一句话白驹过隙,沧海桑田
文末送福利啦~
1、Java(SE、JVM)、算法数据结构、数据库(Mysql、redis)、Maven、Netty、RocketMq、Zookeeper、多线程、IO、SSM、Git、Linux、Docker、Web前端相关学习笔记
2、2023最新BATJ大厂面试题集
3、项目源码
4、学习小组
领取方式:关注下方公主号,回复:【笔记】、【面试】获取相关福利。
文章持续更新,可以关注下方公众号或者微信搜一搜「 迷迭香编程 」获取项目源码、干货笔记、面试题集,第一时间阅读,获取更完整的链路资料。


