您的位置:上海毫米网络优化公司 > 网站优化分享 >
相关推荐recommended
- 2023 最新版IntelliJ IDEA 2023.1创建Java
- SpringBoot通过@Cacheable注解实现缓存功能
- Spring Boot:筑基
- 剑指offer刷题笔记-链表
- 大语言模型LLM《提示词工程指南》学习笔记05
- 基于补丁方式修复 nginx漏洞 缓冲区错误漏洞(CVE-2022-4
- linux的一些基本操作和命令
- 【Java EE】关于Spring MVC 响应
- IntelliJ IDEA 2023.3 的 AI Assistant
- SSL数字证书
- mysql workbench使用教程
- 一篇讲明白 Hadoop 生态的三大部件
- Kettle如何连接SQL Server和问题处理
- SQL Sever 基础知识 - 数据排序
- ruoyi-vue(若依前后端分离版本)环境搭建 用idea 安装re
- 基于chow算法的5G超密集网络功率分配matlab仿真
- ThinkPHP 系列漏洞
- nginx输出日志配置与查看
- [SpringBoot 2.x.x] 循环依赖The dependen
- 【MyBatis Plus】初识 MyBatis Plus,在 Spr
- 【Linux】使用Jenkins + svn + springboot
- 前端Vue日常工作中--Watch数据监听
- 「PHP系列」PHP面向对象详解
- 初始SpringBoot:详解特性和结构
- Spring AI与大模型Ollama如何集成整合?
- 缓存相关知识总结
- SpringAI——Java生态接入LLM
- 【SQL相关】Hive行列字符串的合并与拆分
- 【已解决】.nginx: error while loading sh
- 如何使用web文件管理器Net2FTP搭建个人网盘
如何将Springboot项目升级成Springcloud项目(有图详解)
作者:mmseoamin日期:2024-03-20
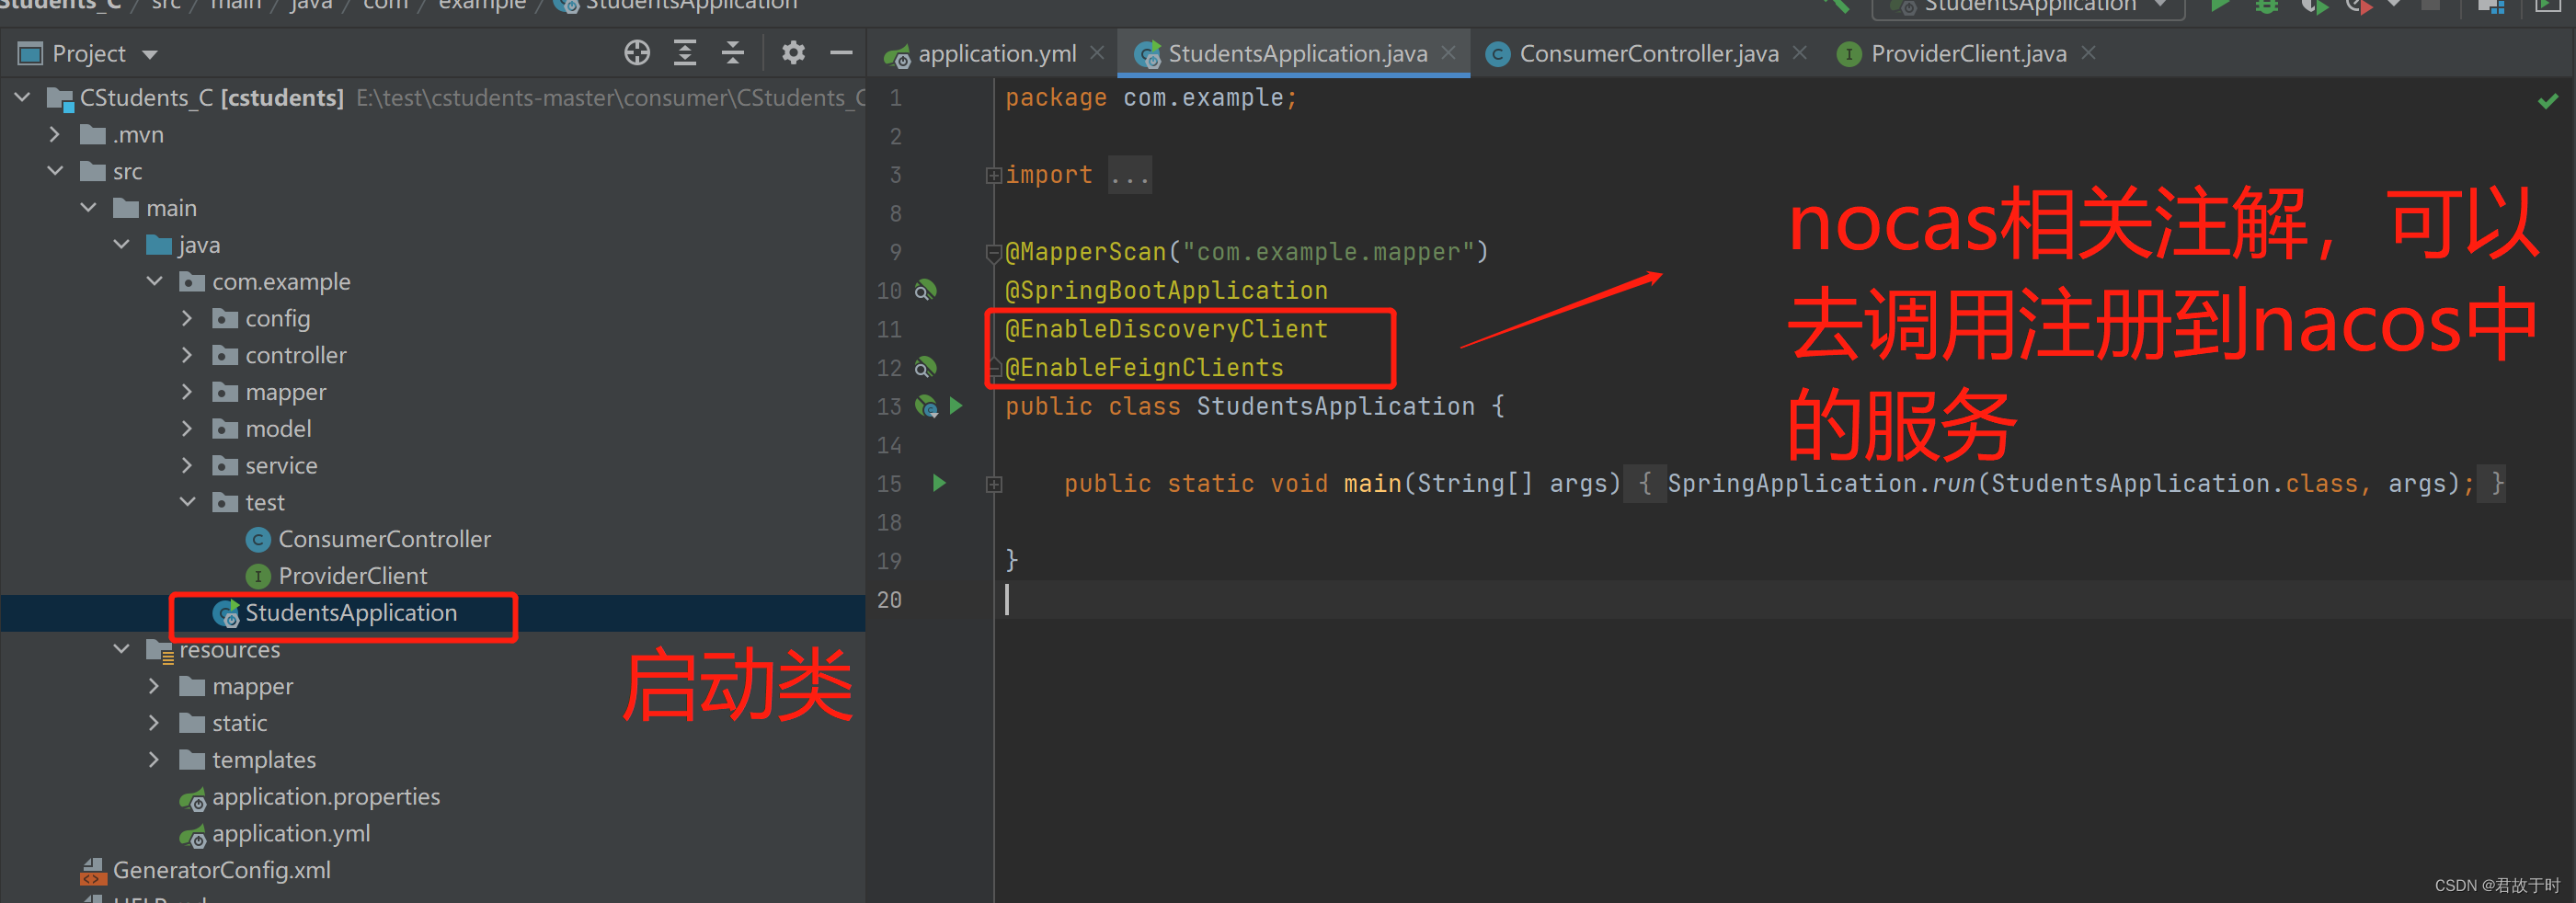
本文以nacos为例
分为以下几个步骤
1. 下载nacos软件
2. pom文件配置
3. application.yml文件配置
4. 代码调用
5. 效果展示
一 . 下载nacos软件
1.1 下载nacos-server-2.2.0-BETA这个版本
nacos-server-2.2.0-BETA
1.2 修改nacos配置文件
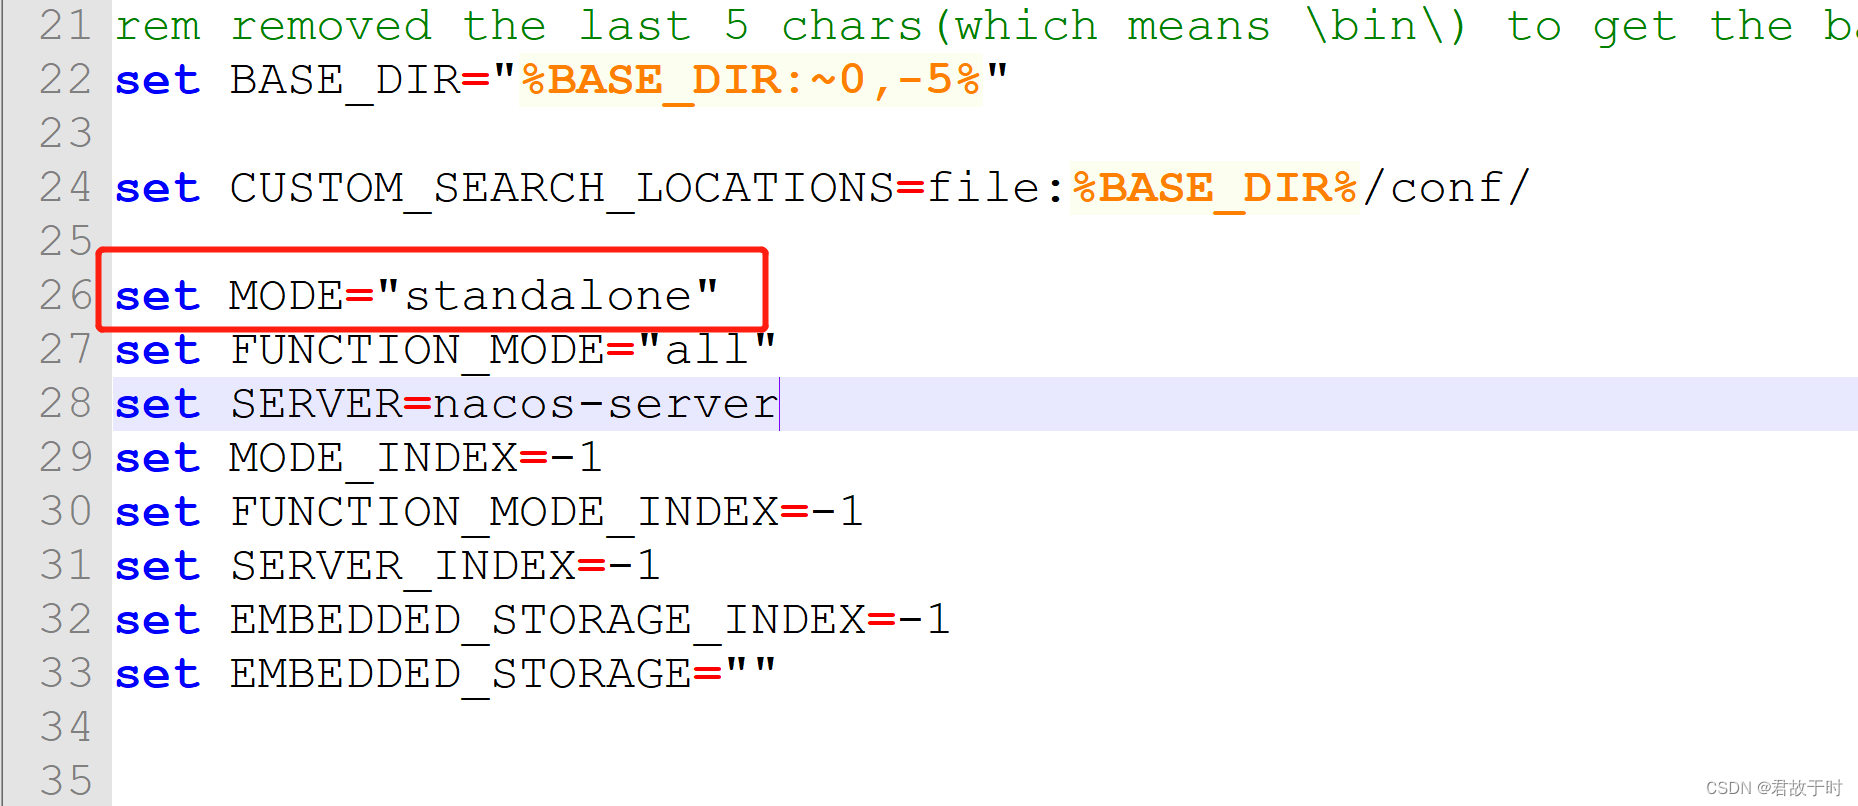
打开bin目录下的startup.cmd,将第26行的
set MODE=“cluster”
改为:
set MODE=“standalone”
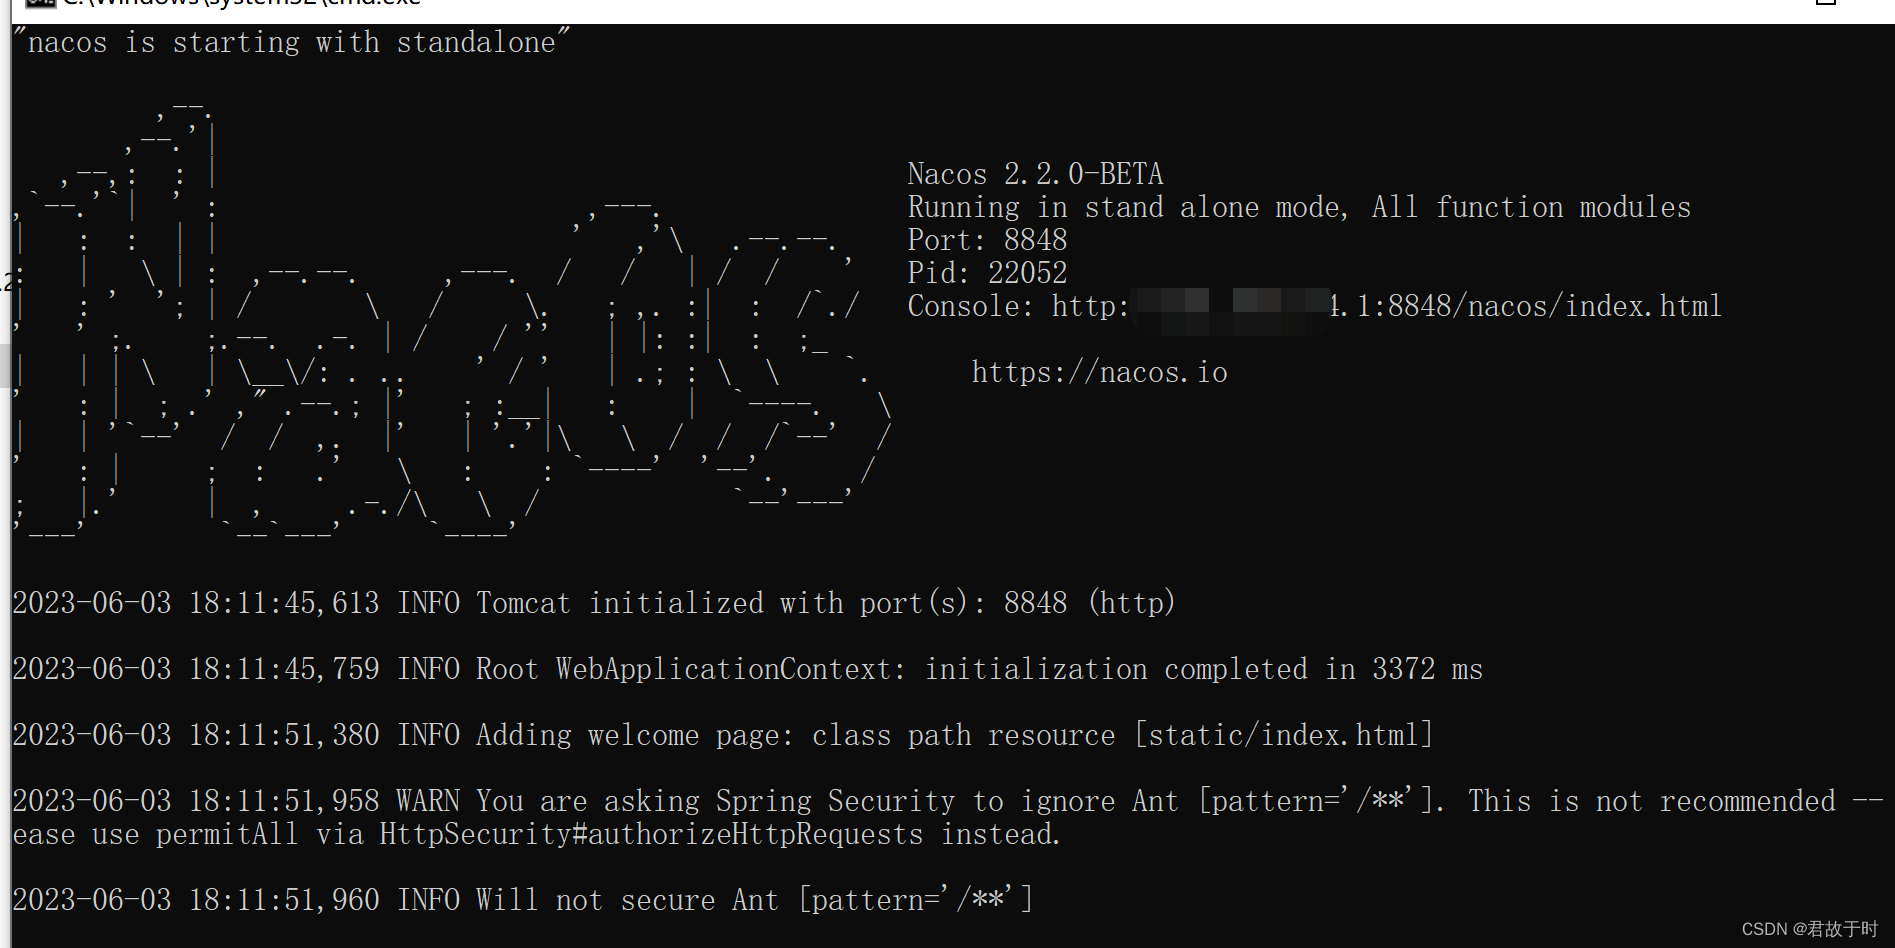
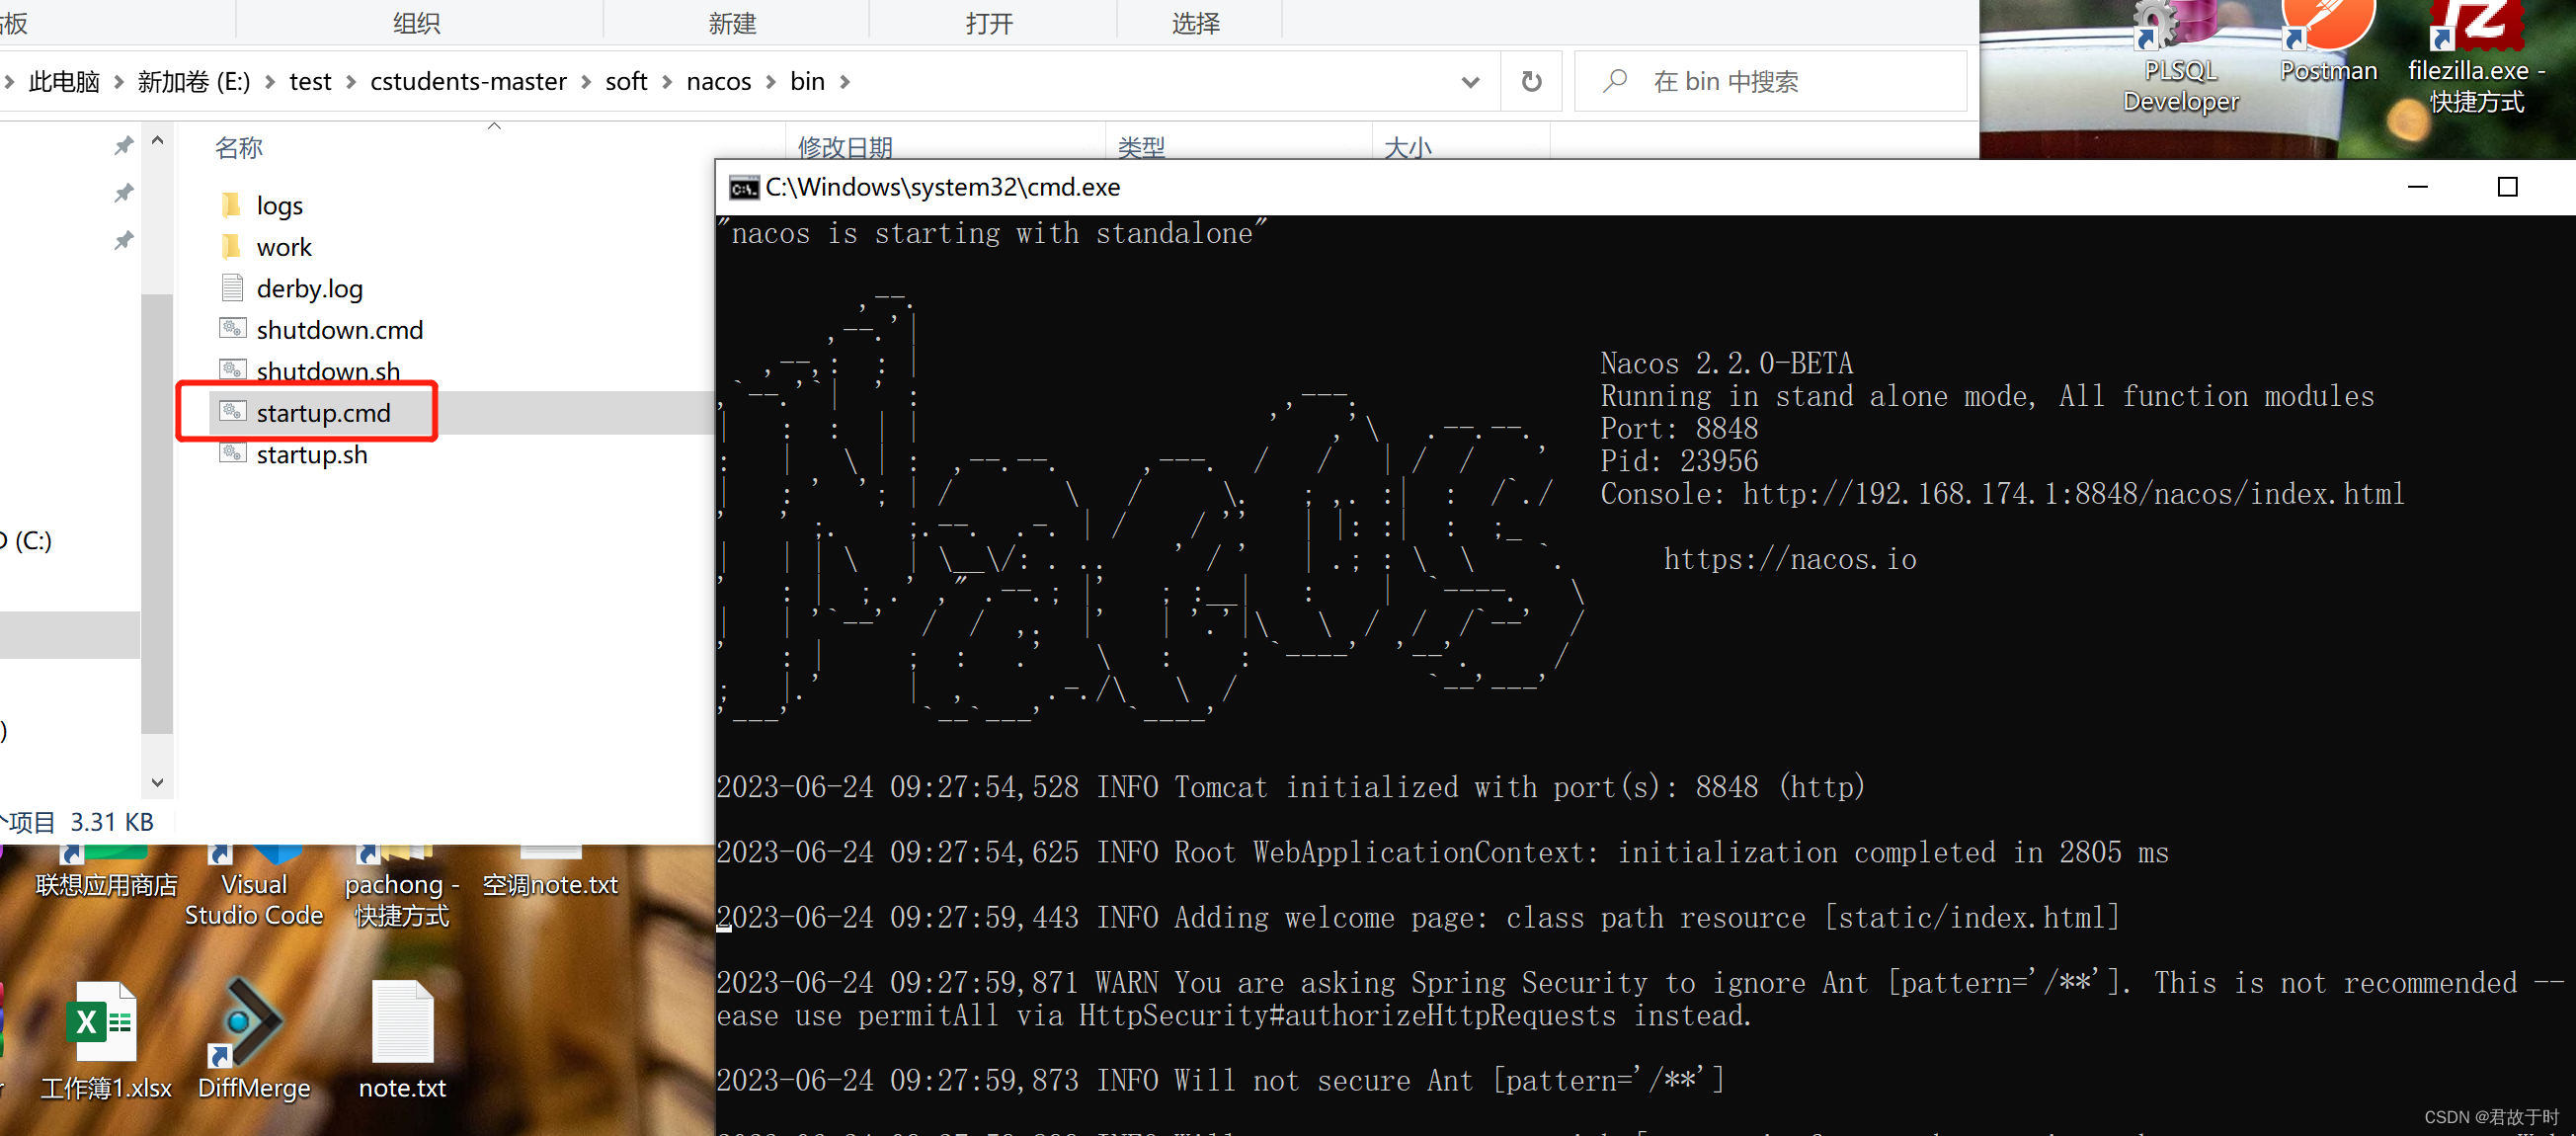
1.3 双击startup.cmd
如下图则表示启动成功
二. 项目中引入jar,配置文件pom.xml
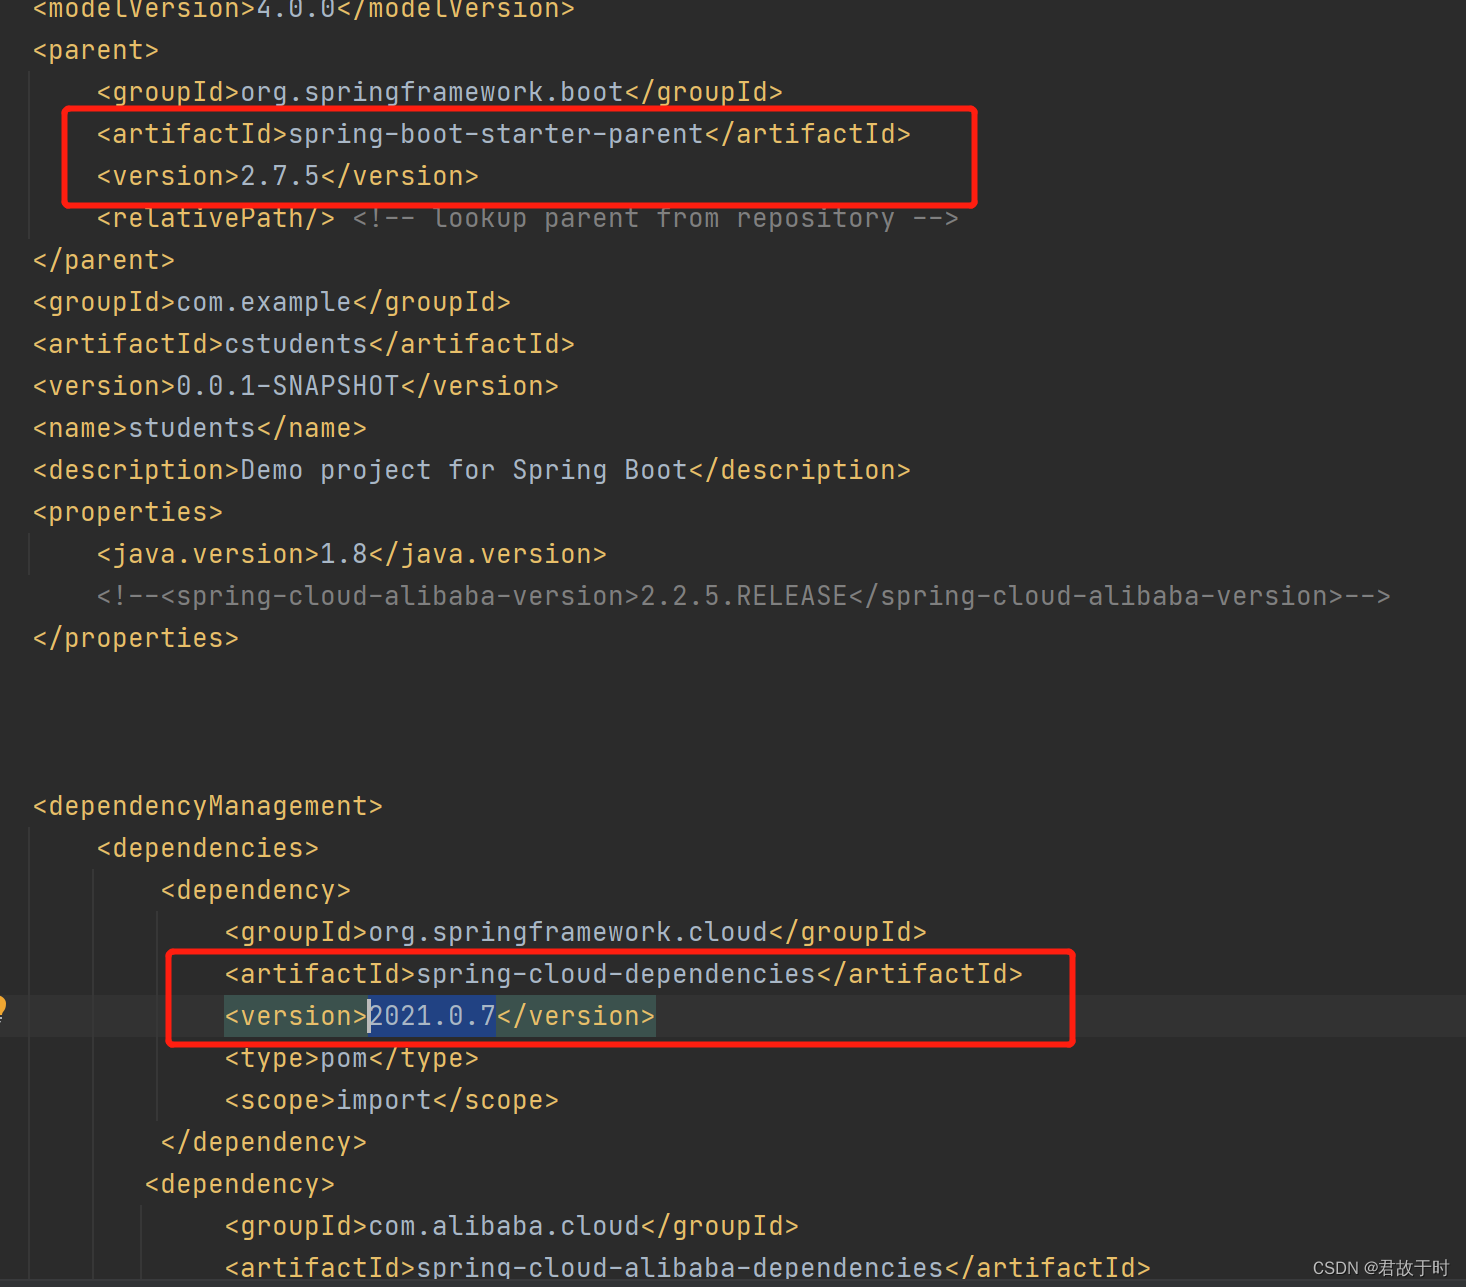
Springboot升级为Springcloud版本一定要对应,不然就会有很多稀奇古怪的错误
本文是将2.7.5的Springboot升级为2021.0.7的Springcloud
如图:
以下是几个关键的配置:
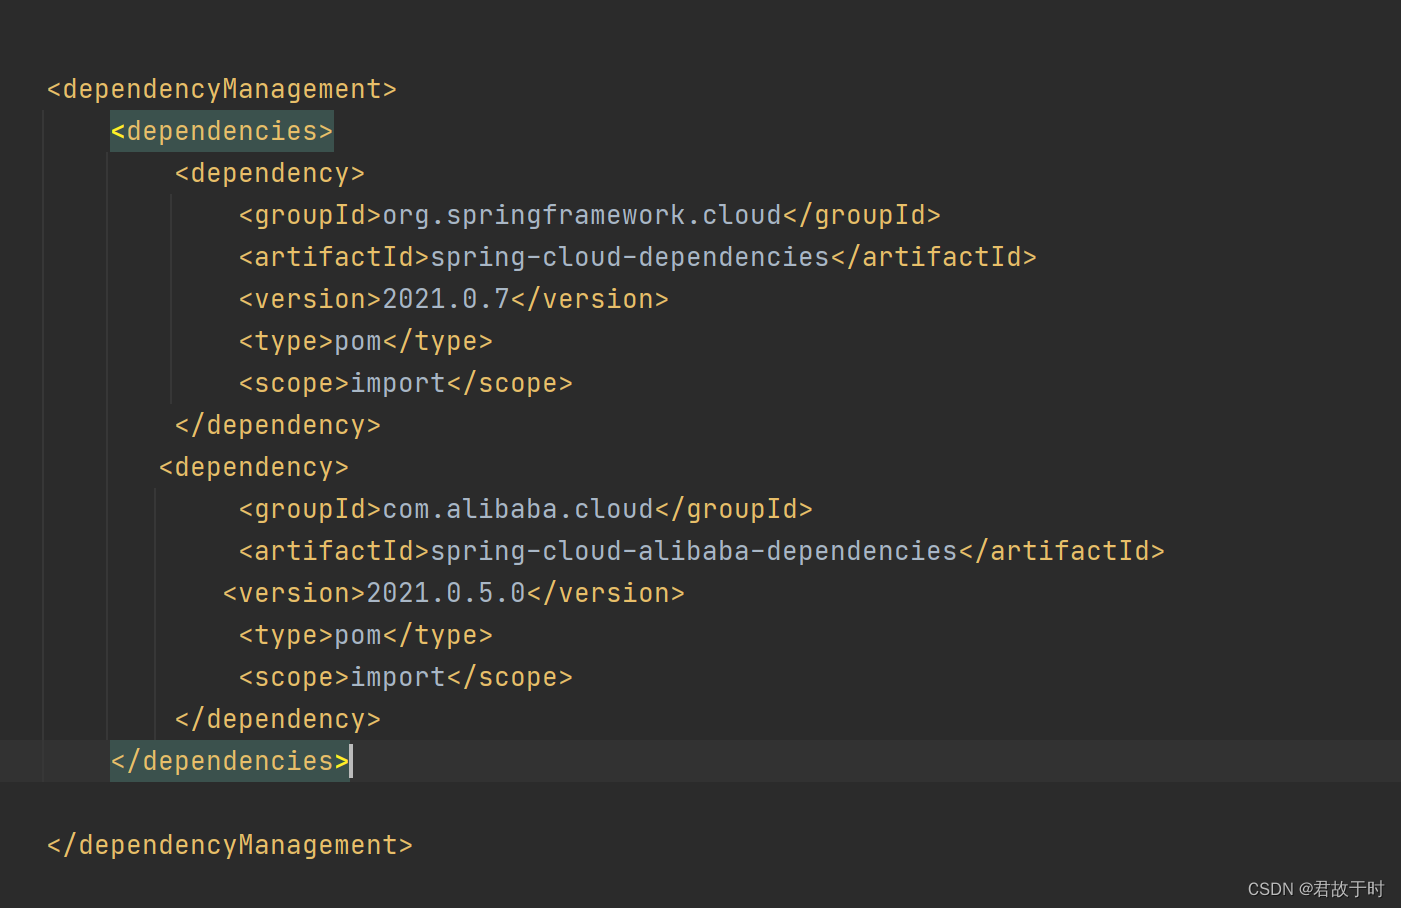
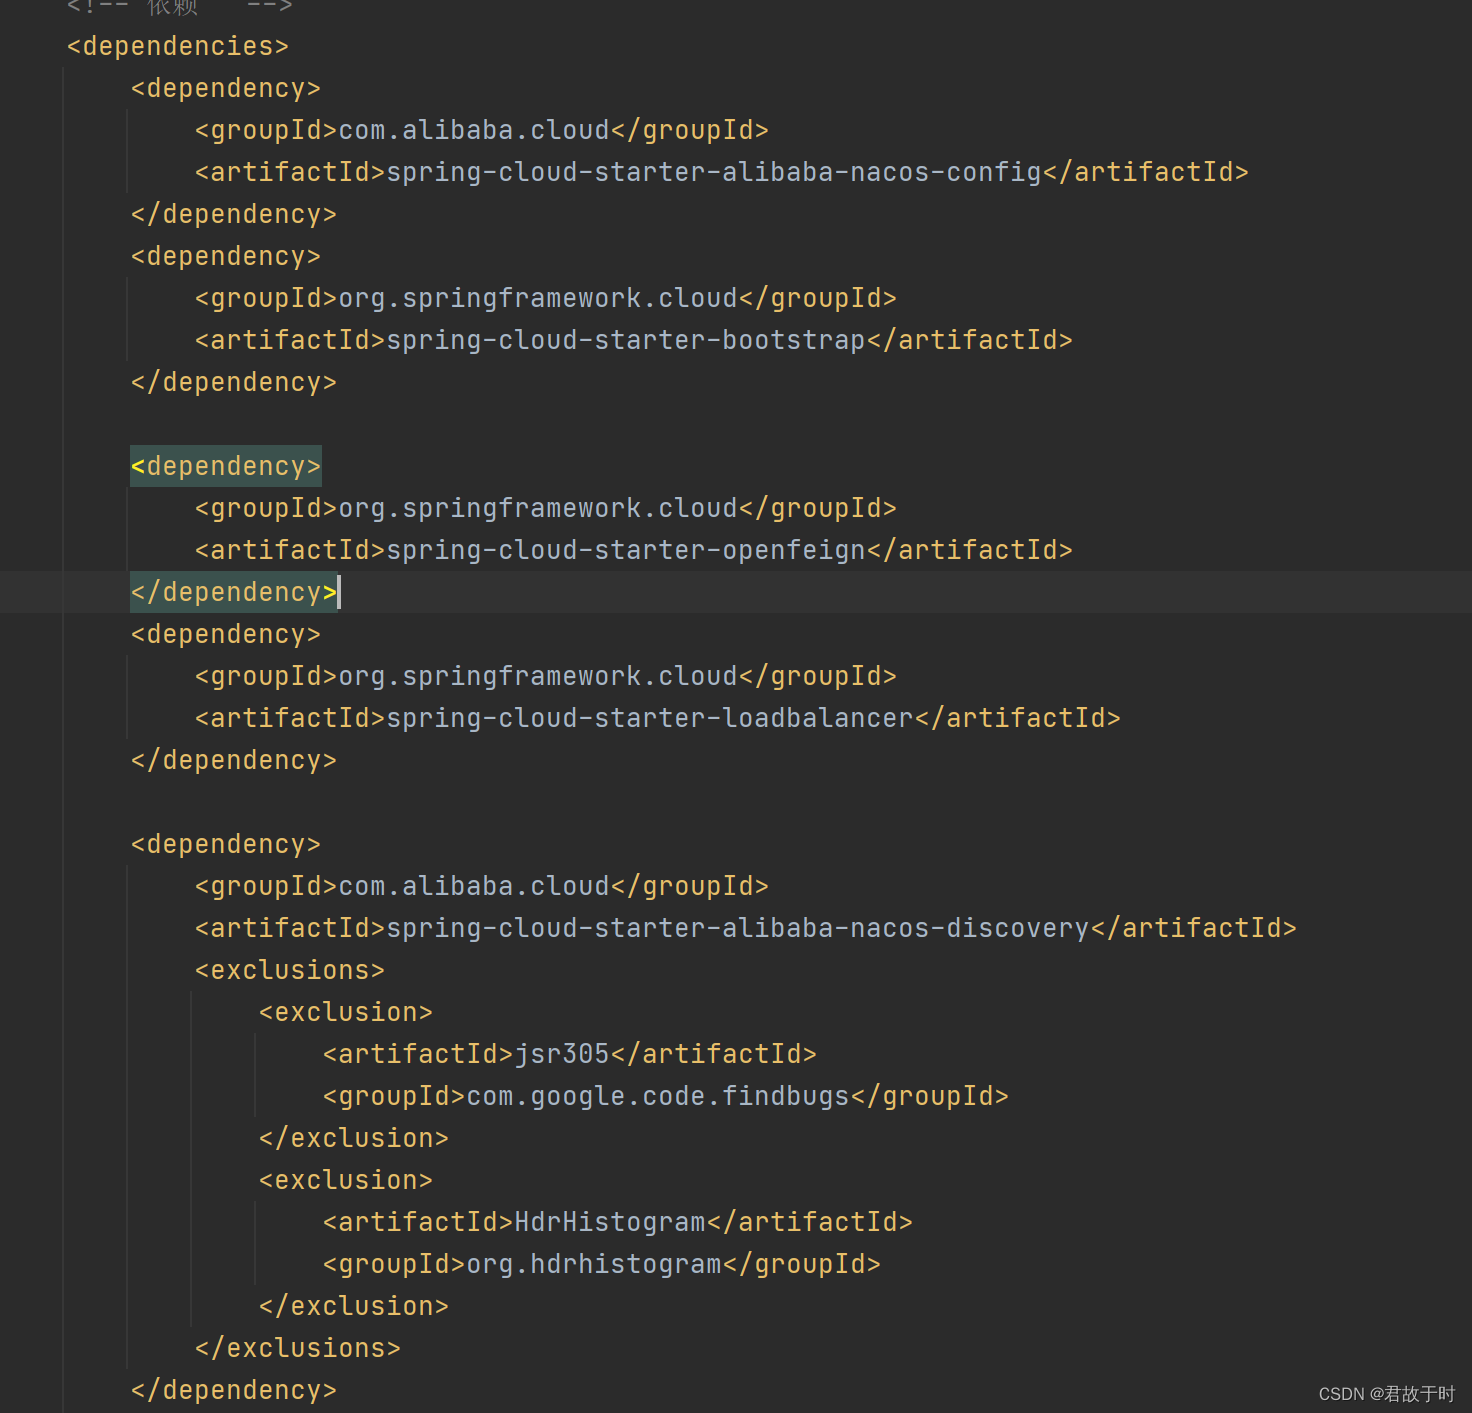
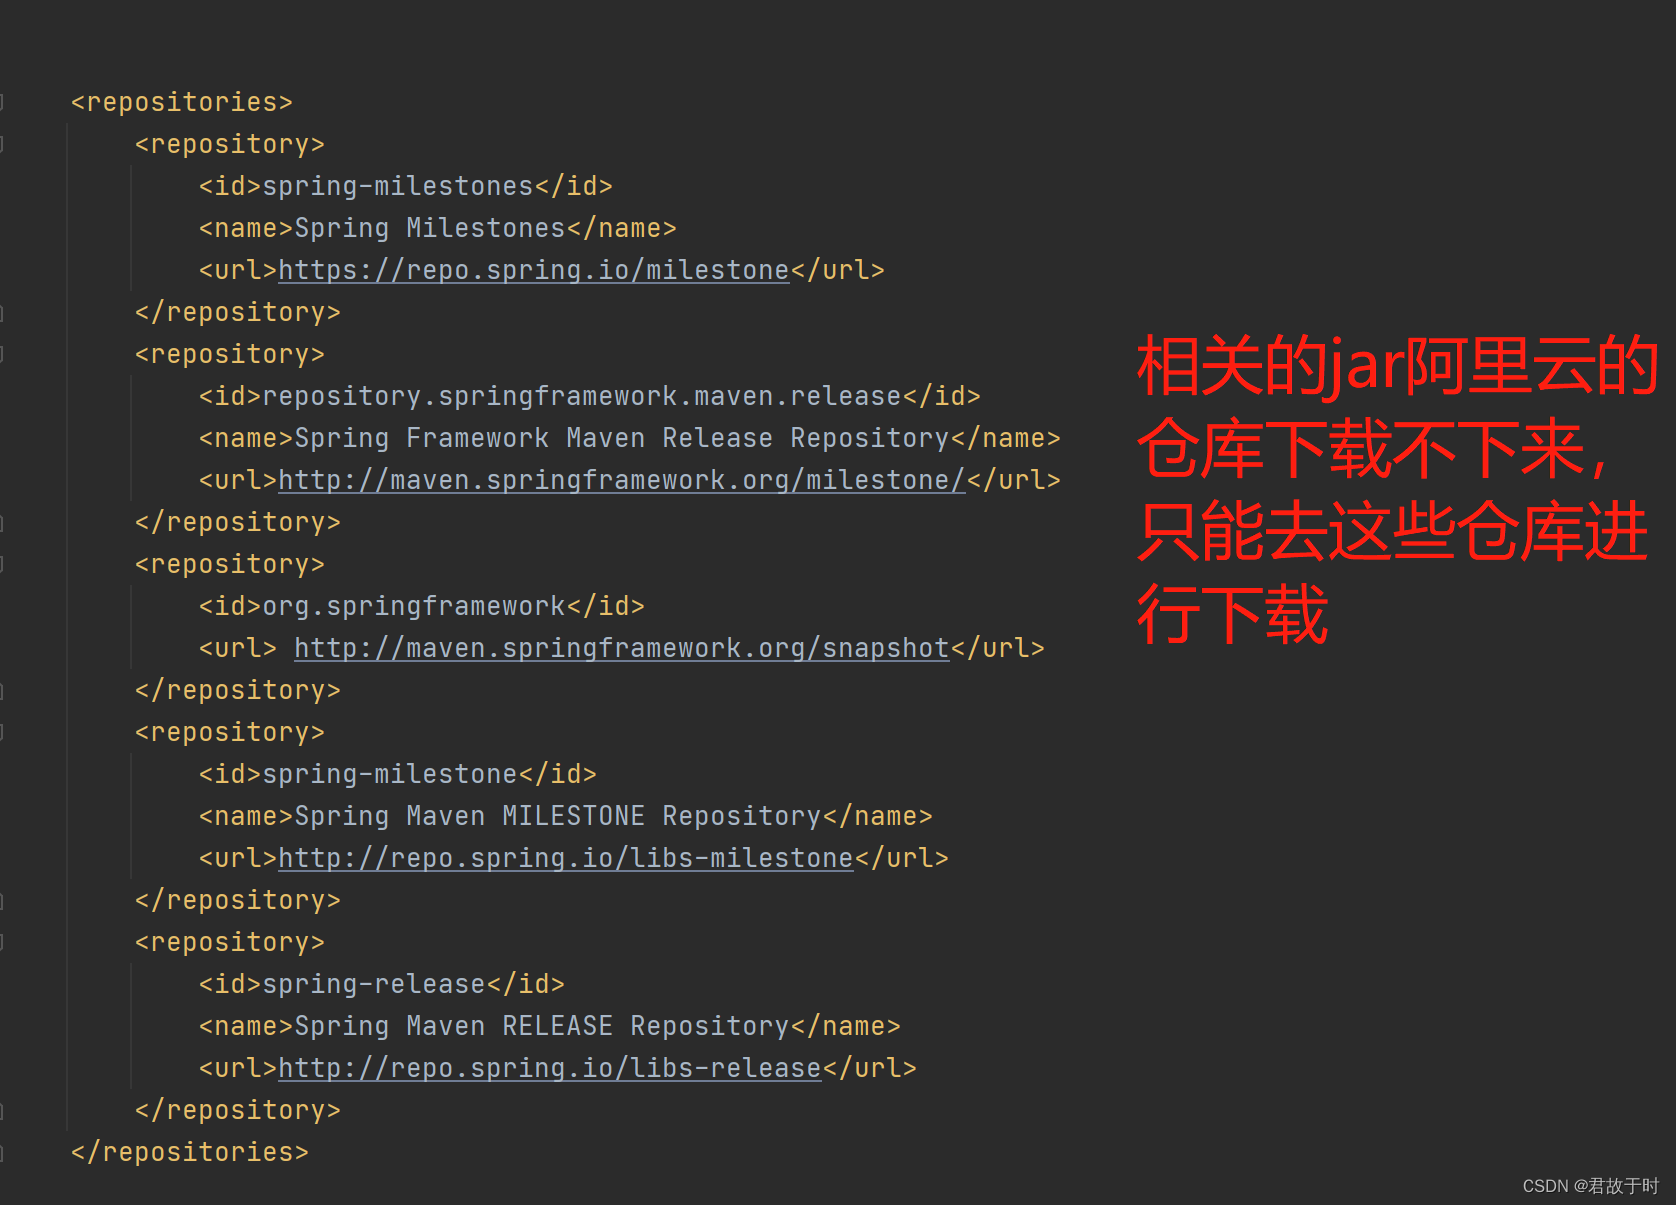
完整的pom.xml配置文件
    4.0.0

        org.springframework.boot
        spring-boot-starter-parent
        2.7.5


    com.example
    cstudents
    0.0.1-SNAPSHOT
    students
    Demo project for Spring Boot

        1.8


                org.springframework.cloud
                spring-cloud-dependencies
                2021.0.7
                pom
                import


                com.alibaba.cloud
                spring-cloud-alibaba-dependencies
               2021.0.5.0
                pom
                import


            com.alibaba.cloud
            spring-cloud-starter-alibaba-nacos-config


            org.springframework.cloud
            spring-cloud-starter-bootstrap


            org.springframework.cloud
            spring-cloud-starter-openfeign


            org.springframework.cloud
            spring-cloud-starter-loadbalancer


            com.alibaba.cloud
            spring-cloud-starter-alibaba-nacos-discovery


                    jsr305
                    com.google.code.findbugs


                    HdrHistogram
                    org.hdrhistogram


            org.springframework.boot
            spring-boot-starter-web


            org.springframework.boot
            spring-boot-starter-test
            test


            org.springframework.boot
            spring-boot-starter-thymeleaf


            org.projectlombok
            lombok


            org.springframework.boot
            spring-boot-starter-data-jpa


            org.mybatis.spring.boot
            mybatis-spring-boot-starter
            2.2.1


            com.alibaba
            druid-spring-boot-starter
            1.2.15


            mysql
            mysql-connector-java
            8.0.31


            com.github.pagehelper
            pagehelper-spring-boot-starter
            1.4.5


            com.baomidou
            mybatis-plus-boot-starter
            3.4.2


            org.springframework.boot
            spring-boot-devtools


            spring-milestones
            Spring Milestones
            https://repo.spring.io/milestone


            repository.springframework.maven.release
            Spring Framework Maven Release Repository
            http://maven.springframework.org/milestone/


            org.springframework
             http://maven.springframework.org/snapshot


            spring-milestone
            Spring Maven MILESTONE Repository
            http://repo.spring.io/libs-milestone


            spring-release
            Spring Maven RELEASE Repository
            http://repo.spring.io/libs-release


                org.mybatis.generator
                mybatis-generator-maven-plugin
                1.3.6

                    GeneratorConfig.xml
                    true
                    true
在升级为Springcloud时,有些jar会有冲突,本文pom.xml文件中注释掉的就是冲突的jar,但是读者得根据自己的实际情况进行增删冲突jar,不过一般就是文中的这几个
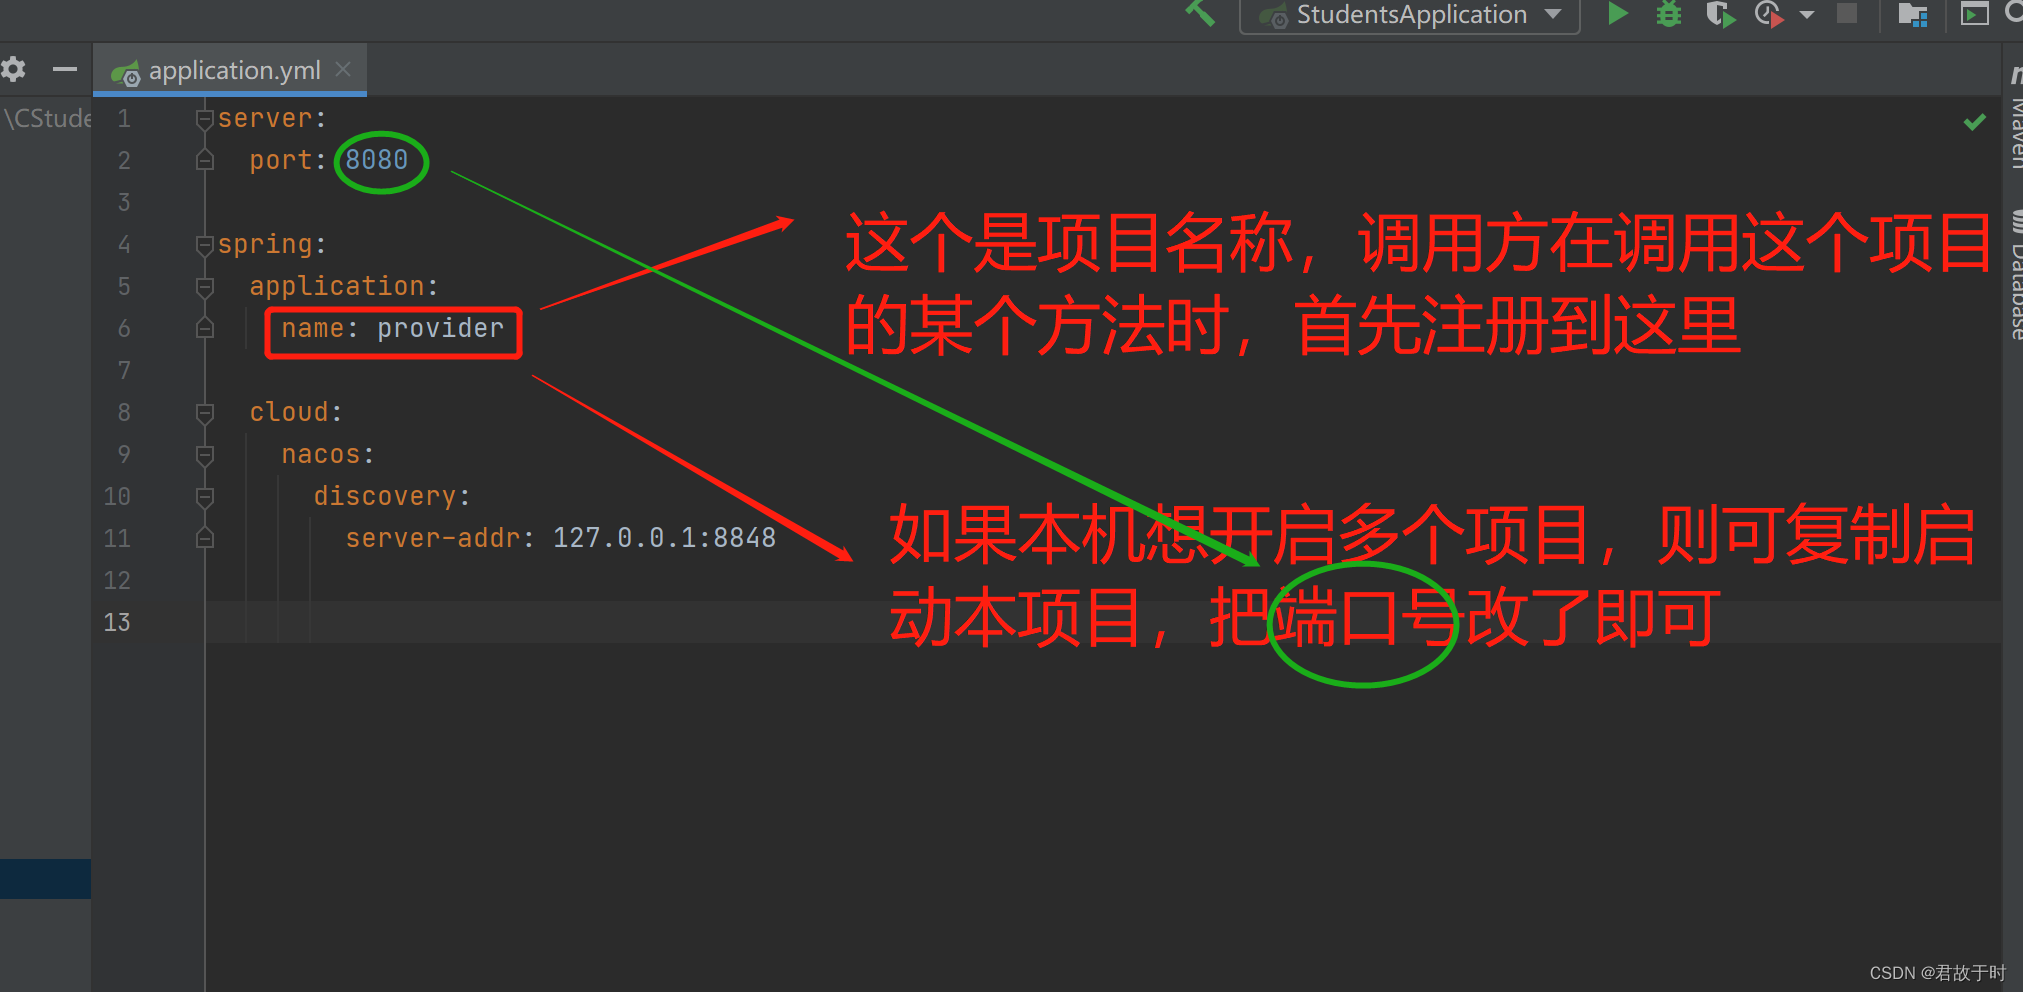
三. application.yml文件配置
server:
  port: 9080
spring:
  application:
    name: consumer
  cloud:
    nacos:
      discovery:
        server-addr: 127.0.0.1:8848
注意事项:
4. 代码调用:
项目说明,项目有一个消费者(调用方),和两个生产者(被调用方)
4.1 生产者
生产者代码解析:
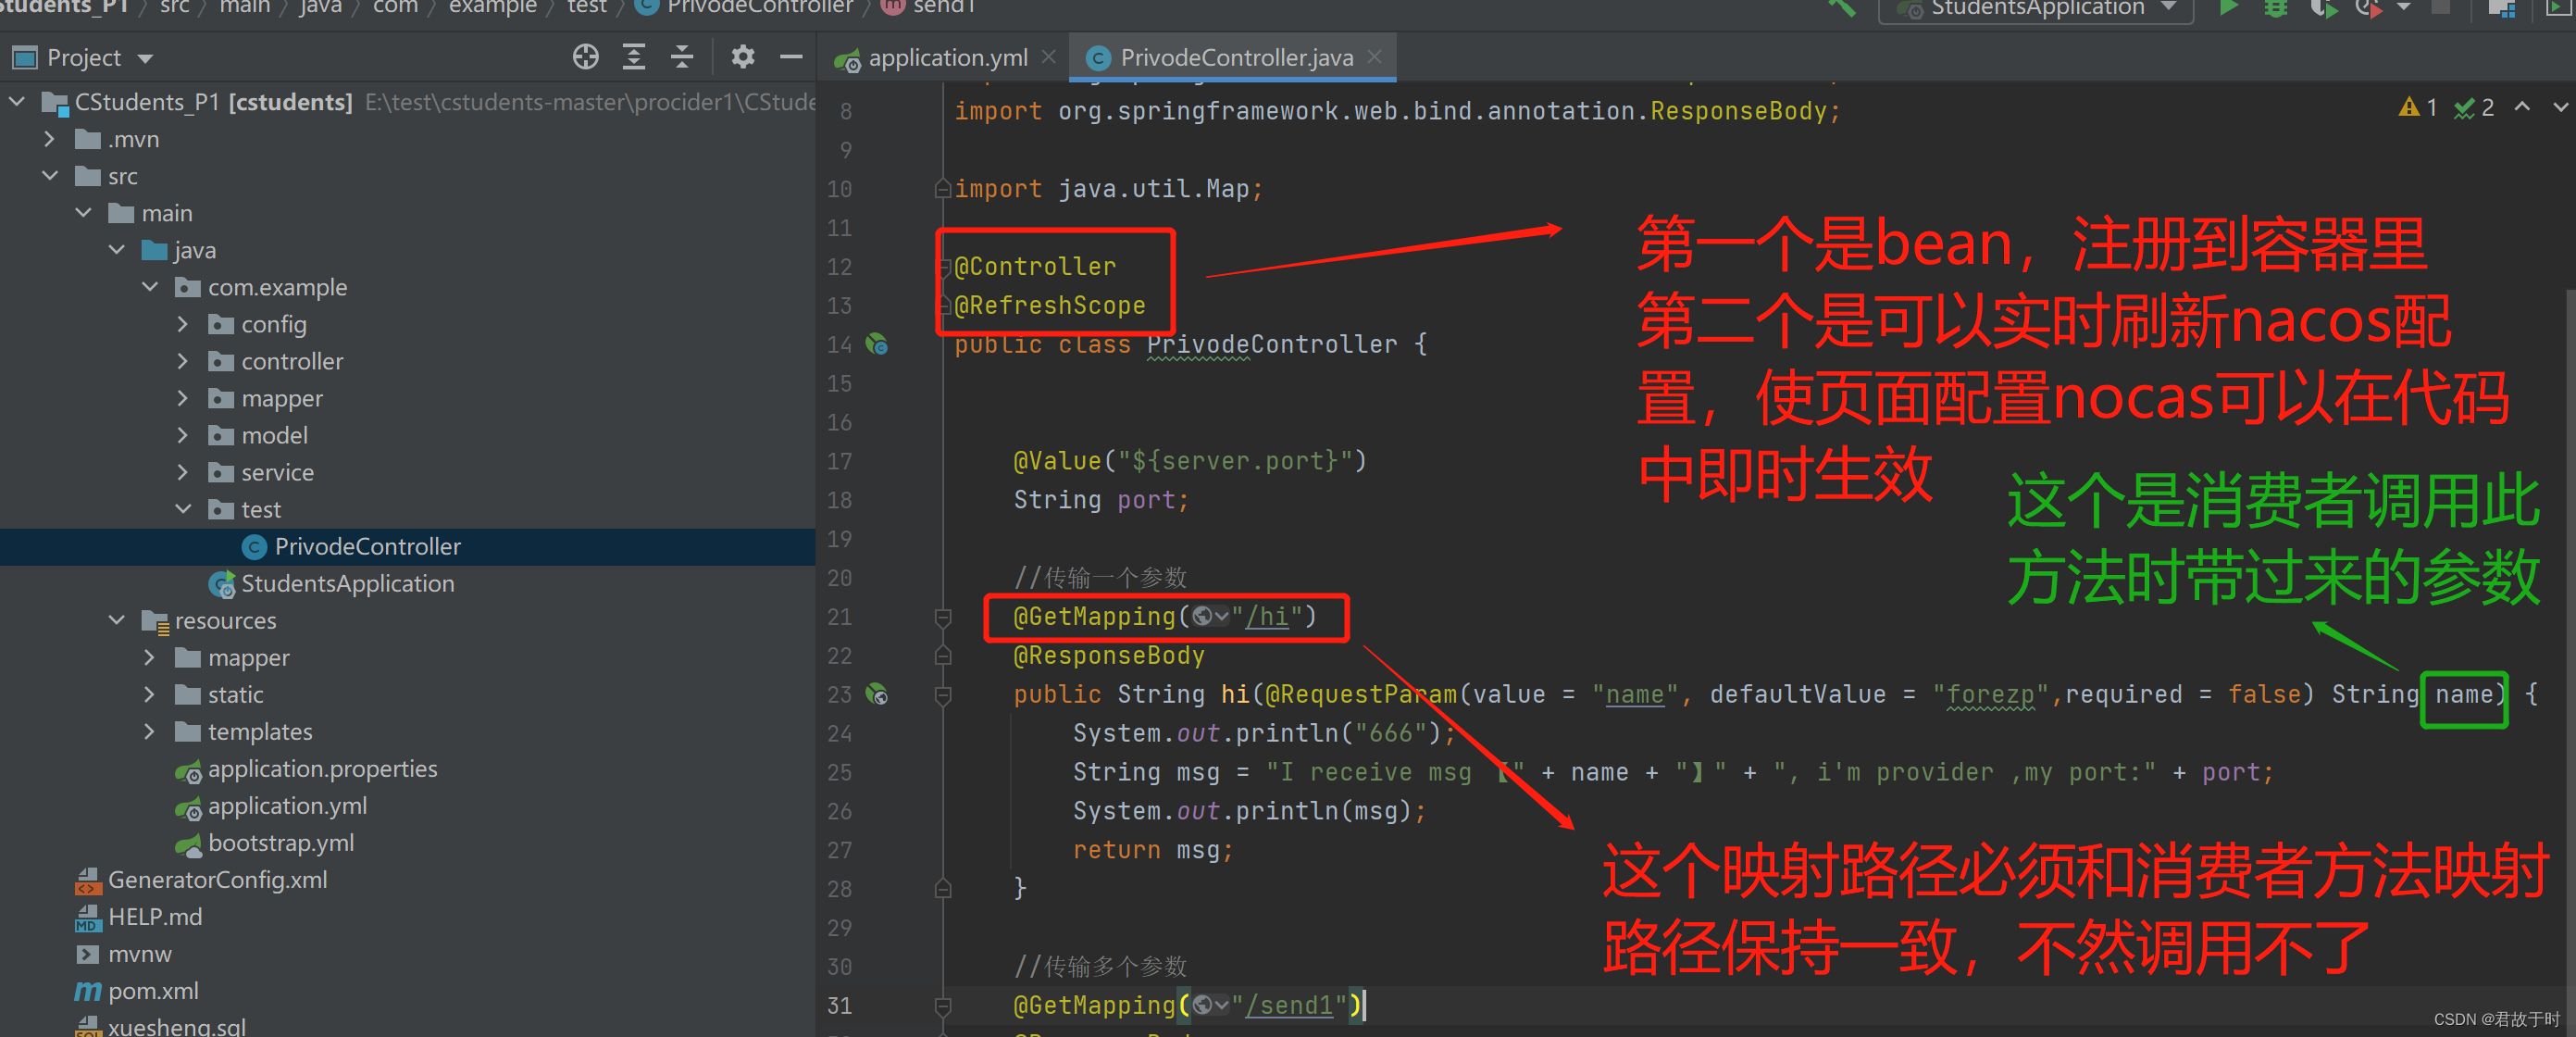
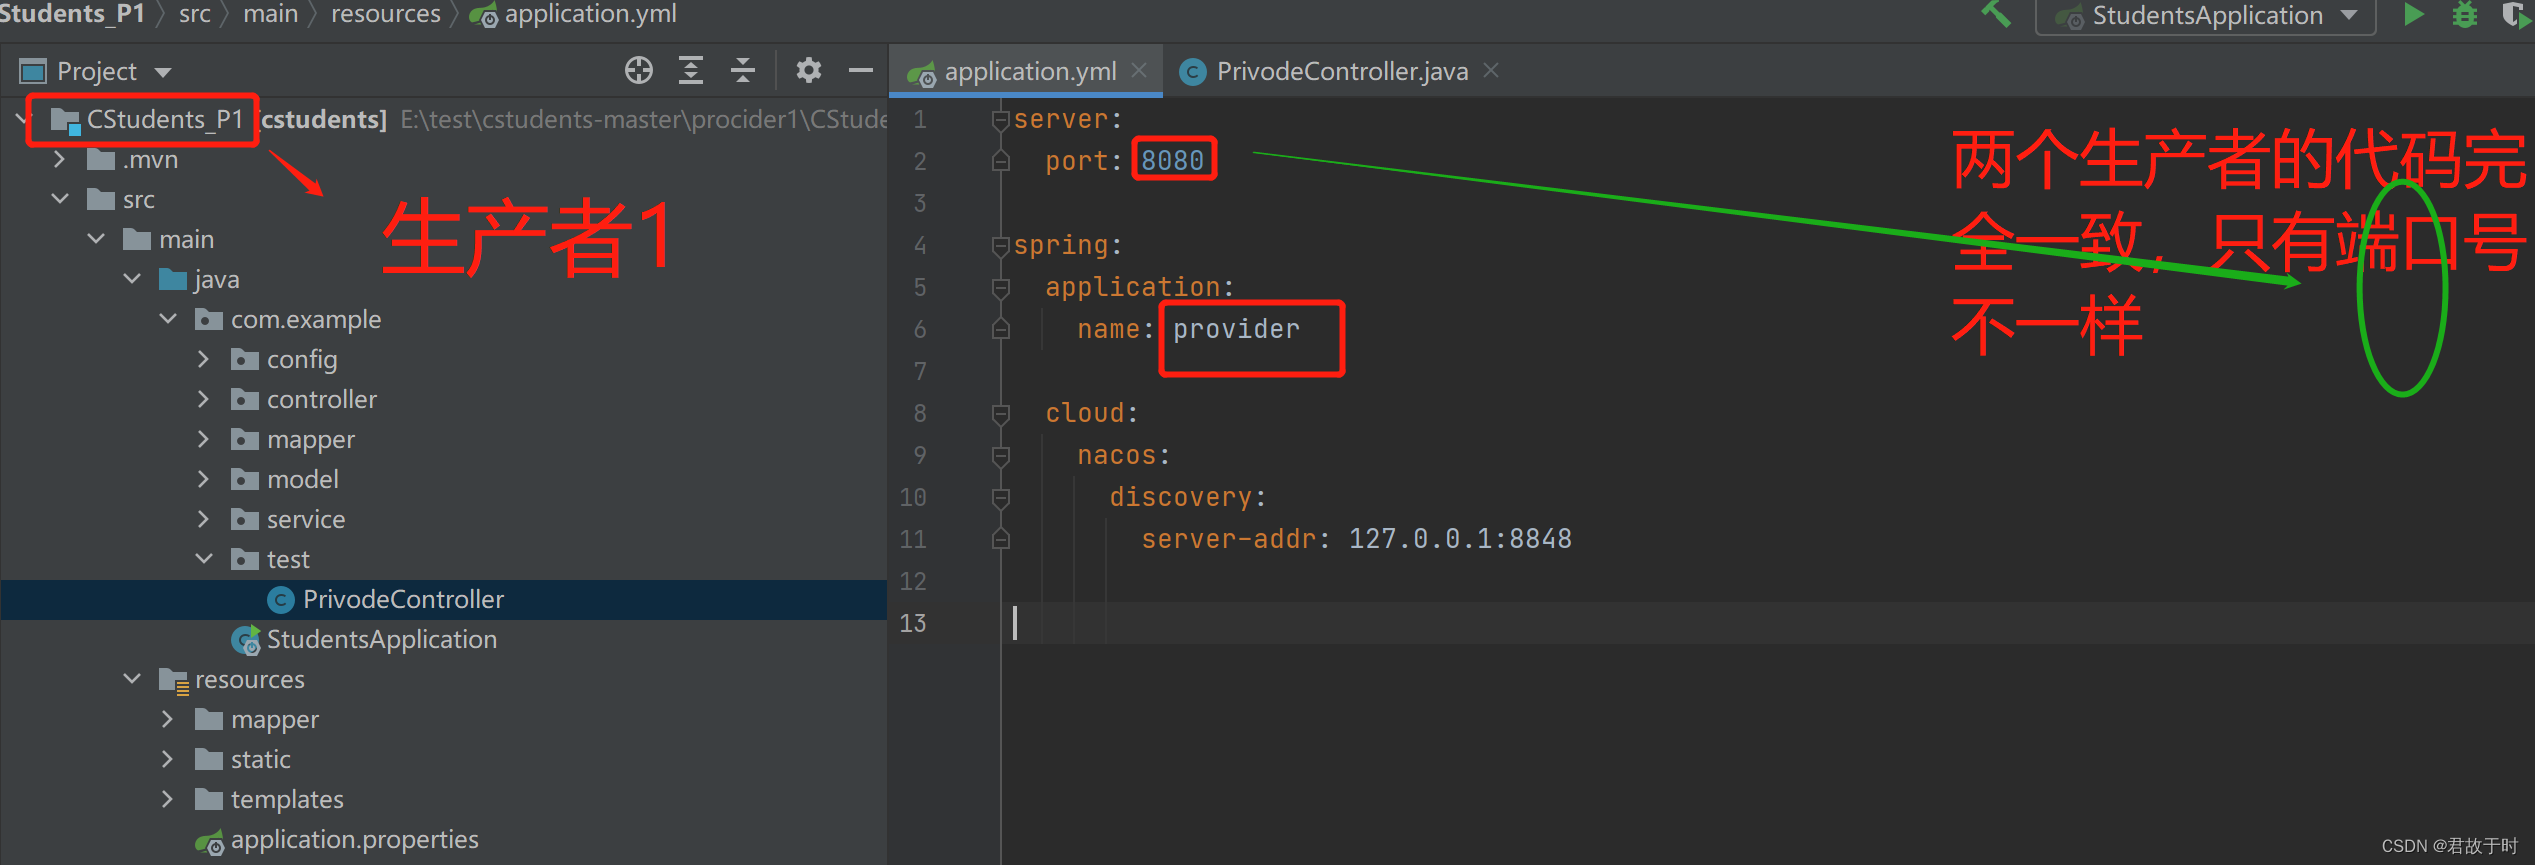

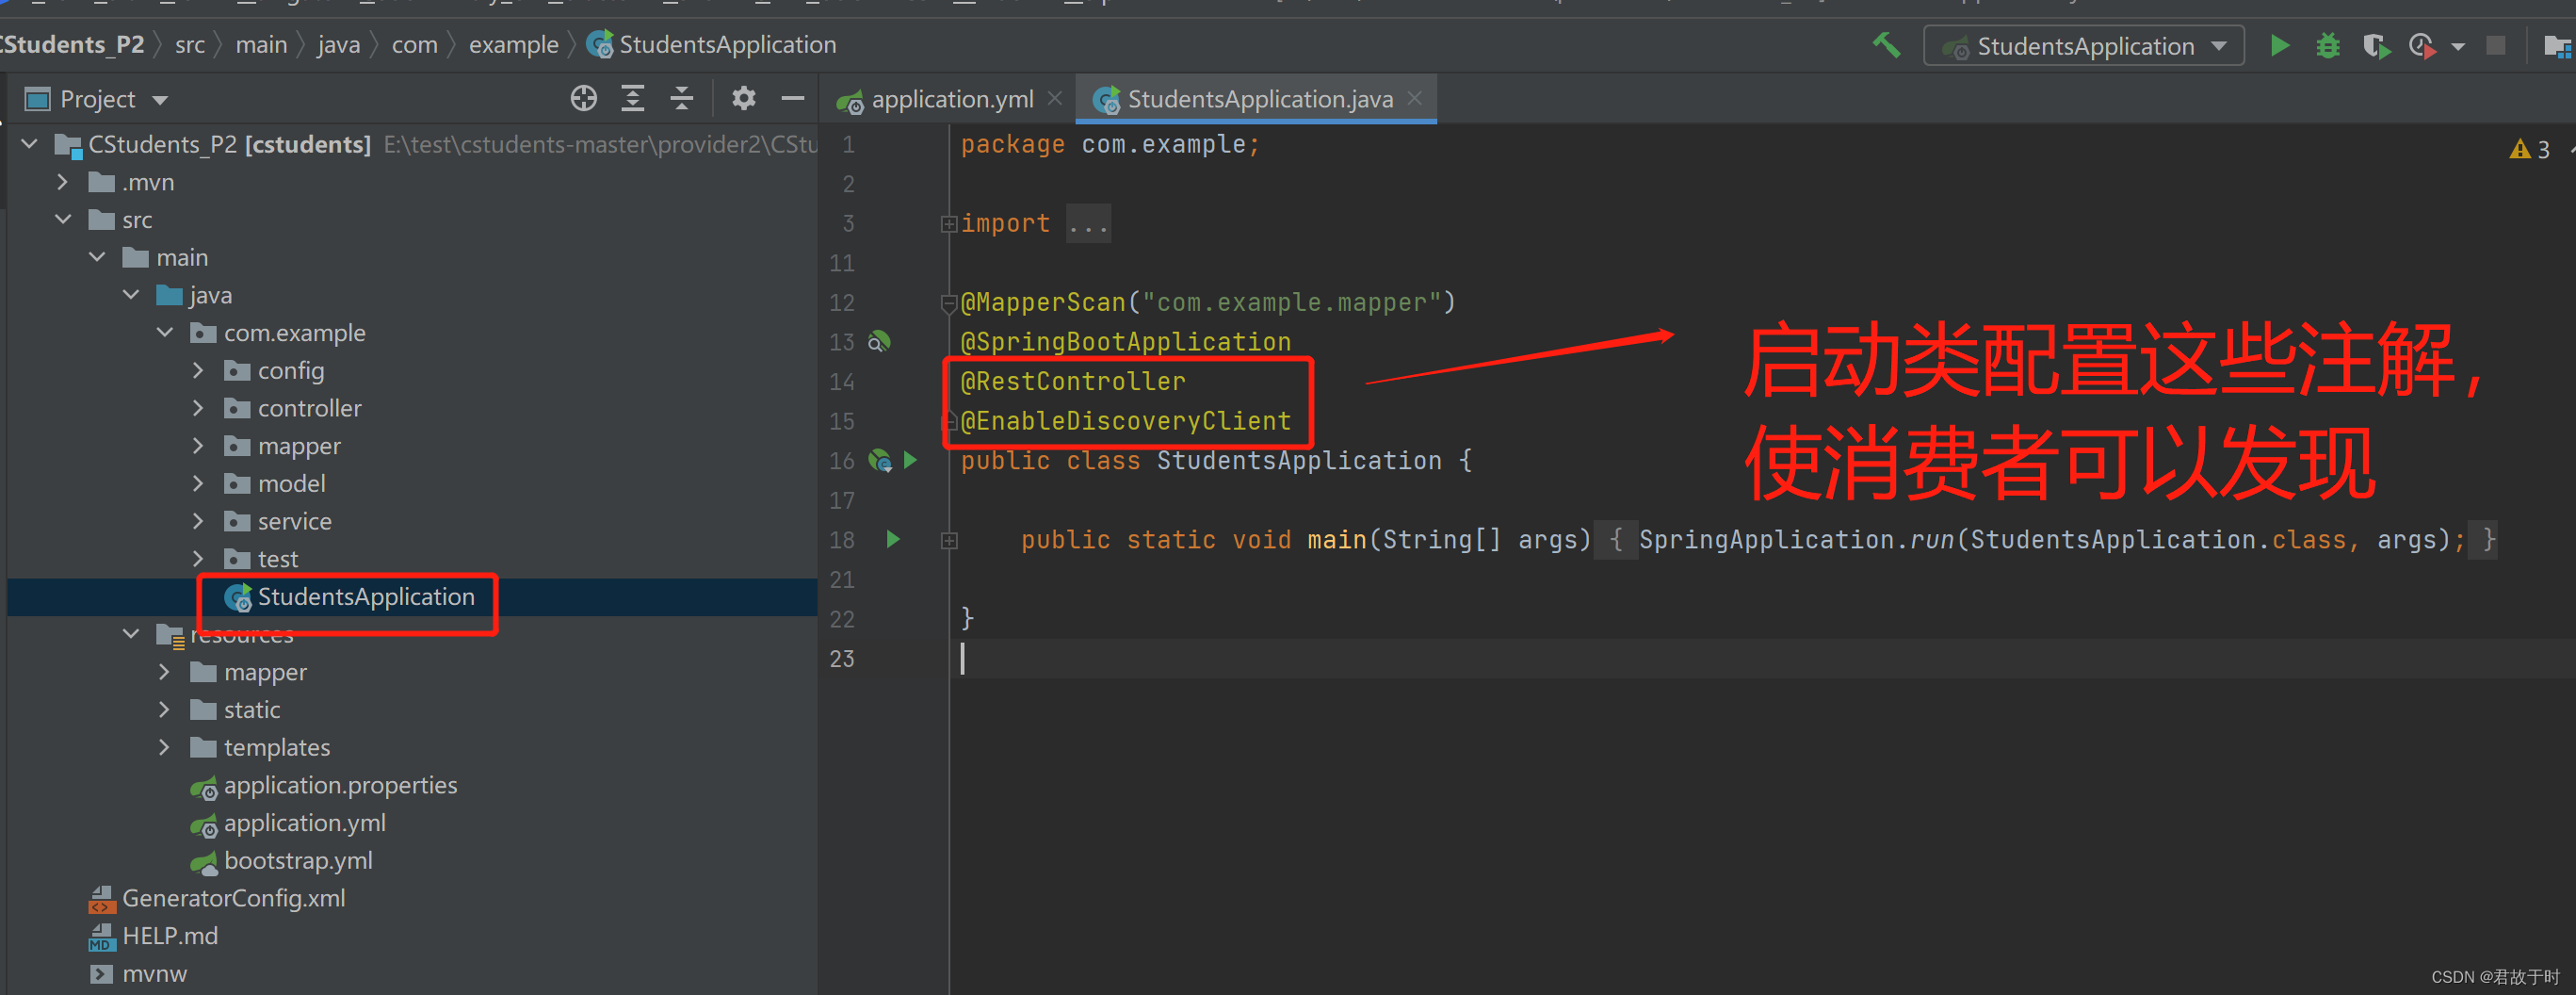
代码:
生产者application.yml:
server:
  port: 8081
spring:
  application:
    name: provider
  cloud:
    nacos:
      discovery:
        server-addr: 127.0.0.1:8848
生产者调用代码:
本代码中设置了三种情况:
消费者调用时传输一个参数,两个参数,一个集合的三种情况:
package com.example.test;
import org.springframework.beans.factory.annotation.Value;
import org.springframework.cloud.context.config.annotation.RefreshScope;
import org.springframework.stereotype.Controller;
import org.springframework.web.bind.annotation.GetMapping;
import org.springframework.web.bind.annotation.RequestParam;
import org.springframework.web.bind.annotation.ResponseBody;
import java.util.Map;
@Controller
@RefreshScope
public class PrivodeController {
    @Value("${server.port}")
    String port;
    //传输一个参数
    @GetMapping("/hi")
    @ResponseBody
    public String hi(@RequestParam(value = "name", defaultValue = "forezp",required = false) String name) {
        System.out.println("666");
        String msg = "I receive msg 【" + name + "】" + ", i'm provider ,my port:" + port;
        System.out.println(msg);
        return msg;
    }
    //传输多个参数
    @GetMapping("/send")
    @ResponseBody
    public String send1(@RequestParam(value = "city", defaultValue = "Shanghai",required = false) String city,
                       @RequestParam(value = "site", defaultValue = "School",required = false) String site) {
        System.out.println("666");
        String msg = "My favorite city is " + city+ " , I want to go to " + site;
        System.out.println(msg);
        return msg;
    }
    //传输Map
    @GetMapping("/send2")
    @ResponseBody
    public String send2(@RequestParam Map data) {
        System.out.println("666");
        String msg = "My name is " + data.get("name")+ " , I am " + data.get("age") + " years old.";
        System.out.println(msg);
        return msg;
    }
}
生产者启动类:
package com.example;
import org.mybatis.spring.annotation.MapperScan;
import org.springframework.boot.SpringApplication;
import org.springframework.boot.autoconfigure.SpringBootApplication;
import org.springframework.cloud.client.discovery.EnableDiscoveryClient;
import org.springframework.web.bind.annotation.RestController;
@MapperScan("com.example.mapper")
@SpringBootApplication
@RestController
@EnableDiscoveryClient
public class StudentsApplication {
    public static void main(String[] args) {
        SpringApplication.run(StudentsApplication.class, args);
    }
}
4.2 消费者
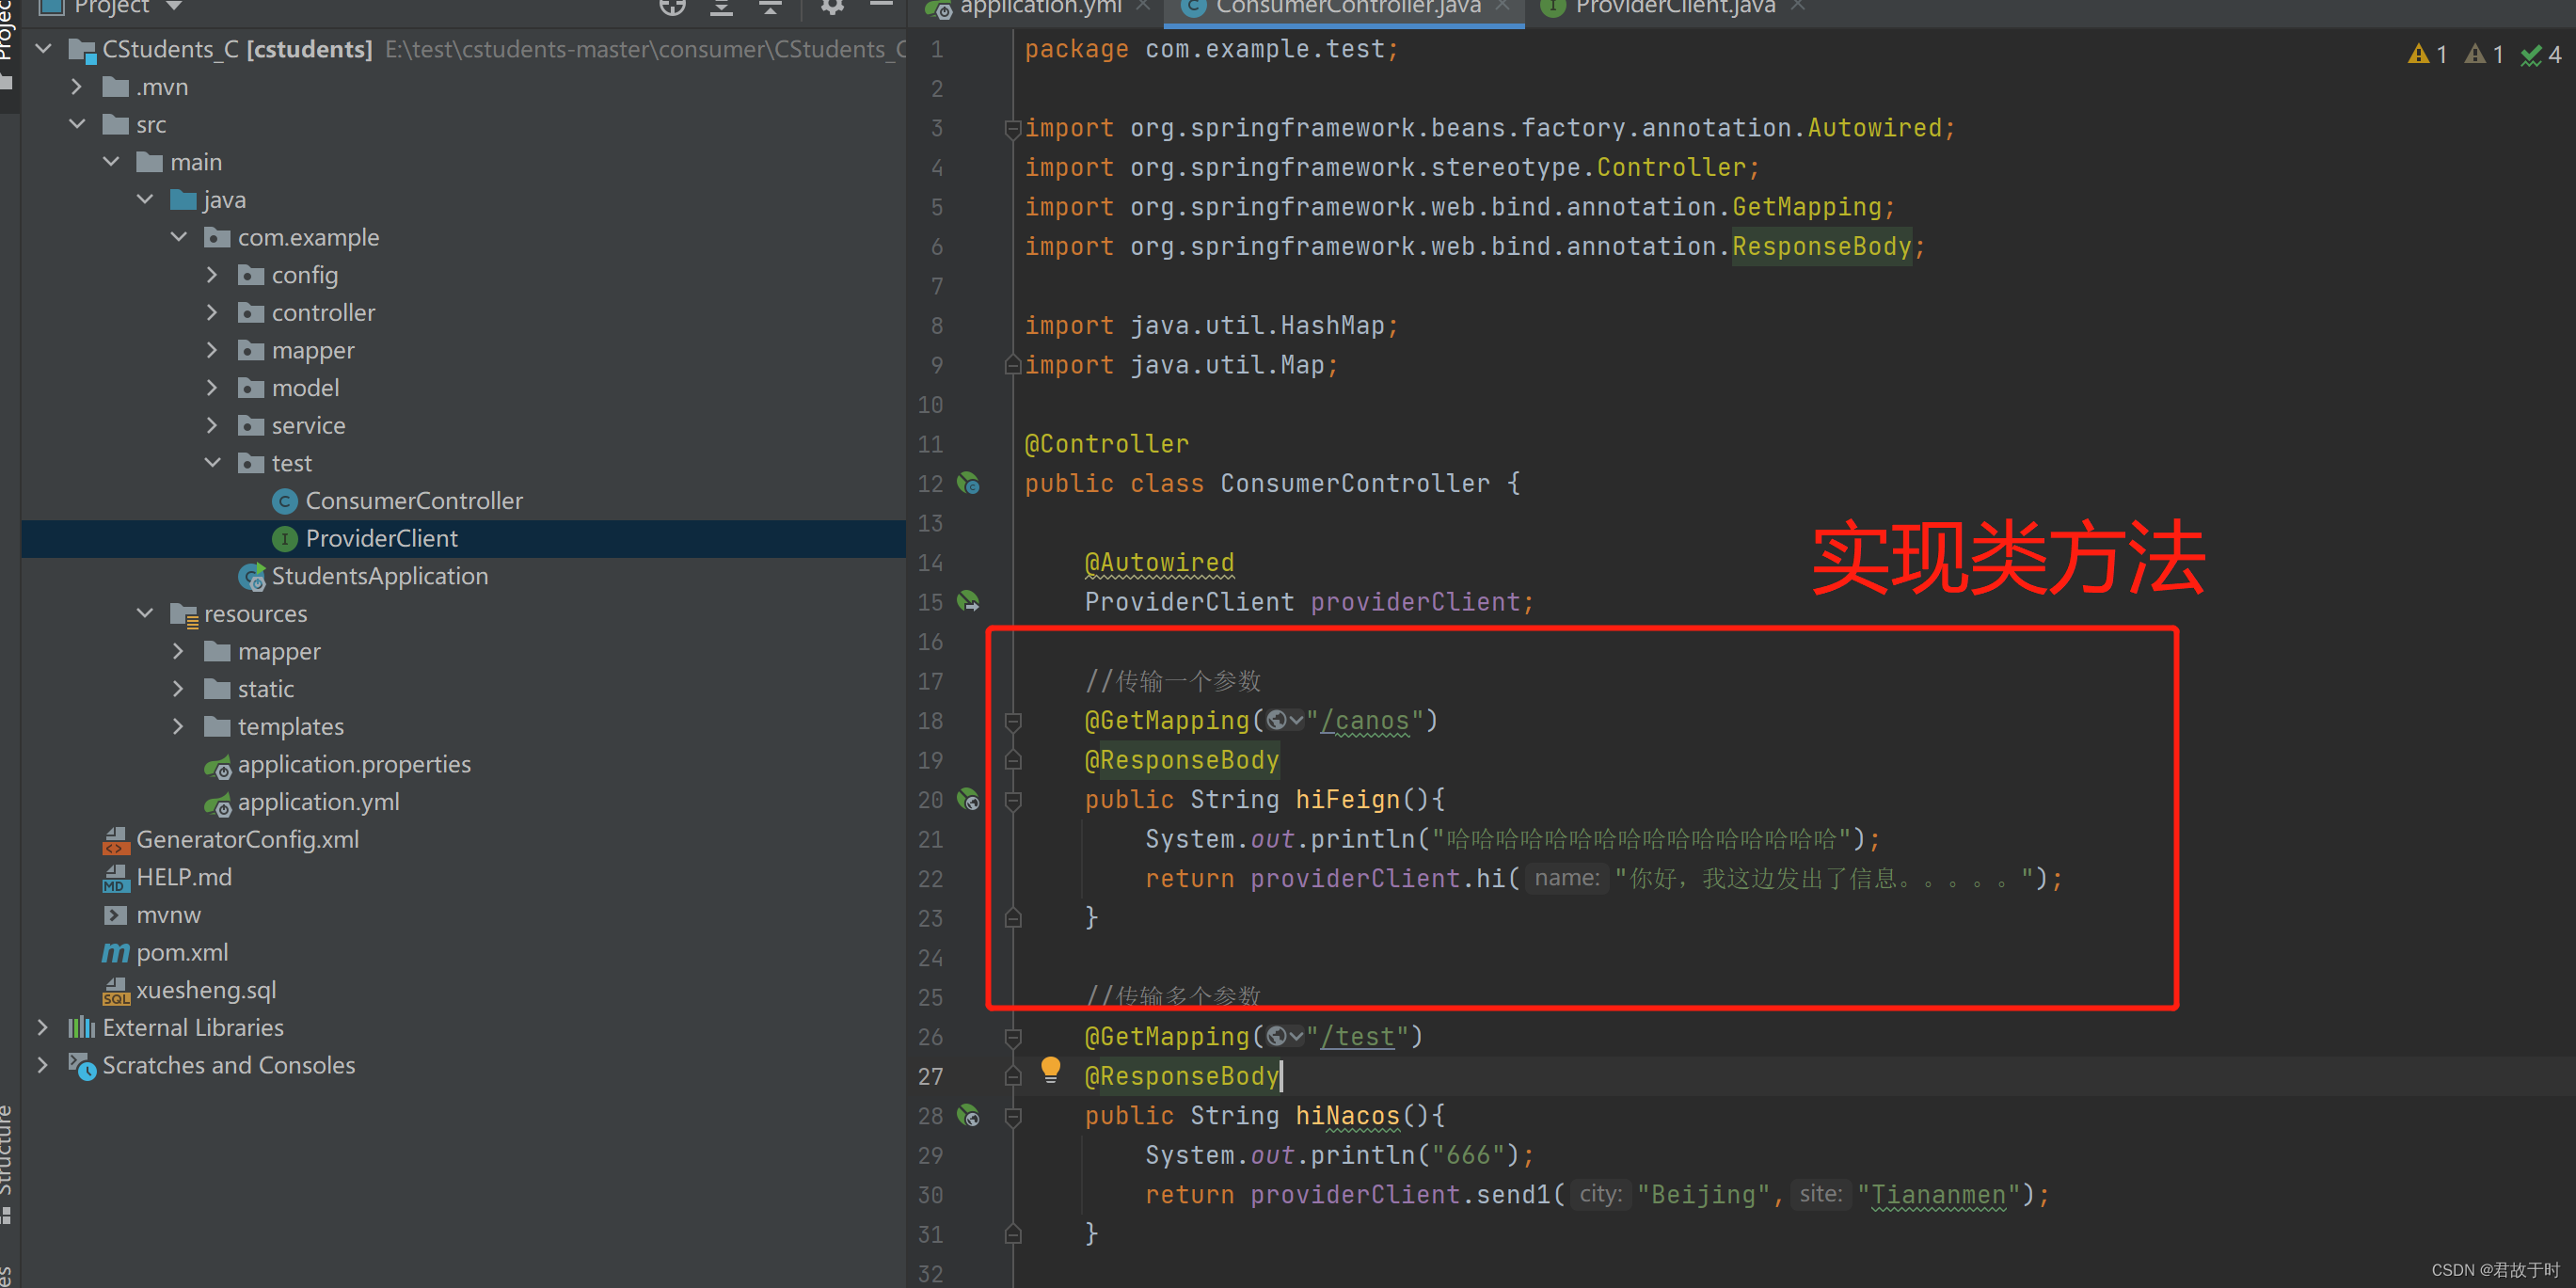
消费者代码解析:
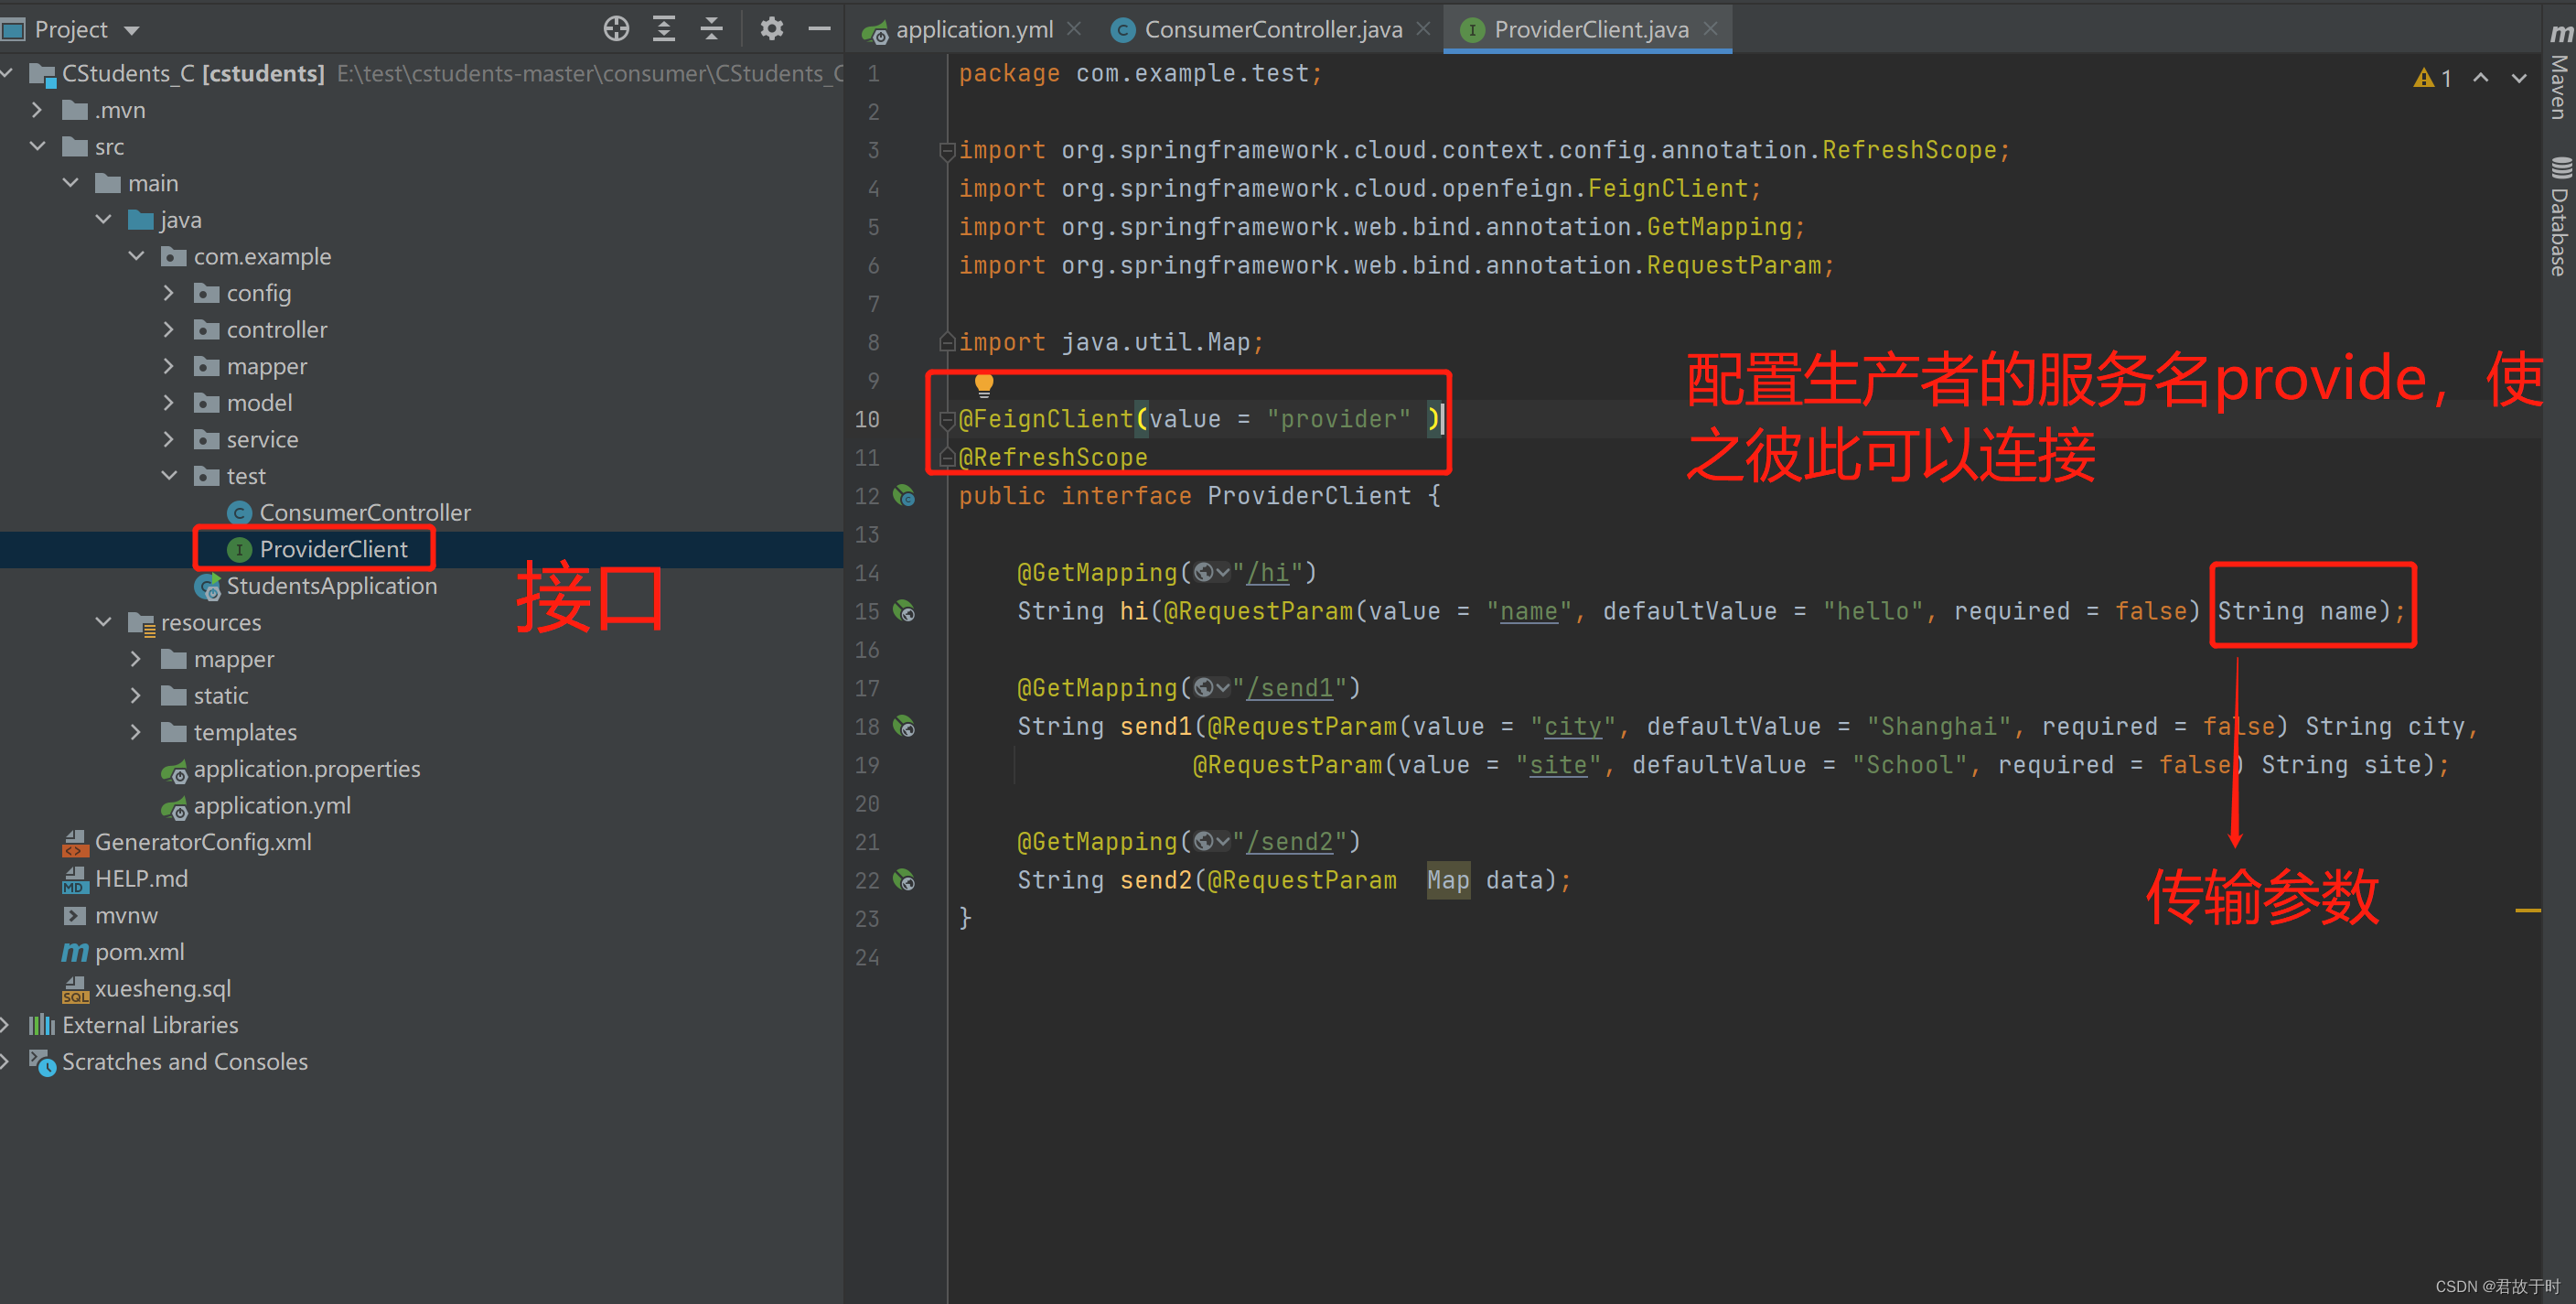
消费者代码:
消费者application.yml
server:
  port: 9080
spring:
  application:
    name: consumer
  cloud:
    nacos:
      discovery:
        server-addr: 127.0.0.1:8848
消费者接口:
package com.example.test;
import org.springframework.cloud.context.config.annotation.RefreshScope;
import org.springframework.cloud.openfeign.FeignClient;
import org.springframework.web.bind.annotation.GetMapping;
import org.springframework.web.bind.annotation.RequestParam;
import java.util.Map;
@FeignClient(value = "provider" )
@RefreshScope
public interface ProviderClient {
    @GetMapping("/hi")
    String hi(@RequestParam(value = "name", defaultValue = "hello", required = false) String name);
    @GetMapping("/send1")
    String send1(@RequestParam(value = "city", defaultValue = "Shanghai", required = false) String city,
                @RequestParam(value = "site", defaultValue = "School", required = false) String site);
    @GetMapping("/send2")
    String send2(@RequestParam  Map data);
}
消费者实现类:
package com.example.test;
import org.springframework.beans.factory.annotation.Autowired;
import org.springframework.stereotype.Controller;
import org.springframework.web.bind.annotation.GetMapping;
import org.springframework.web.bind.annotation.ResponseBody;
import java.util.HashMap;
import java.util.Map;
@Controller
public class ConsumerController {
    @Autowired
    ProviderClient providerClient;
    //传输一个参数
    @GetMapping("/canos")
    @ResponseBody
    public String hiFeign(){
        System.out.println("哈哈哈哈哈哈哈哈哈哈哈哈哈哈哈哈");
        return providerClient.hi("你好,我这边发出了信息。。。。。");
    }
    //传输多个参数
    @GetMapping("/test")
    @ResponseBody
    public String hiNacos(){
        System.out.println("666");
        return providerClient.send1("Beijing","Tiananmen");
    }
    //传输Map
    @GetMapping("/test2")
    @ResponseBody
    public String hiNacos2(){
        System.out.println("777");
        Map data = new HashMap();
        data.put("name","Jack");
        data.put("age","18");
        return providerClient.send2(data);
    }
}
5. 效果展示:
双击启动nacos:
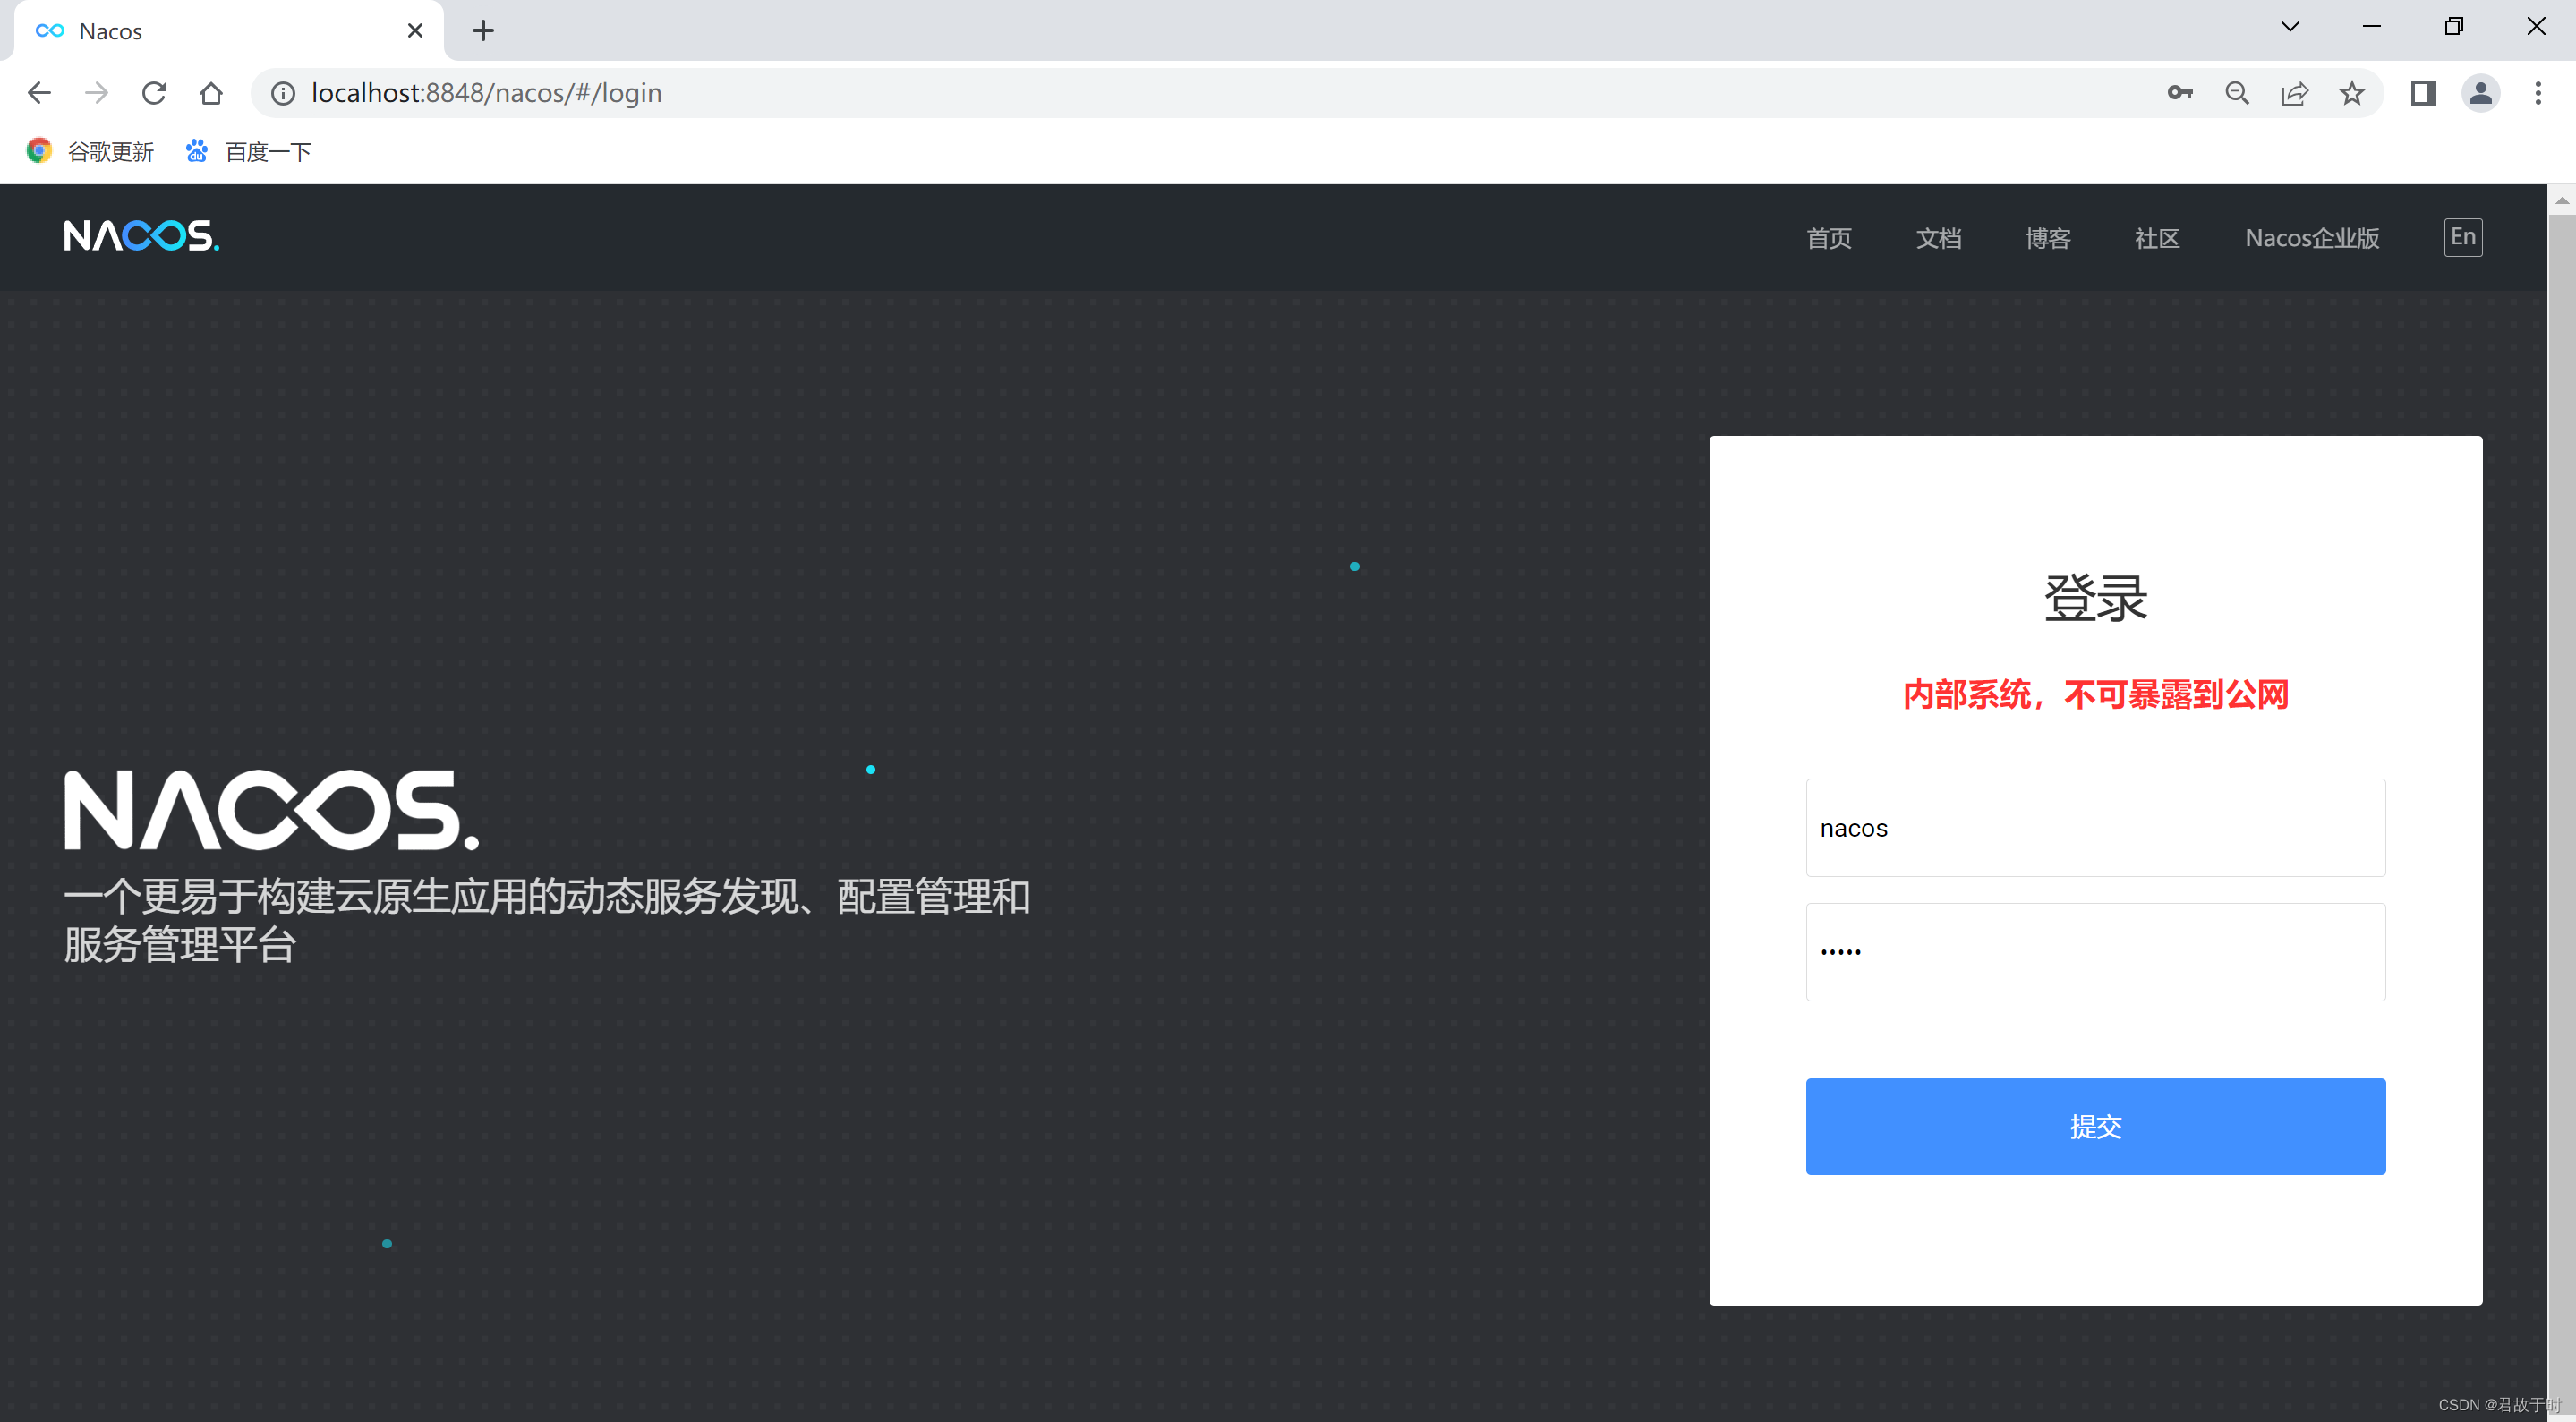
登录nocas:
用户名和密码默认是:nacos
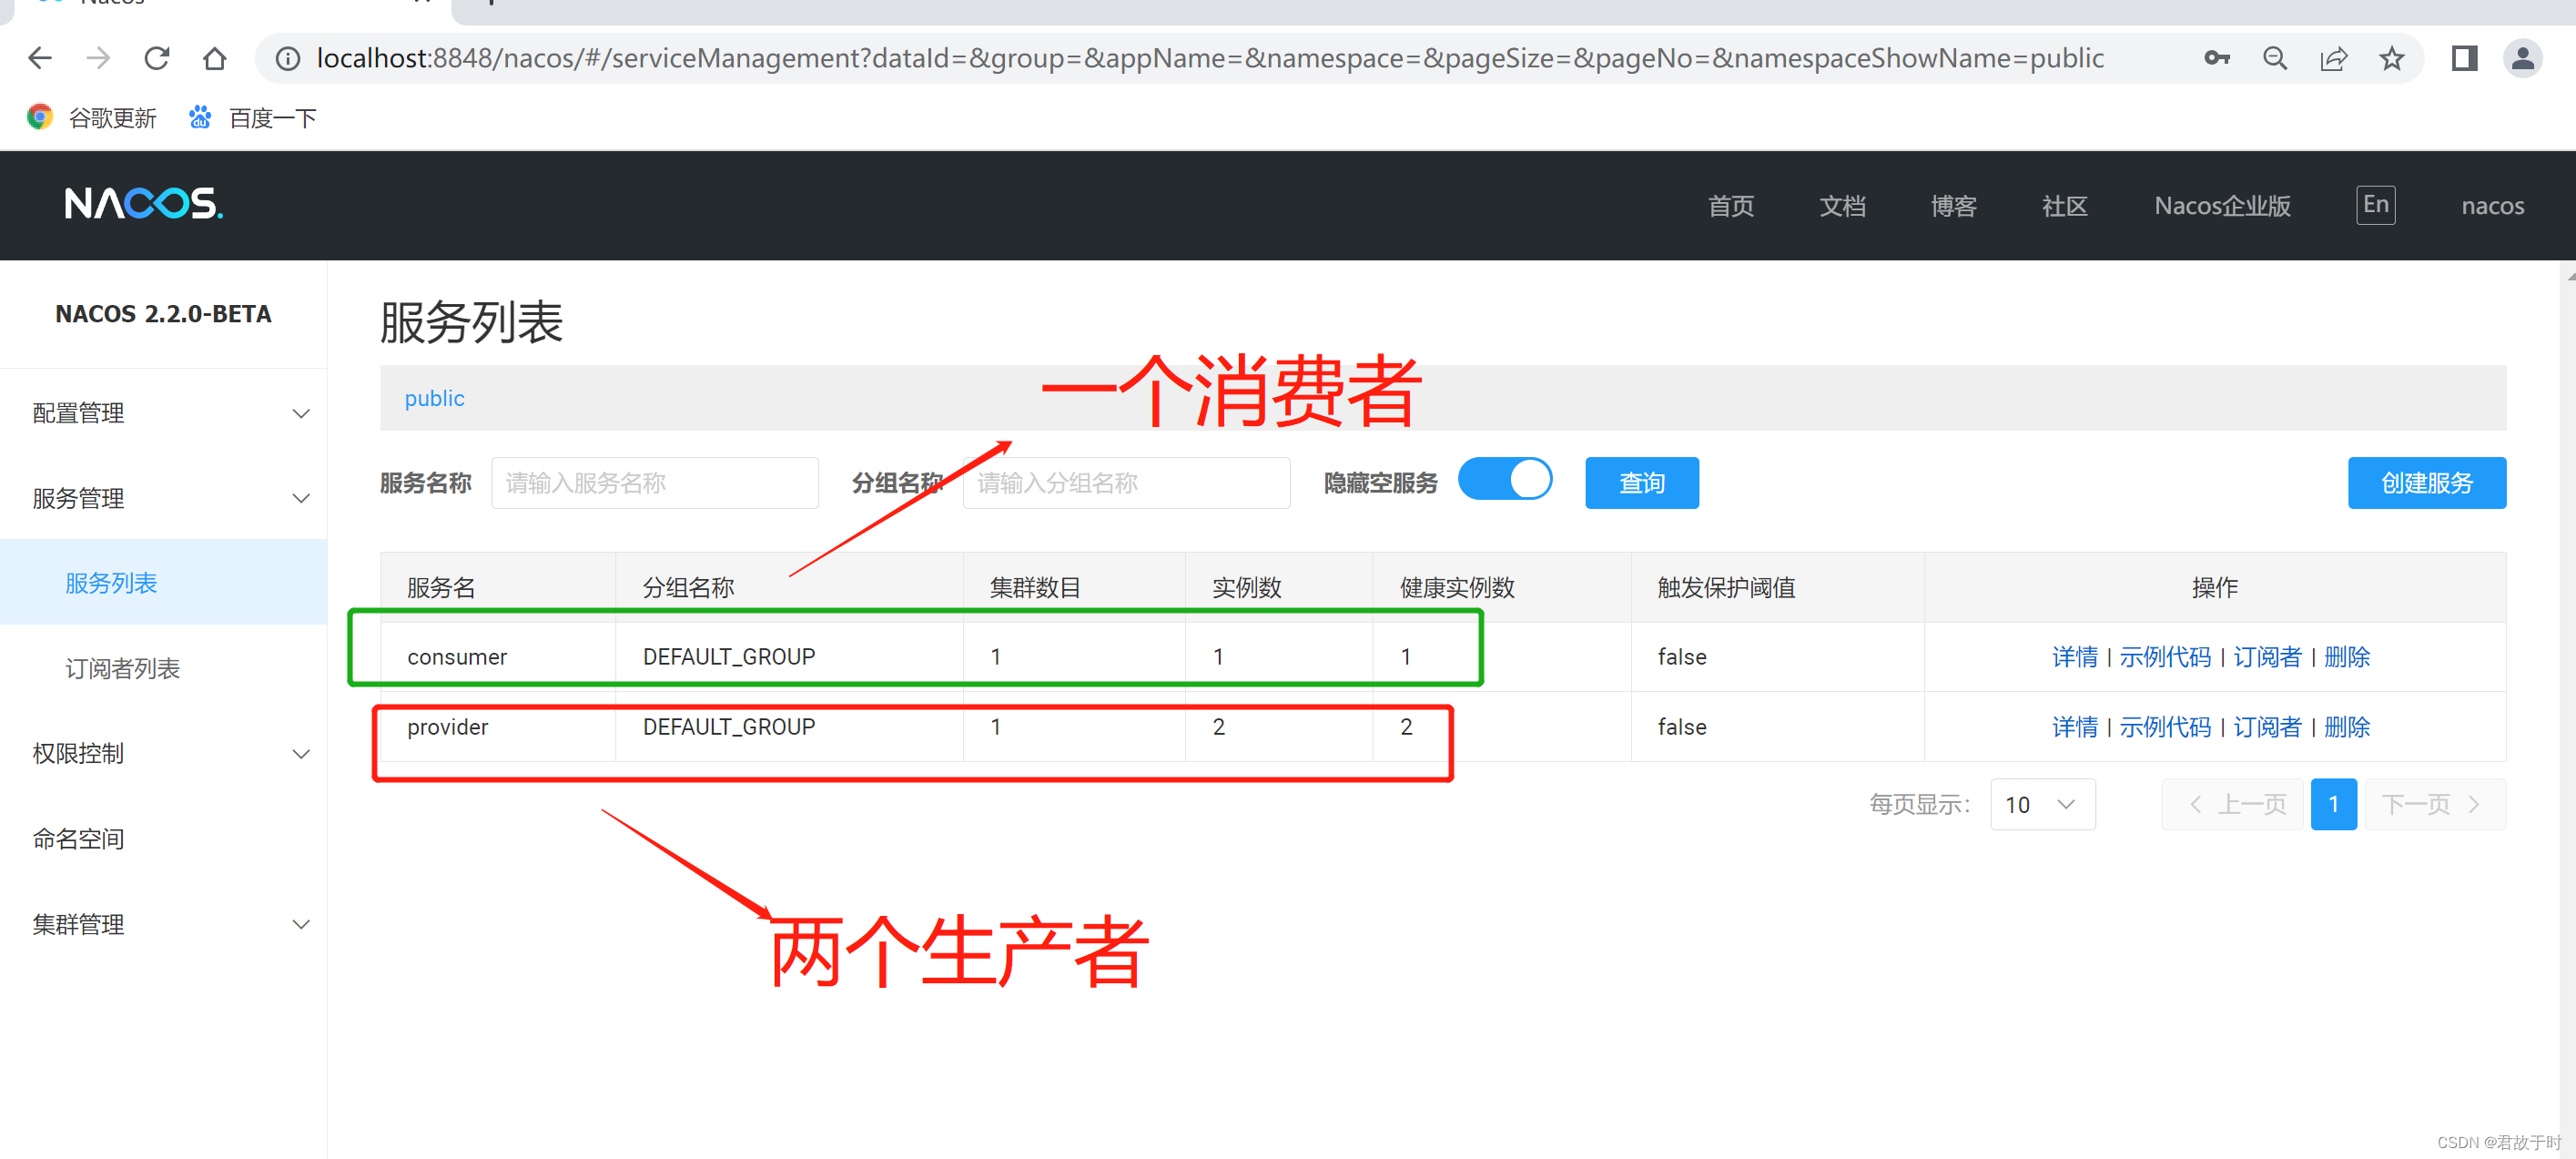
启动一个消费者CStudents_C、两个生产者CStudents_P1、CStudents_P2

观察naocs控制面板:
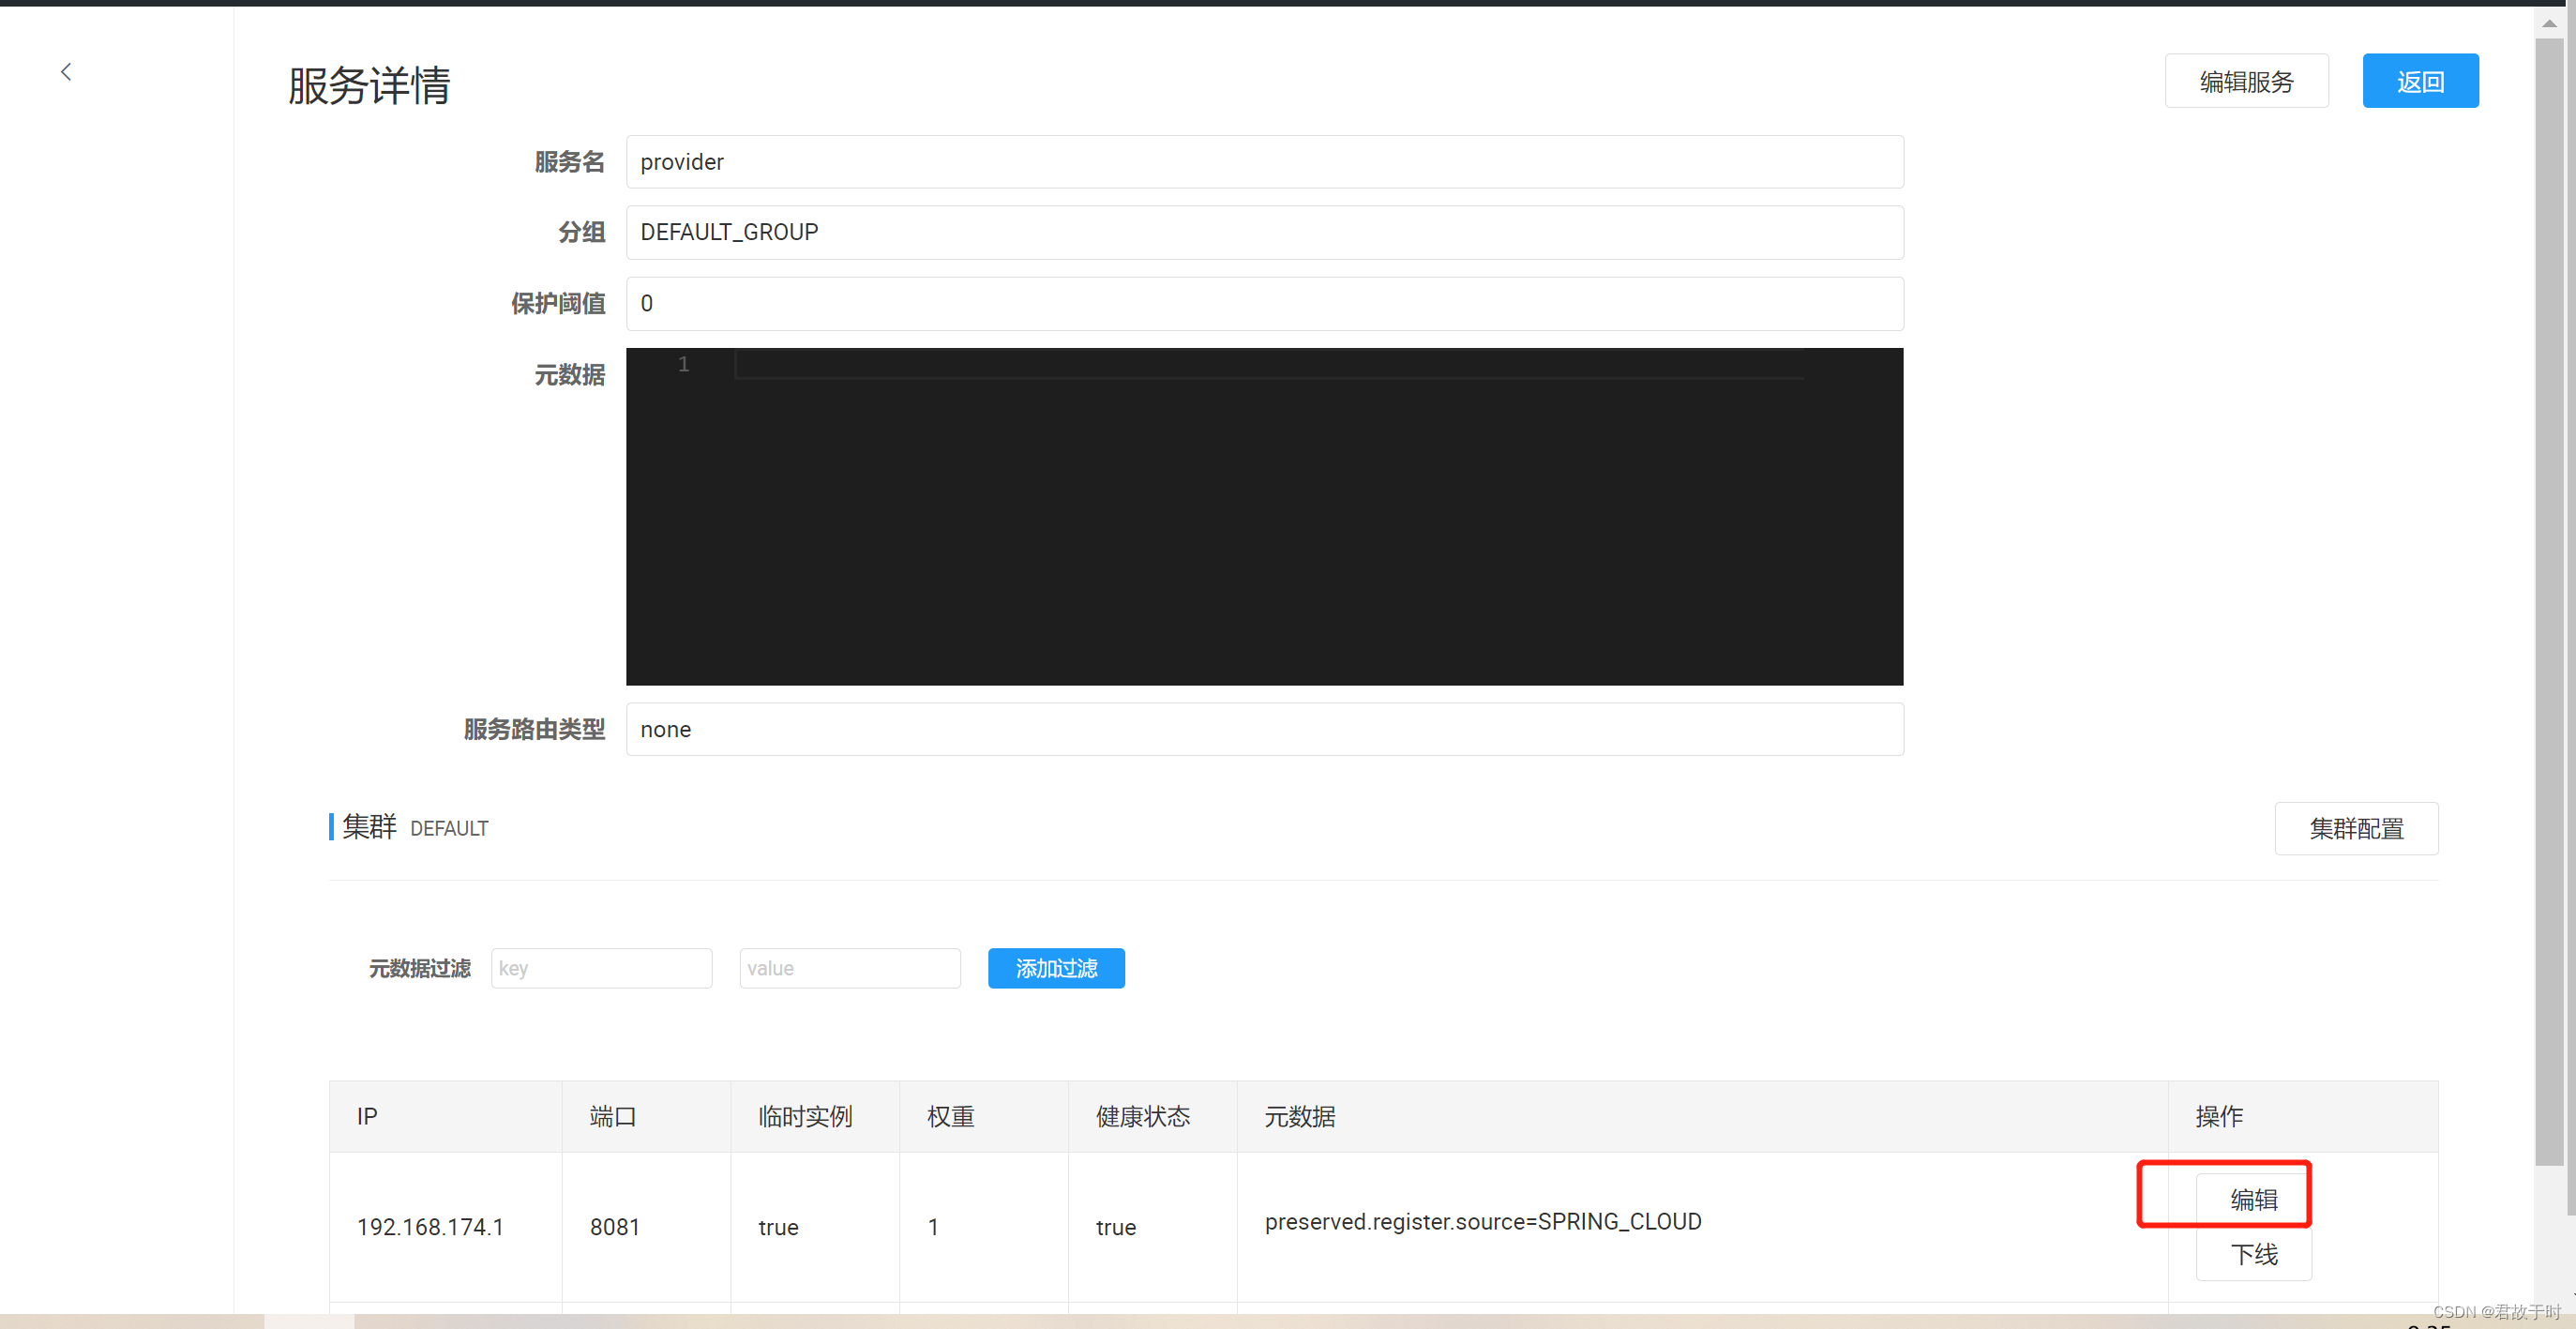
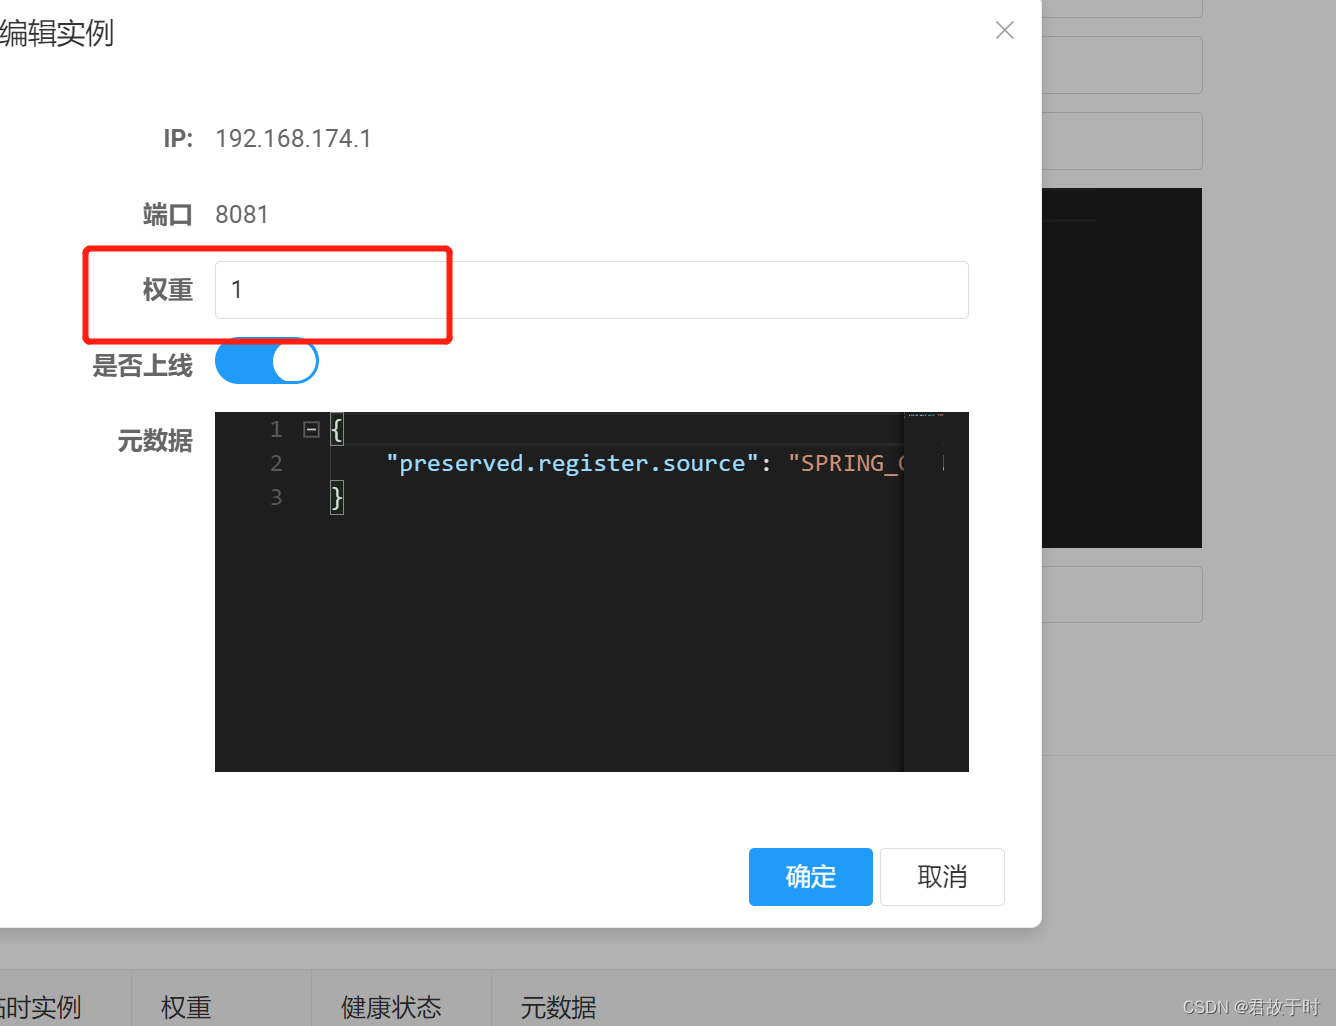
可以对服务进行上线下线或者分配权重:

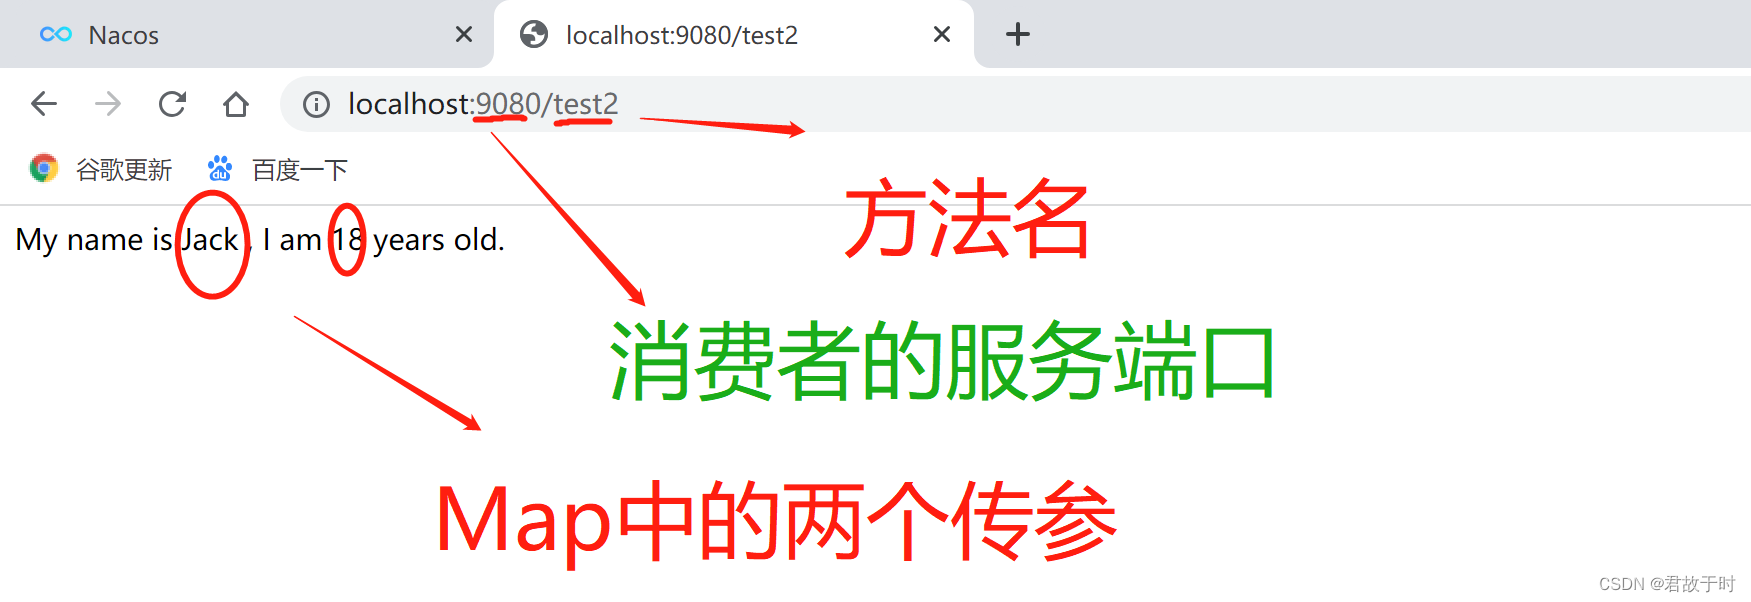
调用效果展示:
