- AI小说推文工具,一键生成AI视频推文助手
- Idea搭建springboot基本框架
- No ‘Access-Control-Allow-Origin‘ he
- 大数据 DataX-Web 详细安装教程
- 如何使用Flask搭建web程序框架并实现无公网IP远程访问本地程序
- OpenAI 推出新网络爬虫GPTBot,为GPT-5做准备
- org.springframework.boot.web.server
- HCIA | WLAN二层旁挂组网实验
- MySQL--表的操作
- vue前端简单实现无缝循环滚动自动播放,滚动条上下滚动,鼠标悬停,从鼠
- 事务及SpringBoot中的事务开启
- Spring Security 之方法级的权限管控 @PreAutho
- MySQL 故障诊断:MySQL 占用 CPU 过高问题定位及优化
- SSL数字证书
- SpringBoot接口入参校验的几种方式
- 关于Node.js作为后端的入门教程
- 【MySQL】MySQL数据库主键自增长删除后ID不连续的问题及其解决
- Rust|60个新手常犯的错误
- Vue实例挂载的过程
- esp8266用arduino连上阿里云(图文操作,100%成功)
- Springboot 整合 Quartz(定时任务框架)
- 019——IIC模块驱动开发(基于EEPROM【AT24C02】和I.
- MYSQL下载及安装完整教程
- 基于微信小程序的网上购物平台小程序的设计与实现 服务器端口php+my
- 「PHP系列」PHP CookieSession详解
- Resolved [org.springframework.http.
- 【mysql】mysql命令使用大全,你想要的都在这里
- 掌握Go语言:Go语言类型转换,解锁高级用法,轻松驾驭复杂数据结构(3
- AI大模型引领金融创新变革与实践【文末送书】
- Spring Boot中多线程的使用
一、创建一个flask项目
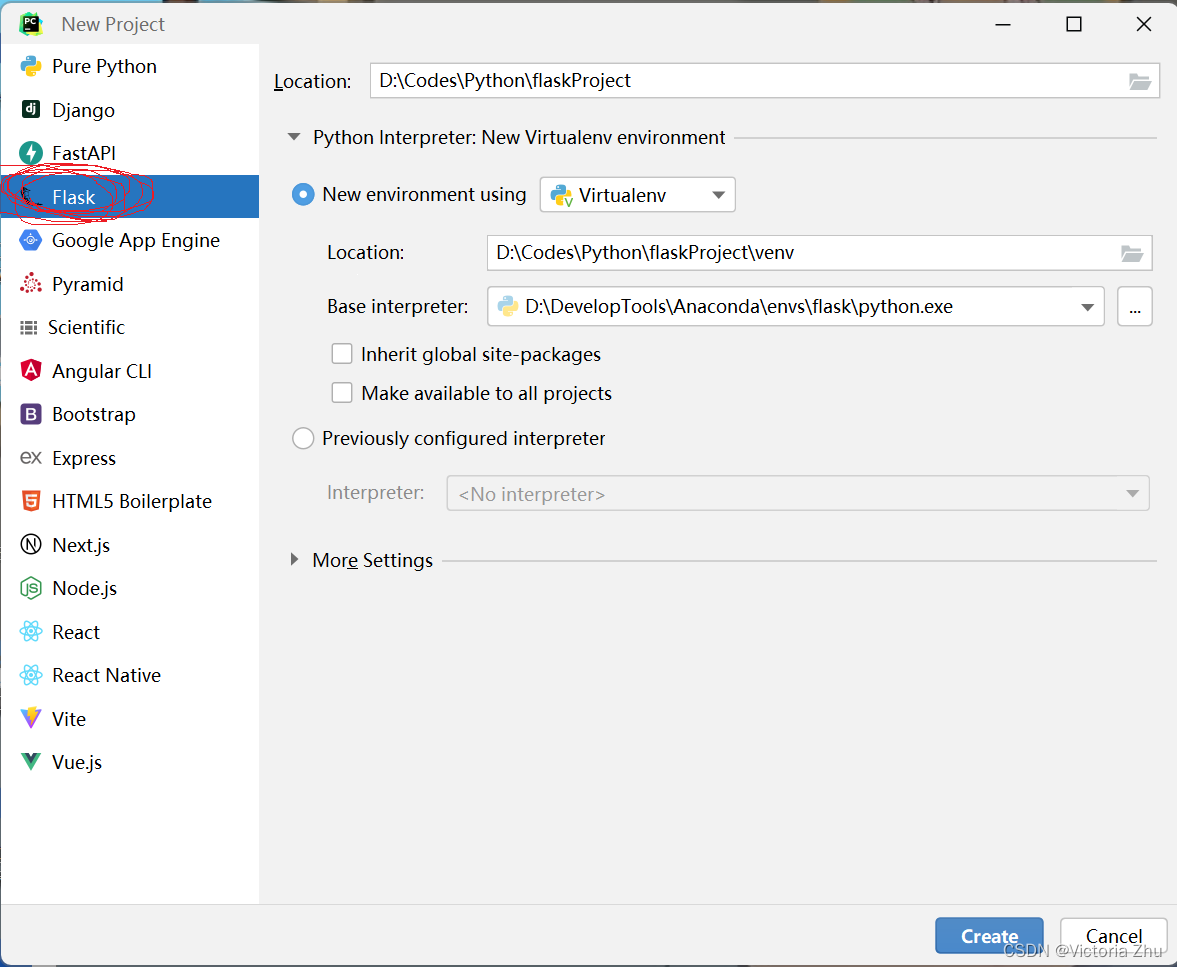
首先,开发工具我们选择jetbrains公司的Pycharm,打开Pycharm,选择new Project,flask,路径根据自己的自身情况改,最好点击create创建成功!
此时,新建好的flask工程目录长这样
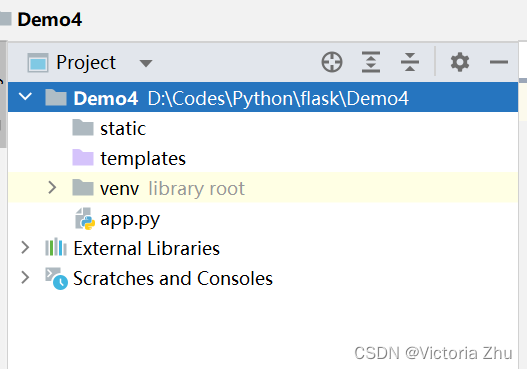
static文件夹下存放一些文件,比如css,js,images等,templates文件夹存放一些html的文件,便于日后flask部署。
app.py文件
from flask import Flask  #导入项目库
app = Flask(__name__)  #实例化flask
@app.route('/')  #flask的路由
def hello_world():  # put application's code here
    return 'Hello World!'
if __name__ == '__main__':   #主函数
    app.run()
其中,app = Flask(__name__)用于实例化flask项目,@app.route('/')是flask的路由,括号中‘/’表示网址使用根目录,app.run()用于启动flask项目。
二、解读yolov5代码
YOLOv5是一种计算机视觉的目标检测算法,全称是"You Only Look Once version 5"。它是由美国加州大学伯克利分校的研究者开发的,相较于之前的YOLO版本,YOLOv5具有更快的检测速度和更高的精度。其优点有
- YOLOv5采用了一个名为CSPNet的新的骨干网络,可以更好地提取特征。
- YOLOv5使用了更高效的训练技术,如自适应训练、数据增强和多尺度训练,从而在实际应用中具有更好的性能表现。
- YOLOv5是一种端到端的深度学习模型,可以直接从原始图像中检测和定位目标。它使用卷积神经网络(CNN)来学习图像中物体的特征,并使用多尺度预测和网格分割来检测和定位目标,因此可以在高速运行的同时保持高精度。
YOLOv5的代码就在GitHub上,这是其地址 ONNX > CoreML > TFLite">GitHub - ultralytics/yolov5: YOLOv5 🚀 in PyTorch > ONNX > CoreML > TFLite
在YOLOv5中,最核心的就是权重文件,当模型训练完成之后,会在run目录下的train文件夹里面的exp文件夹中的weights文件夹生成两个pt文件,best.pt顾名思义就是最好的一次,last.pt就是最后一次
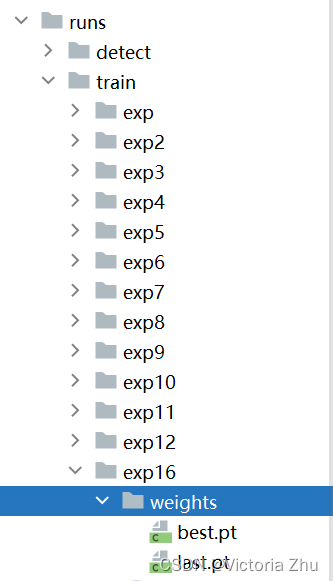
其中训练文件我就不多描述了,主要讲解一下检测文件
def parse_opt():
    """
       weights: 训练的权重路径,可以使用自己训练的权重,也可以使用官网提供的权重
       默认官网的权重yolov5s.pt(yolov5n.pt/yolov5s.pt/yolov5m.pt/yolov5l.pt/yolov5x.pt/区别在于网络的宽度和深度以此增加)
       source: 测试数据,可以是图片/视频路径,也可以是'0'(电脑自带摄像头),也可以是rtsp等视频流, 默认data/images
       data: 配置数据文件路径, 包括image/label/classes等信息, 训练自己的文件, 需要作相应更改, 可以不用管
       如果设置了只显示个别类别即使用了--classes = 0 或二者1, 2, 3等, 则需要设置该文件,数字和类别相对应才能只检测某一个类
       imgsz: 网络输入图片大小, 默认的大小是640
       conf-thres: 置信度阈值, 默认为0.25
       iou-thres:  做nms的iou阈值, 默认为0.45
       max-det: 保留的最大检测框数量, 每张图片中检测目标的个数最多为1000类
       device: 设置设备CPU/CUDA, 可以不用设置
       view-img: 是否展示预测之后的图片/视频, 默认False, --view-img 电脑界面出现图片或者视频检测结果
       save-txt: 是否将预测的框坐标以txt文件形式保存, 默认False, 使用--save-txt 在路径runs/detect/exp*/labels/*.txt下生成每张图片预测的txt文件
       save-conf: 是否将置信度conf也保存到txt中, 默认False
       save-crop: 是否保存裁剪预测框图片, 默认为False, 使用--save-crop 在runs/detect/exp*/crop/剪切类别文件夹/ 路径下会保存每个接下来的目标
       nosave: 不保存图片、视频, 要保存图片,不设置--nosave 在runs/detect/exp*/会出现预测的结果
       classes: 设置只保留某一部分类别, 形如0或者0 2 3, 使用--classes = n, 则在路径runs/detect/exp*/下保存的图片为n所对应的类别, 此时需要设置data
       agnostic-nms: 进行NMS去除不同类别之间的框, 默认False
       augment: TTA测试时增强/多尺度预测
       visualize: 是否可视化网络层输出特征
       update: 如果为True,则对所有模型进行strip_optimizer操作,去除pt文件中的优化器等信息,默认为False
       project:保存测试日志的文件夹路径
       name:保存测试日志文件夹的名字, 所以最终是保存在project/name中
       exist_ok: 是否重新创建日志文件, False时重新创建文件
       line-thickness: 画框的线条粗细
       hide-labels: 可视化时隐藏预测类别
       hide-conf: 可视化时隐藏置信度
       half: 是否使用F16精度推理, 半进度提高检测速度
       dnn: 用OpenCV DNN预测
       """
    parser = argparse.ArgumentParser()
    parser.add_argument('--weights', nargs='+', type=str, default=ROOT / 'weights/best.pt', help='model path(s)')
    # parser.add_argument('--source', type=str, default=ROOT / 'data/images', help='file/dir/URL/glob, 0 for webcam')  #图片检测
    parser.add_argument('--source', type=str, default=ROOT / '0', help='file/dir/URL/glob, 0 for webcam')  #视频检测
    parser.add_argument('--data', type=str, default=ROOT / 'data/Amy.yaml', help='(optional) dataset.yaml path')
    parser.add_argument('--imgsz', '--img', '--img-size', nargs='+', type=int, default=[640], help='inference size h,w')
    parser.add_argument('--conf-thres', type=float, default=0.25, help='confidence threshold')
    # conf-thres  置信度阈值,越低框越多
    parser.add_argument('--iou-thres', type=float, default=0.45, help='NMS IoU threshold')
    parser.add_argument('--max-det', type=int, default=1000, help='maximum detections per image')
    parser.add_argument('--device', default='', help='cuda device, i.e. 0 or 0,1,2,3 or cpu')
    parser.add_argument('--view-img', action='store_true', help='show results')
    parser.add_argument('--save-txt', action='store_true', help='save results to *.txt')
    parser.add_argument('--save-conf', action='store_true', help='save confidences in --save-txt labels')
    parser.add_argument('--save-crop', action='store_true', help='save cropped prediction boxes')
    parser.add_argument('--nosave', action='store_true', help='do not save images/videos')
    parser.add_argument('--classes', nargs='+', type=int, help='filter by class: --classes 0, or --classes 0 2 3')
    parser.add_argument('--agnostic-nms', action='store_true', help='class-agnostic NMS')
    parser.add_argument('--augment', action='store_true', help='augmented inference')
    parser.add_argument('--visualize', action='store_true', help='visualize features')
    parser.add_argument('--update', action='store_true', help='update all models')
    parser.add_argument('--project', default=ROOT / 'runs/detect', help='save results to project/name')
    parser.add_argument('--name', default='exp', help='save results to project/name')
    parser.add_argument('--exist-ok', action='store_true', help='existing project/name ok, do not increment')
    parser.add_argument('--line-thickness', default=3, type=int, help='bounding box thickness (pixels)')
    parser.add_argument('--hide-labels', default=False, action='store_true', help='hide labels')
    parser.add_argument('--hide-conf', default=False, action='store_true', help='hide confidences')
    parser.add_argument('--half', action='store_true', help='use FP16 half-precision inference')
    parser.add_argument('--dnn', action='store_true', help='use OpenCV DNN for ONNX inference')
    opt = parser.parse_args()
    opt.imgsz *= 2 if len(opt.imgsz) == 1 else 1  # expand
    print_args(vars(opt))
    return opt
检测代码中最重要的部分就是pare_opt函数,各种参数的注释我全部写在代码中,大家可以进行参考,其中weights是训练出来的权重best.pt的路径,source就是检测数据的来源,default=ROOT/'0'代表调用本地摄像头,default=ROOT/'data/images'代表是检测的data目录下的images里面的图片
使用flask肯定不能直接调用,需要根据需求来进行调用
class VideoCamera(object):
    def __init__(self):
        # 通过opencv获取实时视频流
        self.img_size = 640
        self.threshold = 0.4
        self.max_frame = 160
        self.video = cap  #视频流
        self.weights = 'weights/best.pt'   #yolov5权重文件
        self.device = 'cuda:0' if torch.cuda.is_available() else 'cpu'
        self.device = select_device(self.device)
        model = attempt_load(self.weights)
        model.to(self.device).eval()
        model.half()
        # torch.save(model, 'test.pt')
        self.m = model
        self.names = model.module.names if hasattr(
            model, 'module') else model.names
        self.colors = [
            (randint(0, 255), randint(0, 255), randint(0, 255)) for _ in self.names
        ]
    def __del__(self):
        if self.video is None:
            # 没有上传视频时,不执行读取帧的操作
            return None
        self.video.release()
    def get_frame(self):
        if self.video is None:
            # 没有上传视频时,不执行读取帧的操作
            return None
        ret, frame = self.video.read()  # 读视频
        if not ret:
            # 视频已经播放完毕,没有更多的帧可供处理
            return None
        im0, img = self.preprocess(frame)  # 转到处理函数
        pred = self.m(img, augment=False)[0]  # 输入到模型
        pred = pred.float()
        pred = non_max_suppression(pred, self.threshold, 0.3)
        pred_boxes = []
        image_info = {}
        count = 0
        for det in pred:
            if det is not None and len(det):
                det[:, :4] = scale_coords(
                    img.shape[2:], det[:, :4], im0.shape).round()
                for *x, conf, cls_id in det:
                    lbl = self.names[int(cls_id)]
                    x1, y1 = int(x[0]), int(x[1])
                    x2, y2 = int(x[2]), int(x[3])
                    pred_boxes.append(
                        (x1, y1, x2, y2, lbl, conf))
                    count += 1
                    key = '{}-{:02}'.format(lbl, count)
                    image_info[key] = ['{}×{}'.format(
                        x2 - x1, y2 - y1), np.round(float(conf), 3)]
        frame = self.plot_bboxes(frame, pred_boxes)
        ret, jpeg = cv2.imencode('.jpg', frame)
        return jpeg.tobytes()
    def preprocess(self, img):
        img0 = img.copy()
        img = letterbox(img, new_shape=self.img_size)[0]
        img = img[:, :, ::-1].transpose(2, 0, 1)
        img = np.ascontiguousarray(img)
        img = torch.from_numpy(img).to(self.device)
        img = img.half()  # 半精度
        img /= 255.0  # 图像归一化
        if img.ndimension() == 3:
            img = img.unsqueeze(0)
        return img0, img
    def plot_bboxes(self, image, bboxes, line_thickness=None):
        tl = line_thickness or round(
            0.002 * (image.shape[0] + image.shape[1]) / 2) + 1  # line/font thickness
        for (x1, y1, x2, y2, cls_id, conf) in bboxes:
            color = self.colors[self.names.index(cls_id)]
            c1, c2 = (x1, y1), (x2, y2)
            cv2.rectangle(image, c1, c2, color,
                          thickness=tl, lineType=cv2.LINE_AA)
            tf = max(tl - 1, 1)  # font thickness
            t_size = cv2.getTextSize(
                cls_id, 0, fontScale=tl / 3, thickness=tf)[0]
            c2 = c1[0] + t_size[0], c1[1] - t_size[1] - 3
            cv2.rectangle(image, c1, c2, color, -1, cv2.LINE_AA)  # filled
            cv2.putText(image, '{}-{:.2f} '.format(cls_id, conf), (c1[0], c1[1] - 2), 0, tl / 3,
                        [225, 255, 255], thickness=tf, lineType=cv2.LINE_AA)
        return image
这里是封装了一个类名为VideoCamera,其中__init__(self)方法用于初始化类的实例,里面设置了一些参数包括图片的大小,权重的路径,视频的地址,是否使用GPU等,__del__(self)方法用于释放资源,如果视频播放完毕,则关闭视频流,get_frame(self)方法获取视频流的帧,对帧进行预处理,使用YOLOv5进行目标检测,处理检测结果,提取预测框的信息,绘制带有预测框的图像并返回其 JPEG 编码,preprocess(self, img) 方法对图像进行预处理,复制原始图像,调整图像尺寸、通道顺序,将图像转换为 PyTorch 张量,并移动到设备上,对图像进行归一化处理,plot_bboxes(self, image, bboxes, line_thickness=None) 方法在图像上绘制检测框,为每个类别进行随机分配颜色。
三、flask后端代码
flask项目录
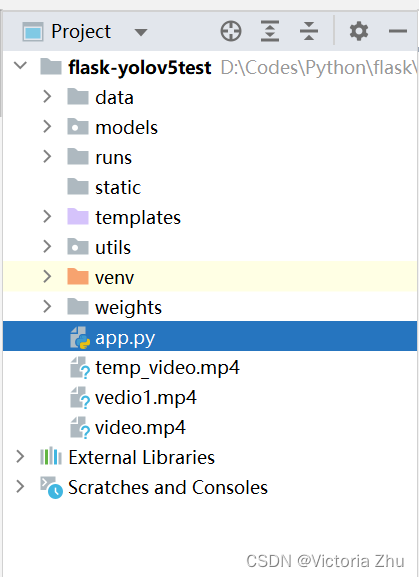
其中data目录,models目录,runs目录,weights目录,utils目录是从yolov5的工程目录中copy过来的,其他的都是flask项目自带的。
首先导入相关库
from flask import *
from flask_cors import CORS
import torch
import numpy as np
from models.experimental import attempt_load
from utils.general import non_max_suppression, scale_coords
from utils.augmentations import letterbox
from utils.torch_utils import select_device
import cv2
from random import randint
然后
@app.route('/')
def index():
    return render_template('index.html')  #template文件夹下的index.html
def gen(camera):
    while True:
        frame = camera.get_frame()
        # 使用generator函数输出视频流, 每次请求输出的content类型是image/jpeg
        if frame is None:
            break
        yield (b'--frame\r\n'
               b'Content-Type: image/jpeg\r\n\r\n' + frame + b'\r\n\r\n')
@app.route('/video_feed')  # 这个地址返回视频流响应
def video_feed():
    return Response(gen(VideoCamera()),
                    mimetype='multipart/x-mixed-replace; boundary=frame')
@app.route('/detect',methods=['POST'])
def vedio_stream():
    global cap
    if request.method == 'POST':
        stream = request.files['videoFile'].stream
        # 将文件流写入临时文件
        temp_video_path = 'temp_video.mp4'
        with open(temp_video_path, 'wb') as temp_video_file:
            temp_video_file.write(stream.read())
        cap = cv2.VideoCapture(temp_video_path)
    else:
        return 'request method error!'
    return redirect('/')
index()函数用于当访问url(‘/’)时,将渲染成index.html的模板,gen() 函数是一个生成器函数,用于不断地获取视频帧并生成对应的MJPEG格式数据。这个函V数作为视频流的生成器,/video_feed 路由返回一个包含视频流响应的 Response 对象。 是一个用于获取视频帧的相机类,该类的 get_frame 方法用于获取视频帧数据。
四、前端代码
我艺术细胞太少,前端很简陋,之所以写出来是因为有几个重点要强调一下
视频检测
视频检测
其中https://blog.csdn.net/m0_74760466/article/details/{{url_for('video_feed')}}对应的就是上面的video_feed函数,因为video_feed函数的路由是video_feed,这样返回的视频以每帧的方式呈现,action中的网址写的就是video_steam函数,使用的是post方法,input标签里面的name="videoFile"就是对应下面
stream = request.files['videoFile'].stream
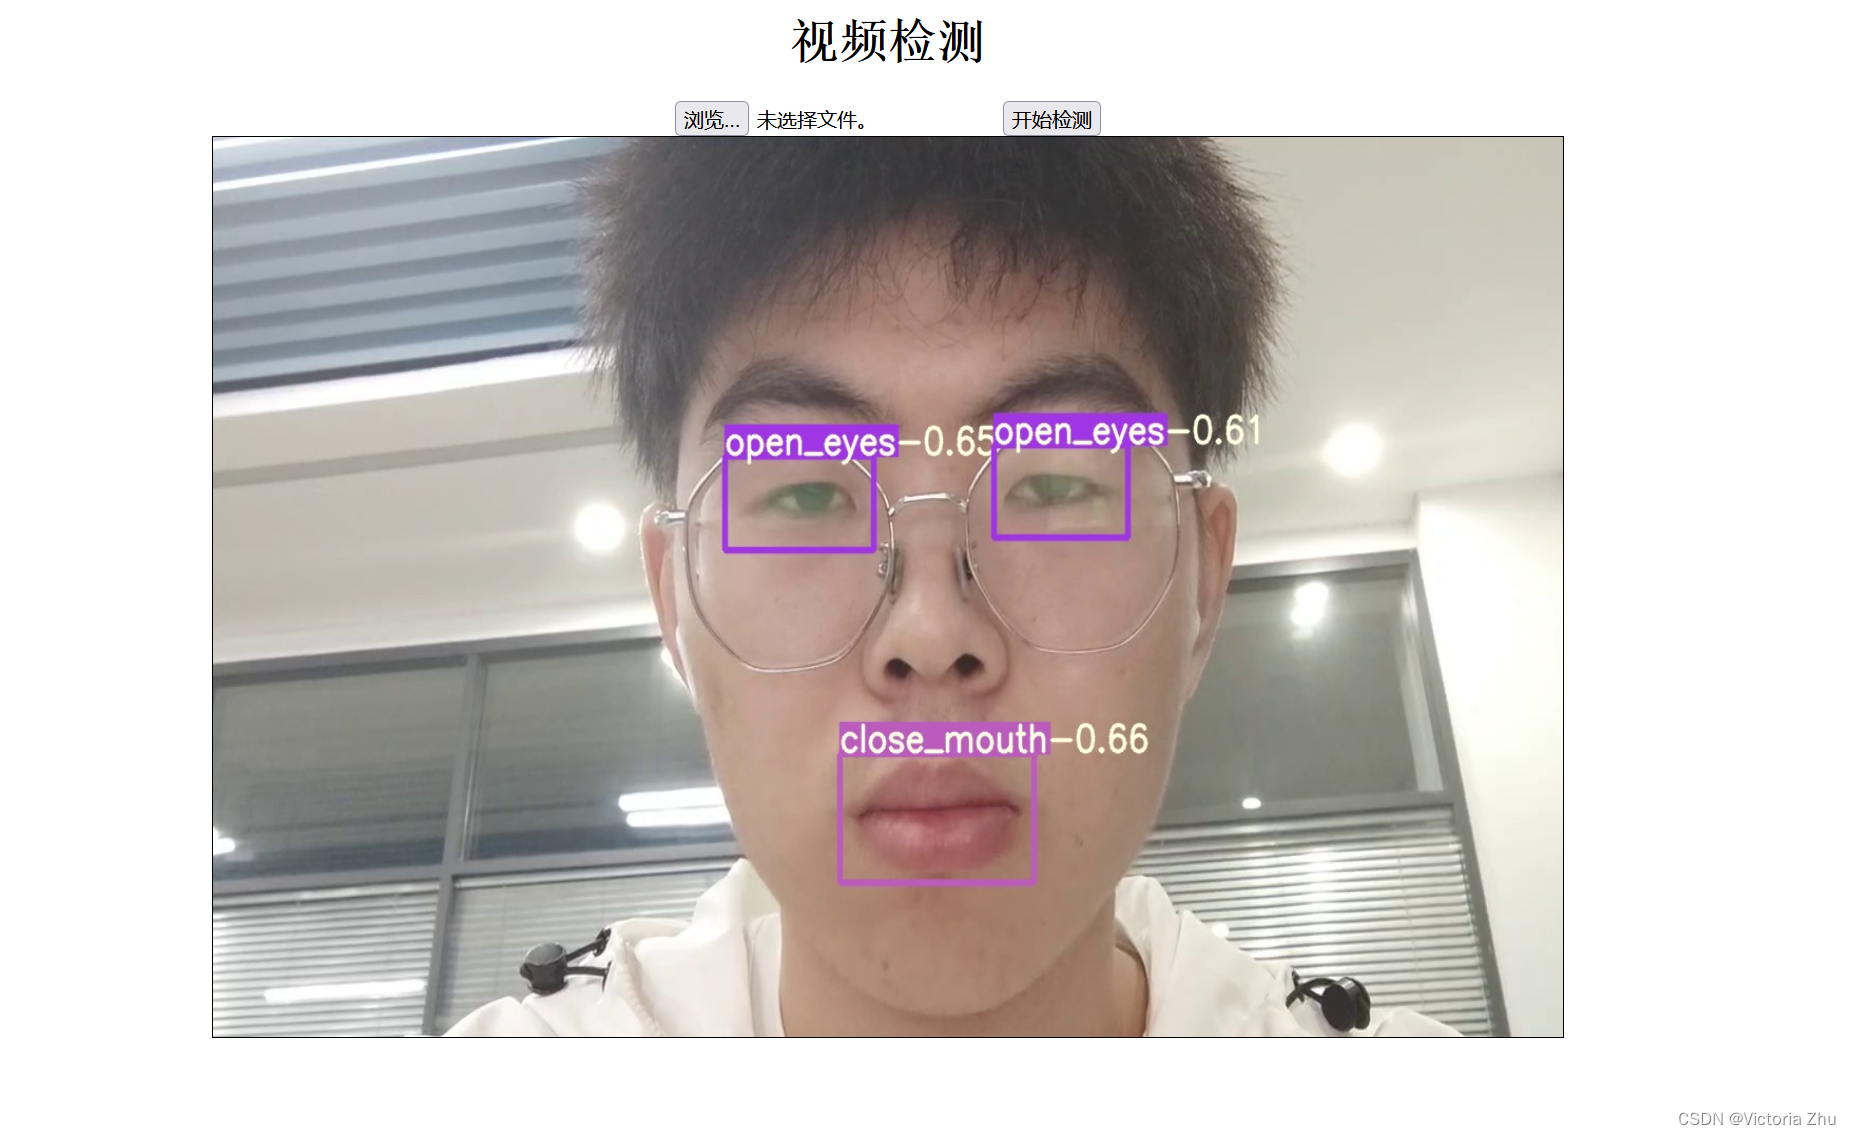
运行结果
最后看一下运行结果
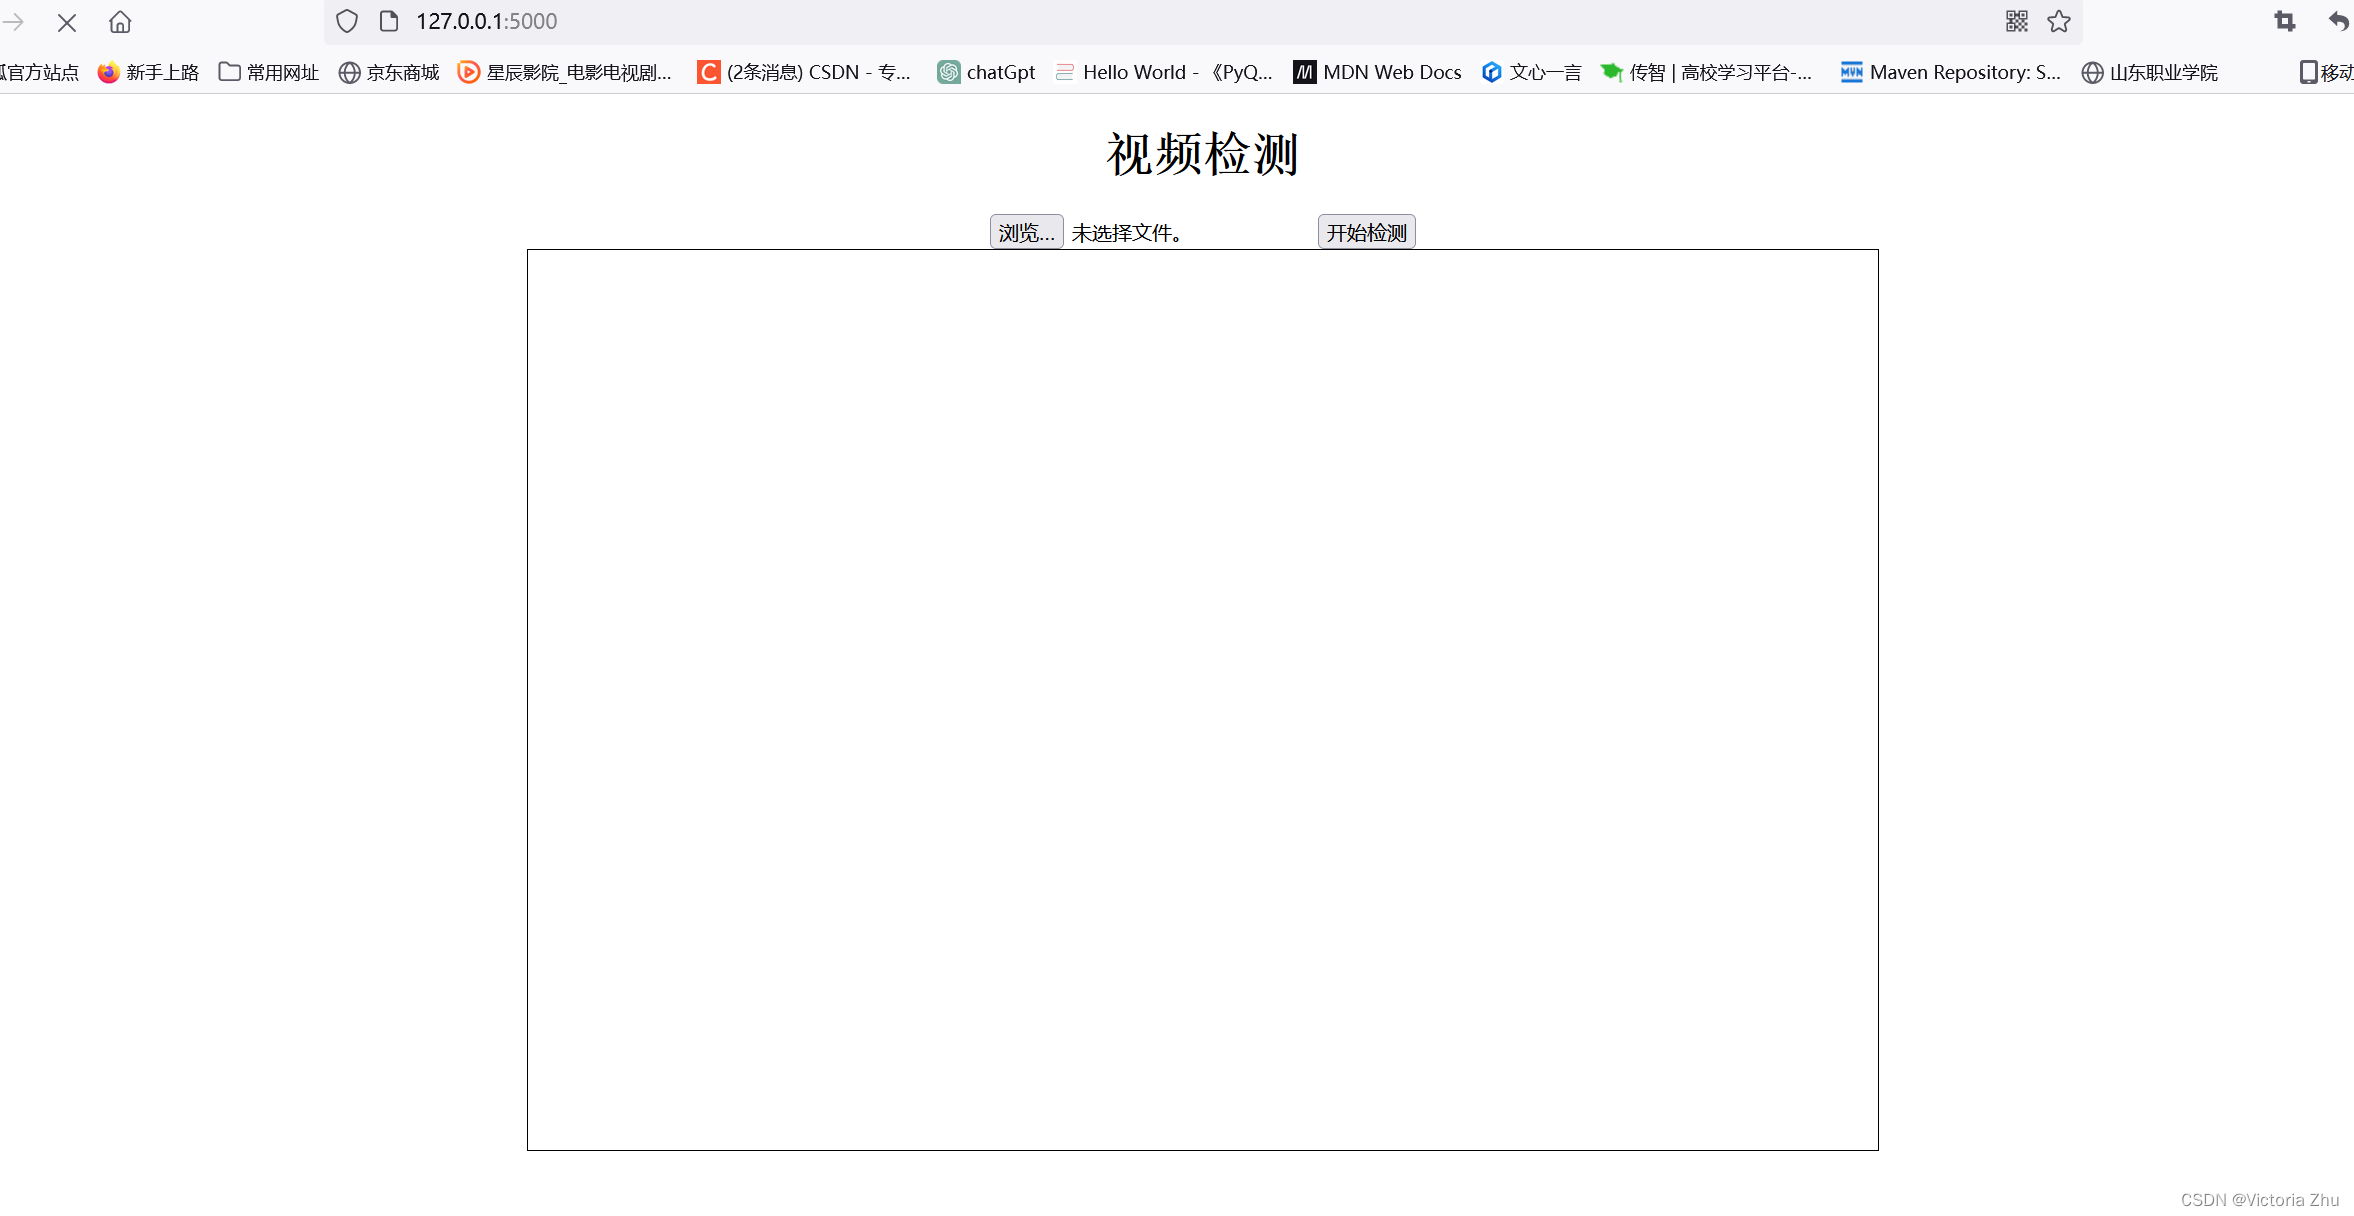
下面是本帅哥的帅哥,哈哈,自恋一下,大家不要把重点放在本帅哥身上哈。
