- Leetcode-二叉树oj题
- Python副业技术总结,手把手教你用宝塔面板部署Django程序
- 说一下Spring Security中@PermitAll和@PreA
- 「SpringBrick快速入门指南」:一款基于Spring Boot
- Spring Cloud Nacos集成Seata2.0 AT模式
- SpringBoot3整合Redis&基础操作
- Spring Boot 经典面试题(五)
- Anaconda安装配置以及与vscode配合使用
- 速学数据结构 | 用队列实现栈你都被难住了?那是你没掌握好技巧
- 淘宝电商用户行为数据分析及可视化-基于MySQLTableau
- 【爬虫实战】使用Python获取花粉俱乐部中Mate60系列的用户发帖
- 无人新零售引领的创新浪潮
- 「PHP系列」PHP 命名空间详解
- setTimeout、setInterval、requestAnima
- 标记垃圾,有三种色彩:四千长文带你深入了解三色标记算法
- 云计算基础、Issa、Pssa、Saas区别
- SpringBoot项目整合MybatisPlus并使用SQLite作
- Golang入门基础
- 【MySQL】学习和总结使用列子查询查询员工工资信息
- Mysql中 order by 多个字段排序
- 【linux】软件工具安装 + vim 和 gcc 使用(上)
- Springboot图书馆座位预约管理系统设计与实现 计算机专业毕业设
- 【基于Ubuntu下Yolov5的目标识别】保姆级教程 | 虚拟机安装
- 【JavaEE】Spring Web-MVC
- MySQL 数据库迁移到 Oracle
- lua学习笔记21完结篇(lua中的垃圾回收)
- Windows 安装 Apache 和 PHP的详细步骤
- 全球首位AI程序员诞生,将会对程序员的影响有多大?
- 机器学习是什么
- plsql developer 一键格式化sql美化sql
Spring Cloud Nacos集成Seata2.0 AT模式
以CentOS 7为例,介绍Spring Cloud Nacos集成Seata2.0 AT模式的流程。分成两个步骤:1.安装配置seata-server、2.项目集成seata-client
一、下载seata-server安装包
根据自己的操作系统选择要下载的安装包格式:下载地址

二、解压安装
将安装包放到指定目录(以/usr/soft/seata为例)
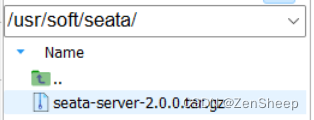
解压,重命名
tar -zxvf seata-server-2.0.0.tar.gz
mv seata seata-server-2.0.0
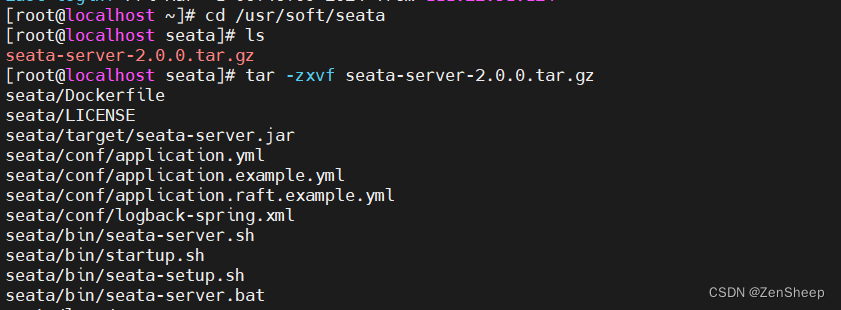
创建生成环境和开发环境目录:
mkdir dev
mkdir prod

将解压后的seata-server-2.0.0拷贝到dev目录下,进入dev目录下:
cp seata-server-2.0.0 -a dev/
cd dev

三、修改seata配置
修改conf目录下的application.yml:
server:
  port: 7091
spring:
  application:
    name: seata-server
logging:
  config: classpath:logback-spring.xml
  file:
    path: ${log.home:${user.home}/logs/seata}
  extend:
    logstash-appender:
      destination: 127.0.0.1:4560
    kafka-appender:
      bootstrap-servers: 127.0.0.1:9092
      topic: logback_to_logstash
console:
  user:
    username: seata
    password: seata

# 这里是主要的配置文件
seata:
  config:
    # support: nacos, consul, apollo, zk, etcd3
    type: nacos
    nacos:
      server-addr: 127.0.0.1:8848
      username: nacos
      password: nacos
      # 如果在nacos上添加了命名空间,则配置命名空间ID
      namespace: fba13bcb-xxxxx-c9a0e # dev
      # 配置分组
      group: SEATA_GROUP
      context-path:
      ##if use MSE Nacos with auth, mutex with username/password attribute
      #access-key:
      #secret-key:
      data-id: seataServer.properties
  registry:
    # support: nacos 、 eureka 、 redis 、 zk  、 consul 、 etcd3 、 sofa
    type: nacos
    preferred-networks: 30.240.*
    nacos:
      application: seata-server
      server-addr: 127.0.0.1:8848
      username: nacos
      password: nacos
      namespace: fba13bcb-xxxx-c9a0e # dev
      group: DEFAULT_GROUP
      cluster: default
      context-path:
      ##if use MSE Nacos with auth, mutex with username/password attribute
      #access-key:
      #secret-key:
  server:
    service-port: 8091 #If not configured, the default is '${server.port} + 1000'
    max-commit-retry-timeout: -1
    max-rollback-retry-timeout: -1
    rollback-retry-timeout-unlock-enable: false
    enable-check-auth: true
    enable-parallel-request-handle: true
    enable-parallel-handle-branch: false
    retry-dead-threshold: 130000
    xaer-nota-retry-timeout: 60000
    enableParallelRequestHandle: true
    recovery:
      committing-retry-period: 1000
      async-committing-retry-period: 1000
      rollbacking-retry-period: 1000
      timeout-retry-period: 1000
    undo:
      log-save-days: 7
      log-delete-period: 86400000
    session:
      branch-async-queue-size: 5000 #branch async remove queue size
      enable-branch-async-remove: false #enable to asynchronous remove branchSession
  store:
    # support: file 、 db 、 redis 、 raft
    mode: db
    session:
      mode: db
    lock:
      mode: db
    db:
      datasource: druid
      db-type: mysql
      driver-class-name: com.mysql.cj.jdbc.Driver
      url: jdbc:mysql://127.0.0.1:3306/mingink-seata?rewriteBatchedStatements=true&&useSSL=false
      user: root
      password: root
      min-conn: 10
      max-conn: 100
      global-table: global_table
      branch-table: branch_table
      lock-table: lock_table
      distributed-lock-table: distributed_lock
      query-limit: 1000
      max-wait: 5000
  metrics:
    enabled: false
    registry-type: compact
    exporter-list: prometheus
    exporter-prometheus-port: 9898
  transport:
    rpc-tc-request-timeout: 15000
    enable-tc-server-batch-send-response: false
    shutdown:
      wait: 3
    thread-factory:
      boss-thread-prefix: NettyBoss
      worker-thread-prefix: NettyServerNIOWorker
      boss-thread-size: 1
  security:
    secretKey: SeataSecretKey0c382ef121d778043159209298fd40bf3850a017
    tokenValidityInMilliseconds: 1800000
    ignore:
      urls: /,/**/*.css,/**/*.js,/**/*.html,/**/*.map,/**/*.svg,/**/*.png,/**/*.jpeg,/**/*.ico,/api/v1/auth/login,/metadata/v1/**
为了让tc服务的集群可以共享配置,我们选择了nacos作为统一配置中心。因此服务端配置文件seataServer.properties文件需要在nacos中配好。在nacos的dev环境中创建seataServer的配置文件:
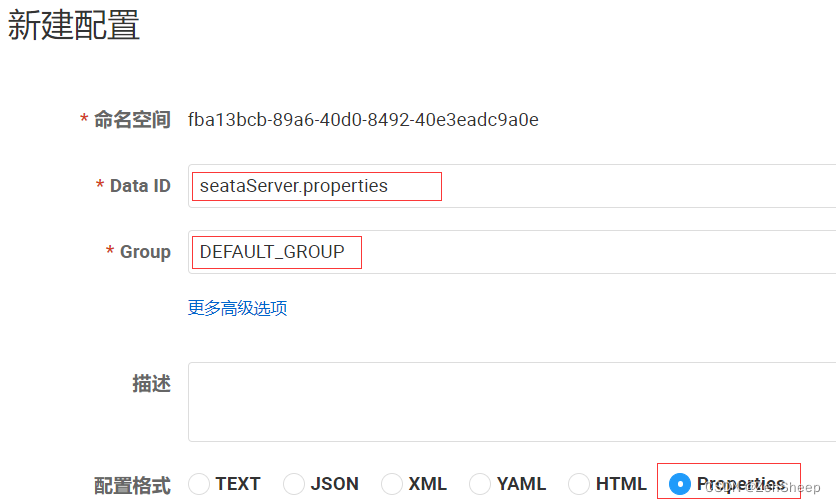
配置内容如下:
# 数据存储方式,db代表数据库
store.mode=db
store.db.datasource=druid
store.db.dbType=mysql
store.db.driverClassName=com.mysql.cj.jdbc.Driver
store.db.url=jdbc:mysql://127.0.0.1:3306/mingink-seata?useUnicode=true&rewriteBatchedStatements=true&serverTimezone=GMT%2B8
store.db.user=root
store.db.password=root
store.db.minConn=5
store.db.maxConn=30
store.db.globalTable=global_table
store.db.branchTable=branch_table
store.db.distributedLockTable=distributed_lock
store.db.queryLimit=100
store.db.lockTable=lock_table
store.db.distributedLockTable=distributed_lock
store.db.maxWait=5000
# 事务、日志等配置
server.recovery.committingRetryPeriod=1000
server.recovery.asynCommittingRetryPeriod=1000
server.recovery.rollbackingRetryPeriod=1000
server.recovery.timeoutRetryPeriod=1000
server.maxCommitRetryTimeout=-1
server.maxRollbackRetryTimeout=-1
server.rollbackRetryTimeoutUnlockEnable=false
server.undo.logSaveDays=7
server.undo.logDeletePeriod=86400000
# 客户端与服务端传输方式
transport.serialization=seata
transport.compressor=none
# 关闭metrics功能,提高性能
metrics.enabled=false
metrics.registryType=compact
metrics.exporterList=prometheus
metrics.exporterPrometheusPort=9898
四、创建数据库表
特别注意:tc服务在管理分布式事务时,需要记录事务相关数据到数据库中,这些表主要记录全局事务、分支事务、全局锁信息,你需要提前创建好这些表。
新建一个名为mingink-seata的数据库(数据库名可以自定义,注意与上面配置对应上):
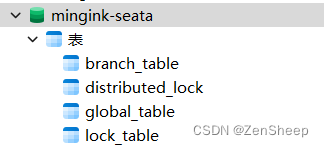
-- -------------------------------- The script used when storeMode is 'db' --------------------------------
-- the table to store GlobalSession data(可以在/script/server/db/mysql.sql找到对应版本的sql文件)
CREATE TABLE IF NOT EXISTS `global_table`
(
    `xid`                       VARCHAR(128) NOT NULL,
    `transaction_id`            BIGINT,
    `status`                    TINYINT      NOT NULL,
    `application_id`            VARCHAR(32),
    `transaction_service_group` VARCHAR(32),
    `transaction_name`          VARCHAR(128),
    `timeout`                   INT,
    `begin_time`                BIGINT,
    `application_data`          VARCHAR(2000),
    `gmt_create`                DATETIME,
    `gmt_modified`              DATETIME,
    PRIMARY KEY (`xid`),
    KEY `idx_status_gmt_modified` (`status` , `gmt_modified`),
    KEY `idx_transaction_id` (`transaction_id`)
) ENGINE = InnoDB
  DEFAULT CHARSET = utf8mb4;
-- the table to store BranchSession data
CREATE TABLE IF NOT EXISTS `branch_table`
(
    `branch_id`         BIGINT       NOT NULL,
    `xid`               VARCHAR(128) NOT NULL,
    `transaction_id`    BIGINT,
    `resource_group_id` VARCHAR(32),
    `resource_id`       VARCHAR(256),
    `branch_type`       VARCHAR(8),
    `status`            TINYINT,
    `client_id`         VARCHAR(64),
    `application_data`  VARCHAR(2000),
    `gmt_create`        DATETIME(6),
    `gmt_modified`      DATETIME(6),
    PRIMARY KEY (`branch_id`),
    KEY `idx_xid` (`xid`)
) ENGINE = InnoDB
  DEFAULT CHARSET = utf8mb4;
-- the table to store lock data
CREATE TABLE IF NOT EXISTS `lock_table`
(
    `row_key`        VARCHAR(128) NOT NULL,
    `xid`            VARCHAR(128),
    `transaction_id` BIGINT,
    `branch_id`      BIGINT       NOT NULL,
    `resource_id`    VARCHAR(256),
    `table_name`     VARCHAR(32),
    `pk`             VARCHAR(36),
    `status`         TINYINT      NOT NULL DEFAULT '0' COMMENT '0:locked ,1:rollbacking',
    `gmt_create`     DATETIME,
    `gmt_modified`   DATETIME,
    PRIMARY KEY (`row_key`),
    KEY `idx_status` (`status`),
    KEY `idx_branch_id` (`branch_id`),
    KEY `idx_xid` (`xid`)
) ENGINE = InnoDB
  DEFAULT CHARSET = utf8mb4;
CREATE TABLE IF NOT EXISTS `distributed_lock`
(
    `lock_key`       CHAR(20) NOT NULL,
    `lock_value`     VARCHAR(20) NOT NULL,
    `expire`         BIGINT,
    primary key (`lock_key`)
) ENGINE = InnoDB
  DEFAULT CHARSET = utf8mb4;
INSERT INTO `distributed_lock` (lock_key, lock_value, expire) VALUES ('AsyncCommitting', ' ', 0);
INSERT INTO `distributed_lock` (lock_key, lock_value, expire) VALUES ('RetryCommitting', ' ', 0);
INSERT INTO `distributed_lock` (lock_key, lock_value, expire) VALUES ('RetryRollbacking', ' ', 0);
INSERT INTO `distributed_lock` (lock_key, lock_value, expire) VALUES ('TxTimeoutCheck', ' ', 0);
在你的项目数据库上创建一个undo_log表:
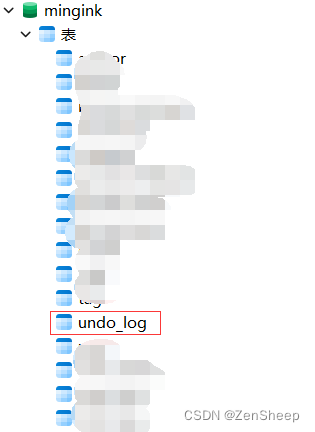
-- for AT mode you must to init this sql for you business database. the seata server not need it.
CREATE TABLE IF NOT EXISTS `undo_log`
(
    `branch_id`     BIGINT       NOT NULL COMMENT 'branch transaction id',
    `xid`           VARCHAR(128) NOT NULL COMMENT 'global transaction id',
    `context`       VARCHAR(128) NOT NULL COMMENT 'undo_log context,such as serialization',
    `rollback_info` LONGBLOB     NOT NULL COMMENT 'rollback info',
    `log_status`    INT(11)      NOT NULL COMMENT '0:normal status,1:defense status',
    `log_created`   DATETIME(6)  NOT NULL COMMENT 'create datetime',
    `log_modified`  DATETIME(6)  NOT NULL COMMENT 'modify datetime',
    UNIQUE KEY `ux_undo_log` (`xid`, `branch_id`)
) ENGINE = InnoDB
  AUTO_INCREMENT = 1
  DEFAULT CHARSET = utf8 COMMENT ='AT transaction mode undo table';
五、启动加粗样式seata-server(TC)服务
在bin目录下找到startup.sh文件,编辑启动命令行:
vim startup.sh
内容如下:
./seata-server.sh -h 127.0.0.1 -p 8091
注意:如果seata-server与你的项目服务在同一台主机可以使用127.0.0.1,如果不再同一台主机(比如seata-server部署在ip为11.22.33.44的服务器,项目服务启动在你的本地主机),那么这里的ip应修改为服务器的ip11.22.33.44,否则会出现本地服务找不到seata-server服务的异常
然后再bin目录下启动seata-server使其注册到nacos上:
sh startup.sh

打开nacos控制面板,找到命名空间对应的服务列表:

可以发现,我们的seata-server已经成功注册到nacos上了。在localhost:7091可以访问seata控制台

附:
- 重启seata-server前需要终止之前启动的进程,netstat -anp | grep 8091查看进程号,kill -9 pid 终止进程;
- 如果seata-server没有注册到nacos上,或者seata控制台 无法打开,可能是因为你的服务器没有开放8091和7091端口;
六、Spring Cloud整合Seata
添加Seata依赖
            com.alibaba.cloud
            spring-cloud-starter-alibaba-seata
添加yml配置
# Seata
seata:
  registry: # TC服务注册中心的配置,微服务根据这些信息去注册中心获取tc服务地址
    # 参考tc服务自己的registry.conf中的配置
    type: nacos
    nacos: # tc
      server-addr: 127.0.0.1:8848
      username: nacos
      password: nacos
      namespace: ${spring.cloud.nacos.discovery.namespace}
      group: DEFAULT_GROUP
      cluster: default
      application: seata-server # tc服务在nacos中的服务名称
  tx-service-group: seata-group # 事务组,根据这个获取tc服务的cluster名称
  service:
    vgroup-mapping: # 事务组与TC服务cluster的映射关系
      seata-group : default
  # 开启数据源的代理模式
  data-source-proxy-mode: AT # 默认就是AT
注解
在AT模式中,使用@GlobalTransactional注解即可设置全局事务:
例如,我的MingInk-User服务中,有个register业务,它依赖于MingInk-Gorse服务的另一个业务,中间通过Open Feign进行远程调用:
 	@Override
    @GlobalTransactional
    public R registerUser(User user) {
        log.info("Begin Register: 【{}】", user.getUserName());
        // 检测用户信息格式是否正确
        ....
        // 插入新用户
        user.setUserId(SnowFlakeFactory.getSnowFlakeFromCache().nextId()); // 雪花算法设置用户Id
        user.setUid((String.valueOf(userMapper.selectList(null).size() + 100001))); // 设置用户Uid
        user.setNickName(user.getUserName()); // 默认新用户昵称为用户(账户)名
        user.setAvatar("null"); // 设置用户默认头像
        user.setBirthday(new Date());
        user.setStatus(0); // 默认用户状态为正常——0
        user.setLoginDate(new Date()); // 最近登录时间
        user.setCreateTime(new Date()); // 当前时间
        user.setUpdateTime(new Date()); // 当前时间
        boolean isInsertSuccess = userMapper.insert(user) > 0;  // 返回值int代表插入成功条数,大于0表示插入成功条数,等于0则代表插入失败
        if (!isInsertSuccess) {
            log.info("用户[{}]注册失败:", user.getUserName());
            return R.fail("用户注册失败");
        }
        // 设置默认权限
        roleService.addUserRole(user.getUserId(), 3L);
        // 注册Gorse User
        GorseUserRequest gorseUserRequest = new GorseUserRequest();
        gorseUserRequest.setUserId(user.getUserId());
        gorseUserRequest.setLabels("[]");
        if (!remoteGorseService.addNewGorseUser(gorseUserRequest)) { // 这是MingInk-Gorse服务的方法
            // 注册Gorse User失败
            log.info("用户[{}]注册Gorse User失败:", user.getUserName());
            return R.fail("用户注册失败");
        }
        log.info("用户[{}]注册成功:", user.getUserName());
        return R.ok(null, "用户注册成功");
    }
在MingInk-Gorse服务的addNewGorseUser方法中,我们也需要给它加上@GlobalTransactional全局事务注解,让它也能注册到事务管理器中,使得全局事务生效:
    @GlobalTransactional
    public boolean addNewGorseUser(GorseUserRequest gorseUserRequest) {
        GorseUser gorseUser = new GorseUser();
        gorseUser.setUserId(gorseUserRequest.getUserId());
        gorseUser.setLabels(gorseUserRequest.getLabels());
        gorseUser.setComment("");
        gorseUser.setSubscribe("[]");
        return gorseUsersMapper.insert(gorseUser) > 0;
    }
通过上述配置,如果普通用户注册成功,但是Gorse用户没有注册成功,会将之前执行的SQL进行回滚。
七、多seata-server部署
将dev目录下的seata-server-2.0.0拷贝到prod目录下:
# 进入dev目录
cd /usr/soft/seata/dev/
# 拷贝文件
cp -a seata-server-2.0.0/ ../prod

修改prod目录下seata配置中的服务启动端口号以及控制台运行端口号:
cd /usr/soft/seata/prod/seata-server-2.0.0/conf
vim application.yml
application.yml


由于我们希望新的seata-server服务运行在nacos的prod命名空间下,因此需要修改响应的namespace:
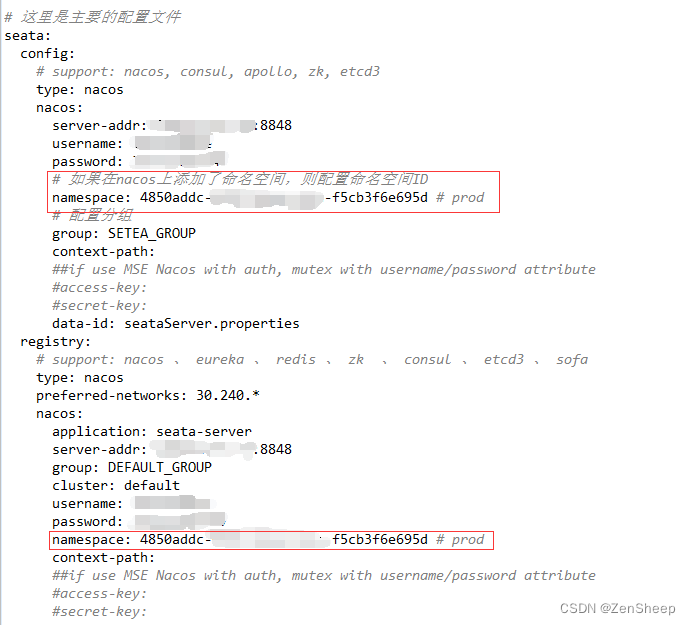
端口号发生了改变,需要同时修改bin目录下的startup.sh:
./seata-server.sh -h 127.0.0.1 -p 8092
在nacos的prod命名空间下可以看到新启动的seata-server服务,这样就能跟dev开发环境区分开来了:


