- Python从入门到网络爬虫(内置函数详解)
- Spring的创建和使用
- Tomcat 启动失败解决(idea)
- Nginx之获取客户端真实ip
- 史上最强解决启动nginx出现Failed to start ngin
- 【Spring篇】Spring整合
- python爬取腾讯在线文档存excel+mysql
- SQL [na]; nested exception is org.h
- ubuntu安装ddns-go实现内网穿透
- 【微服务笔记17】微服务组件之Gateway实现动态路由、配置路由规则
- 2023年再不会Redis,就要被淘汰了
- 51-JS鼠标,键盘,表单,粘贴板,窗口事件,遍历节点树,DOM操作:
- MySQL:1118 - Row size too large(行大小
- Nacos基础(2)——nacos的服务器和命名空间 & sp
- 【Nginx】Nginx主机域名配置
- SpringBoot外部配置文件
- Mysql 行转列,把逗号分隔的字段拆分成多行
- MySQL——插入加锁唯一索引插入死锁批量插入效率
- postgresql-备份与恢复
- IDEA中使用org.springframework.boot.aut
- 【SpringBoot篇】添加富文本编辑器操作
- 一文速通Nginx网关与gateway网关区分
- 成功解决:npm 版本不支持node.js。【 npm v9.1.2
- SpringCloud之gateway基本使用解读
- 关于Spring Boot 2.x升3.x的那些事
- 5.4 Android BCC环境搭建(eadb版 下)
- Spring Cloud Alibaba全家桶(九)——分布式事务组件
- idea导入springboot项目运行教程
- Centos7详细安装部署Mysql8.0两种方案
- 报错:Resolved [org.springframework.we
前言
项目中需要A服务调用B服务,当A服务方法体内出现异常时,若B服务方法已执行,要求B服务能够进行回滚,需要借助分布式事务实现。Seata是一个比较成熟的分布式事务工具,但官方文档比较简洁,查阅网上资料也版本较多不太统一,在此记录一下集成过程以供下次参考。
环境信息
操作系统:Windows10
JDK:1.8.0_351
SpringCloud版本:2021.0.3
Seata版本:1.7.0
集成过程
一、部署启动seata-server
1. 下载seata-server
从Github上下载所需版本的seata-server-x.x.x.zip(我这里是1.7.0)后在本机解压。解压后理论上直接运行bin目录下的seata-server.bat脚本就可以运行seata服务,linux环境下执行sh seata-server.sh。但实际项目中肯定要结合数据库和Nacos使用,所以需要修改配置文件。
2. 修改配置文件
需要注意的是,1.5.0之前的版本配置文件是有多个的,都位于conf文件夹下,如file.conf,registry,conf等。在1.5.0版本之后都整合到一个配置文件里了,即application.yml。以下配置项请按照自己版本查找修改。
以seata-1.7.0为例,打开conf/application.yml进行修改,重点修改nacos部分配置。
server:
  port: 7091
spring:
  application:
    name: seata-server
logging:
  config: classpath:logback-spring.xml
  file:
    path: ${user.home}/logs/seata
  extend:
    logstash-appender:
      destination: 127.0.0.1:4560
    kafka-appender:
      bootstrap-servers: 127.0.0.1:9092
      topic: logback_to_logstash
console:
  user:
    username: seata
    password: seata
seata:
  # nacos配置
  config:
    type: nacos
    nacos:
      server-addr: 127.0.0.1:8848
      namespace:
      group: SEATA_GROUP
      username:
      password:
      context-path:
      data-id: seataServer.properties
      ##if use MSE Nacos with auth, mutex with username/password attribute
      #access-key:
      #secret-key:
  registry:
    # nacos配置
    type: nacos
    nacos:
      application: seata-server
      server-addr: 127.0.0.1:8848
      group: SEATA_GROUP
      namespace:
      cluster: default
      username:
      password:
      context-path:
      ##if use MSE Nacos with auth, mutex with username/password attribute
      #access-key:
      #secret-key:
#  server:
#    service-port: 8091 #If not configured, the default is '${server.port} + 1000'
  security:
    secretKey: SeataSecretKey0c382ef121d778043159209298fd40bf3850a017
    tokenValidityInMilliseconds: 1800000
    ignore:
      urls: /,/**/*.css,/**/*.js,/**/*.html,/**/*.map,/**/*.svg,/**/*.png,/**/*.jpeg,/**/*.ico,/api/v1/auth/login
修改成功后,意味着seata将从nacos获取配置信息,同时注册自身服务到nacos中心。
3. nacos预备
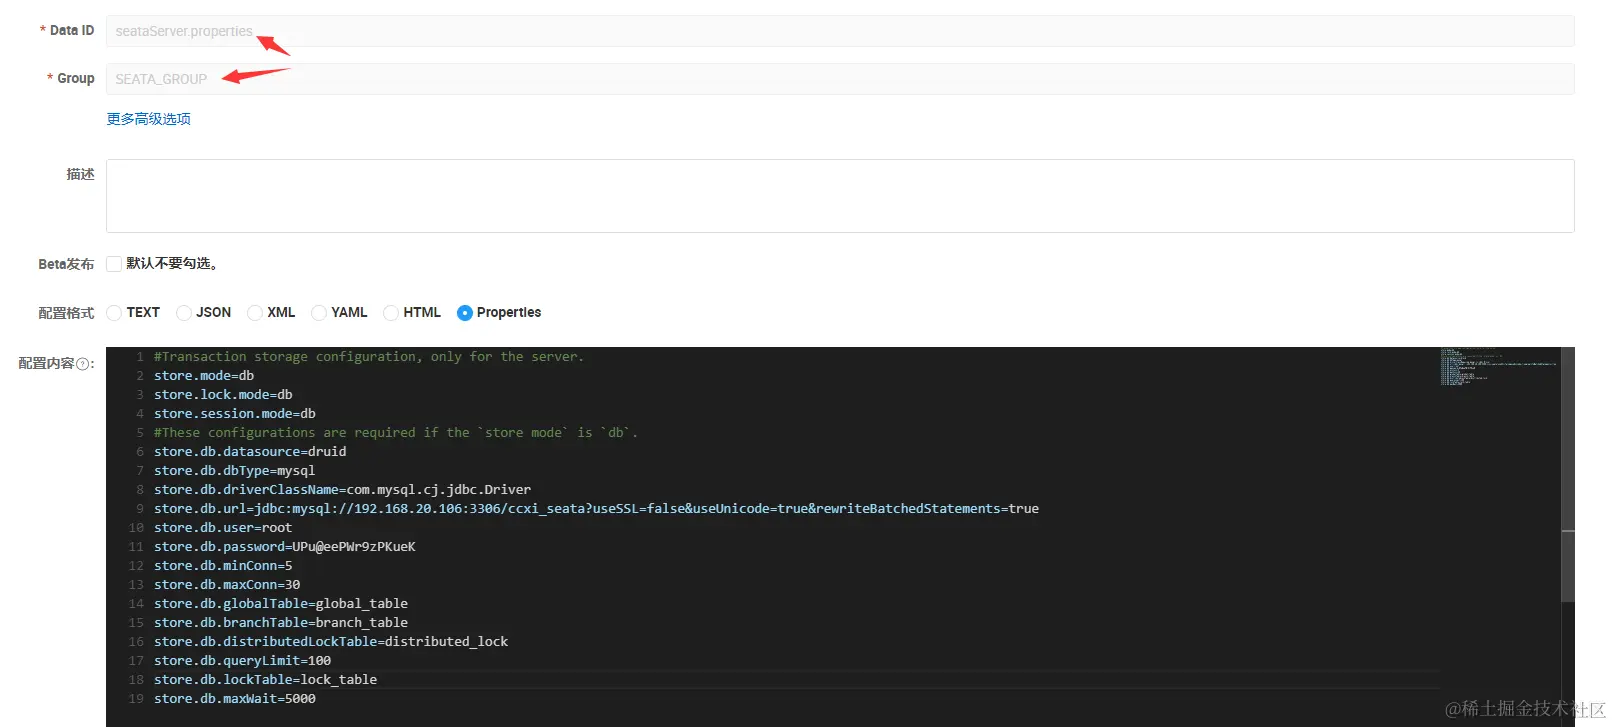
注意到上面配置项中有一项:seata.config.data-id=seataServer.properties,意思为要读nacos上的seataServer.properties配置文件,接下来去Nacos创建该配置文件,注意Group与第2步中的保持一致,这里是SEATA_GROUP。

具体配置项是从seata-server-1.7.0/seata/script/config-center/config.txt粘贴修改而来,其他博客一般建议全粘,笔者查找源码发现那些通用配置项代码里已经写好默认值了,如果不修改没必要都粘过来,这里只使用对我们有用的配置,主要是数据库配置信息。
#Transaction storage configuration, only for the server.
store.mode=db
store.lock.mode=db
store.session.mode=db
#These configurations are required if the `store mode` is `db`.
store.db.datasource=druid
store.db.dbType=mysql
store.db.driverClassName=com.mysql.cj.jdbc.Driver
store.db.url=jdbc:mysql://x.x.x.x:3306/ccxi_seata?useSSL=false&useUnicode=true&rewriteBatchedStatements=true
store.db.user=root
store.db.password=password@1234$#11
store.db.minConn=5
store.db.maxConn=30
store.db.globalTable=global_table
store.db.branchTable=branch_table
store.db.distributedLockTable=distributed_lock
store.db.queryLimit=100
store.db.lockTable=lock_table
store.db.maxWait=5000
注意数据库连接串和驱动类型一定要写对,如果是Mysql8要使用com.mysql.cj.jdbc.Driver。可参考自己Java项目中的配置进行填写。
4. 数据库建表
在上面配置的数据库内,执行seata-server-1.7.0/seata/script/server/db目录下的sql脚本(根据数据库类型),创建服务端所需的表。
5. 启动seata-server
server端基础配置已经完成,运行bin下的seata-server.bat脚本启动服务(linux执行sh seata-server.sh命令)。出现下述打印即为启动成功。(linux到/root/logs/seata目录下查看打印日志)

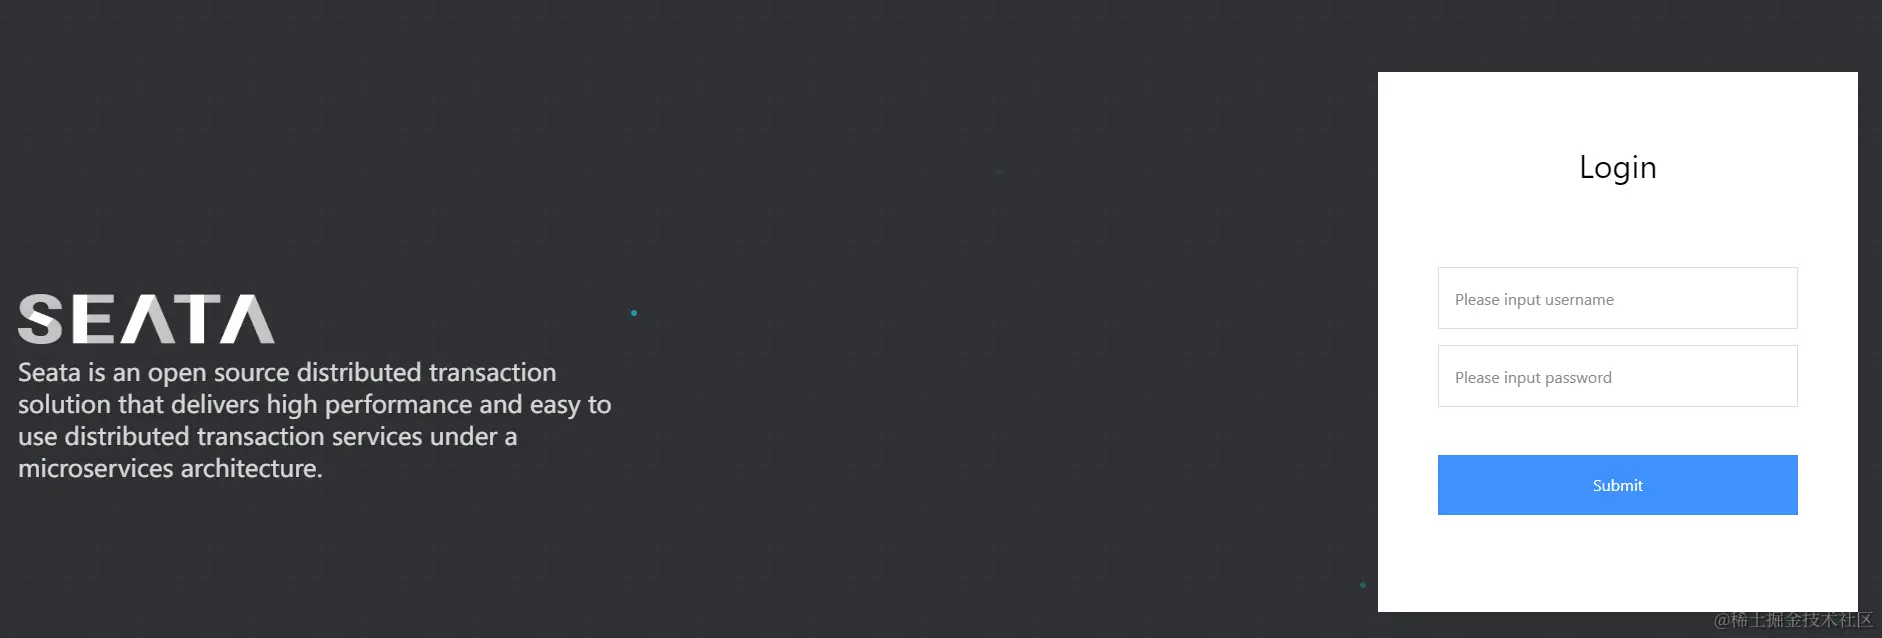
启动成功后,可登录http://ip:7091/#/login 进入seata管理页面,默认用户名和密码都为seata。

同时,检查nacos上是否成功注册了seata服务:

二、微服务(客户端)集成
1. 添加pom依赖
server已经启动,接下来要把需要使用分布式事务的微服务都注册到server上去。首先在每个微服务内添加pom依赖。其中seata-spring-boot-starter这个包为seata核心包,版本号要与自己上述服务端保持一致。此外如果使用SpringCloud,spring-cloud-starter-alibaba-seata也必不可少,这个包的版本号最好与所使用SpringCloud版本保持一致。
... com.alibaba.cloud spring-cloud-starter-alibaba-seata${alibaba.cloud.version} io.seata seata-spring-boot-starter... io.seata seata-spring-boot-starter1.7.0
2. 客户端添加seata配置
包引入后,需要在微服务yml里添加seata客户端所需的配置:
#seata客户端配置
seata:
  enabled: true
  application-id: ccxi-abc
  tx-service-group: ccxi_tx_group
  service:
    vgroup-mapping:
      ccxi_tx_group: default
  registry:
    type: nacos
    nacos:
      server-addr: 127.0.0.1:8848
      namespace: public
      group: SEATA_GROUP
      application: seata-server
其中tx-service-group为我们自定义的事务组,名字随便起,但是下面service.vgroup-mapping下一定要有一个对应你这个名字的映射,映射到default(seata默认的集群名称)。 nacos方面,我们仅配置注册项,即registry下的配置,配置内容与服务端保持一致。这里只配置registry信息而不再配置config相关信息,是因为一是作为客户端,没有必要再到nacos读取配置,本来也没多少配置项,且不需要频繁更换。二是如果使用nacos配置,则需要在nacos上再配置tx-service-group等信息,费力不讨好,且容易与本来的微服务配置形成混淆。
3. 创建undo_log表(仅AT模式)
seata中默认使用的是AT模式,该模式需求每个客户端库内都存在一张undo_log表,用于回滚事务时临时记录数据。如使用该模式,需要自行在业务库内创表。
CREATE TABLE `undo_log` (
  `id` bigint(20) NOT NULL AUTO_INCREMENT,
  `branch_id` bigint(20) NOT NULL,
  `xid` varchar(100) NOT NULL,
  `context` varchar(128) NOT NULL,
  `rollback_info` longblob NOT NULL,
  `log_status` int(11) NOT NULL,
  `log_created` datetime NOT NULL,
  `log_modified` datetime NOT NULL,
  `ext` varchar(100) DEFAULT NULL,
  PRIMARY KEY (`id`),
  UNIQUE KEY `ux_undo_log` (`xid`,`branch_id`)
) ENGINE=InnoDB AUTO_INCREMENT=1 DEFAULT CHARSET=utf8;
4. 启动客户端
配置完成后,照常启动微服务,如果没有异常,在服务端和客户端分别能看到打印,证明客户端成功注册到了服务端。


5. 测试及使用
在所需要使用分布式事务的方法上添加注解@GlobalTransactional,当方法内发生异常时,就可以带动所调用微服务进行回滚。
@Override
@GlobalTransactional(rollbackFor = Exception.class)
public void approve(Long id, String taskKey, String comment) throws Exception {
   Ticket ticket = getTicket(id);
   // 调用流程微服务进行审批操作
   processClient.approve(ticket, taskKey, comment, null);
   // 修改本地工单状态
   ticket.setState(TicketState.APPROVED);
   ticketService.saveOrUpdate(ticket);
   // 记录操作日志
   processLogger.log(ticket.getBusinessKey(), "审批通过", null);
   // 抛出异常测试分布式事务
   throw new Exception("出现异常:测试分布式事务");
}
如果成功触发回滚,两个微服务的控制台均会打印相关信息,重点关注xid应该为一致的。
服务A日志

服务B日志

补充
按照上面步骤集成完之后如果发现不能正常回滚,应在每个服务的方法内打印下xid,看看是否一致,有没有xid为空的。如果有服务拿不到xid,检查下微服务调用时是否拦截掉了这部分header信息。
System.out.println(RootContext.getXID());
【坑】另外,windows下使用时,服务端经常会自己卡住,需要手动到bat窗口内敲回车来解除卡顿。
作者:鹿里噜哩
链接:https://juejin.cn/post/7257713854745395255
来源:稀土掘金
上一篇:柯尼卡美能达设置FTP扫描步骤


